
Want an adorable fall-themed hat? This free knit pumpkin hat pattern is perfect for autumn baby photos! If you love this pattern make sure to check our 200+ free pattern here.

I saw it yesterday—the first sign of fall in my local grocery store. No, not the leaves changing outside. Not even the back-to-school supplies. The pumpkin spice section.
You know what that means? It’s officially pumpkin hat knitting season! 🎃
I don’t know about you, but when September rolls around, I can’t wait to cast on all the cozy autumn knits. And what’s more classic for fall than a free knit pumpkin hat pattern? Whether you’re knitting one for a sweet newborn photo prop, a fall market stall, or just because you can’t resist pumpkin-themed knits, this pattern is one of my favorites.
A Bestseller Back in the Day
Once upon a time, before I started designing knitting patterns, I used to sell handmade photography props. My Pumpkin Spice Beanie? Absolute bestseller. I would knit dozens every single week. It was a little ridiculous. By the end of October, I was so over knitting pumpkins that I practically skipped to my yarn stash just to put the orange skeins away for the season.
But guess what? That means this free knit pumpkin hat pattern has been tested, perfected, and adored by countless parents, photographers, and little pumpkin-wearing babies. And now? It’s all yours—for free!
Oh, and in case you’re wondering—yes, you can sell what you make from this pattern! Etsy shops, craft fairs, baby boutiques—go for it. I pray you sell even more than I ever did!
Choosing the Best Yarn for Your Pumpkin Hat
When I was knitting these beanies like crazy, my absolute favorite yarn was KnitPicks Brava (affiliate link) in Persimmon Heather. It’s the perfect earthy orange—not too bright, not too dull, just that cozy, autumnal shade that screams “pumpkin patch photoshoot.”
But if you’re feeling adventurous, don’t be afraid to mix it up! I’ve made these in:
- Brighter oranges (per customer request)
- Ivory (for that trendy white pumpkin look)
- Olive green (because someone wanted a squash-themed set for twins!)
I really wish I had taken a picture of those sets, but trust me when I say, they were adorable.
And yes, before you ask, KnitPicks Brava (affiliate link) is acrylic. If you prefer a natural fiber alternative, I totally get it! Cascade 220 Superwash Merino (affiliate link) is a fantastic wool option—it knits up beautifully and feels amazing. But for durability, affordability, and easy care? You just can’t beat KnitPicks Brava (affiliate link).
Why This Free Knit Pumpkin Hat Pattern is a Must-Make
If you’re still debating whether you need a free knit pumpkin hat pattern in your life (hint: you do), here are a few reasons why this pattern is a fall must-have:
🍁 Quick Knit – You can finish one in an evening, making it perfect for gifts or last-minute market prep.
🎃 Perfect for Photos – Whether it’s a newborn shoot or a pumpkin patch adventure, this hat is made for adorable fall pictures.
🧶 Beginner-Friendly – If you can knit in the round and do basic decreases, you’ve got this!
🍂 Great for Selling – It’s a crowd-pleaser at markets and an easy best-seller on Etsy.
Seriously, if you’re only going to knit one seasonal item this year (but let’s be real, you’ll knit more), make it this free knit pumpkin hat pattern.
Customizing Your Knit Pumpkin Hat
Want to give your pumpkin hat some extra personality? Here are a few fun ways to customize it:
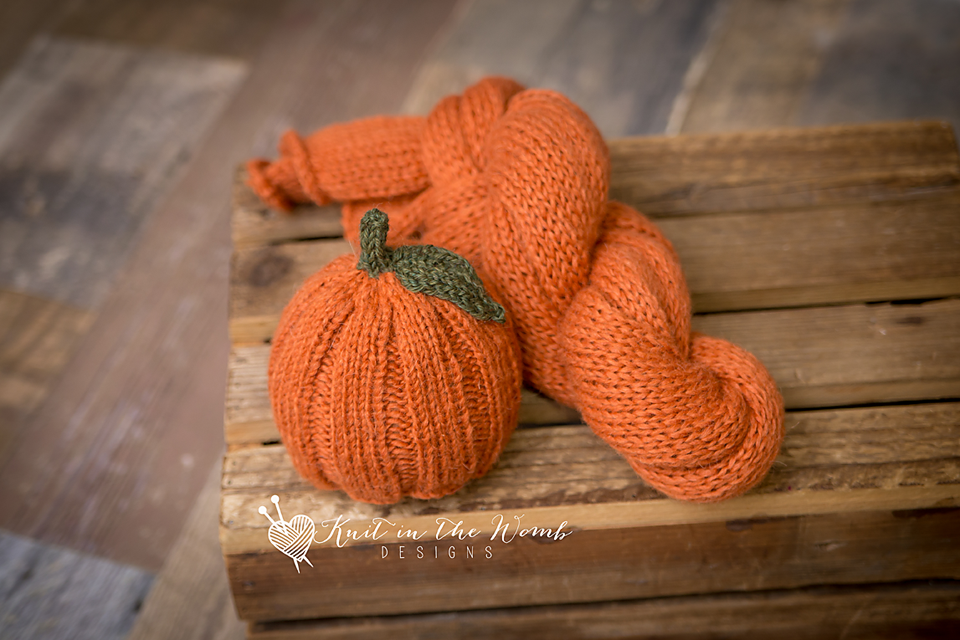
- Add a Leaf: A simple knitted leaf in green gives it that fresh-from-the-vine look.
- Make a Twisty Stem: Instead of a standard I-cord, try a curly stem by adding extra twists to your stitches.
- Try Variegated Yarn: A speckled or variegated orange yarn can give a unique pumpkin-y texture.
- Play with Ribbing: A 1×1 rib instead of a rolled brim can make the hat snugger and stretchier.
No matter how you personalize it, this free knit pumpkin hat pattern is bound to be a fall favorite.
The Ultimate Fall Knitting Project
Every year, the moment I see that first pumpkin spice latte, I know it’s time to cast on a pumpkin hat. It’s a little tradition I’ve made for myself—knitting at least one Pumpkin Spice Beanie every fall.
And now, I hope it becomes a tradition for you too! Whether you knit one for a little pumpkin in your life, whip up a batch for craft fairs, or just enjoy the process of making something festive, this free knit pumpkin hat pattern is the perfect way to celebrate autumn.
So grab your KnitPicks Brava (affiliate link), pick your favorite shade of orange, and let’s get knitting! 🍁🎃
Get the Free Knit Pumpkin Hat Pattern Here!
Ready to make your own? Scroll down to grab the free knit pumpkin hat pattern.
I can’t wait to see your finished hats! Be sure to tag me in your photos—I’d love to see all the adorable little pumpkins you knit up this season. Happy knitting!

Materials and Info
Materials needed: 55-150yds of worsted weight yarn in main color and a few yards for the stem and leaf, size 8 dpn (or circular for magic loop method or larger sizes) a yarn needle
Sizes (head circumference) [finished measurements] –newborn
(13ins)[5x5ins], infant (14.5ins)[5.75×5.75ins], sitter (16ins)[6.5×6.5ins], toddler (17ins)[7x7ins], child (19ins)[7.5×7.5ins]
Gauge – 4sts/1in in stockinette st – ~Gauge is very important!~

Pumpkin Spice Beanie Pattern
NEWBORN
Cast on 54st in orange. Join in the round.
Round 1 – [k4, p2] repeat [to] around.
Repeat round 1 until your work measures 4ins from cast on edge.
Decreases
Round 1 – [k4, p2tog] repeat [to] around (45sts)
Round 2 – [k4, p1] repeat [to] around
Round 3 – [k3, ssk] repeat [to] around (36sts)
Round 4 – knit around
Round 5 – [k2tog, k2] repeat [to] around (27sts)
Cut yarn leaving a few inches to weave in ends. Join green.
Round 6 – [k2tog, k1] repeat [to] around (18sts)
Round 7 – [k2tog] repeat [to] around (9sts) Round 8 – [k2tog, k1] repeat [to] around (6sts) Knit 5 more rounds in stockinette sts. Bind off.
LEAF
Cast on 3sts
Row 1 – purl across
Row 2 – k1, yo, k1, yo, k1 (5sts)
Row 3 – purl across
Row 4 – k2, yo, k1, yo, k2 (7sts)
Row 5 – purl across
Row 6 – k3, yo, k1, yo, k3 (9sts)
Row 7 – purl across
Row 8 – k4, yo, k1, yo, k4 (11sts)
Row 9 – purl across
Row 10 – knit across
Row 11 – purl across
Row 12 – k4, vdd, k4 (9sts)
Row 13 – purl across
Row 14 – k3, vdd, k3 (7sts)
Row 15 – purl across
Row 16 – k2, vdd, k2 (5sts)
Row 17 – purl across
Row 18 – k1, vdd, k1 (3sts)
Row 19 – P3tog (1st)
Do not bind off. Cut yarn and pull through remain stitch. Weave in this end. Use the cast on tail to tack your leaf unto the hat near the base of the stem.

INFANT
Cast on 60st in orange. Join in the round.
Round 1 – [k4, p2] repeat [to] around.
Repeat round 1 until your work measures 4.75ins from cast on edge.
Decreases
Round 1 – [k4, p2tog] repeat [to] around (50sts)
Round 2 – [k4, p1] repeat [to] around
Round 3 – [k3, ssk] repeat [to] around (40sts)
Round 4 – knit around
Round 5 – [k2tog, k2] repeat [to] around (30sts)
Cut yarn leaving a few inches to weave in ends. Join green.
Round 6 – [k2tog, k1] repeat [to] around (20sts)
Round 7 – [k2tog] repeat [to] around (10sts)
Round 8 – [k2tog, k1] repeat [to] around to last st, k1(7sts) Knit 5 more rounds in stockinette sts. Bind off.
LEAF
Cast on 3sts
Row 1 – purl across
Row 2 – k1, yo, k1, yo, k1 (5sts)
Row 3 – purl across
Row 4 – k2, yo, k1, yo, k2 (7sts)
Row 5 – purl across
Row 6 – k3, yo, k1, yo, k3 (9sts)
Row 7 – purl across
Row 8 – k4, yo, k1, yo, k4 (11sts)
Row 9 – purl across
Row 10 – knit across
Row 11 – purl across
Row 12 – k4, vdd, k4 (9sts)
Row 13 – purl across
Row 14 – k3, vdd, k3 (7sts)
Row 15 – purl across
Row 16 – k2, vdd, k2 (5sts)
Row 17 – purl across
Row 18 – k1, vdd, k1 (3sts)
Row 19 – P3tog (1st)
Do not bind off. Cut yarn and pull through remain stitch. Weave in this end. Use the cast on tail to tack your leaf unto the hat near the base of the stem.

SITTER
Cast on 66st in orange. Join in the round.
Round 1 – [k4, p2] repeat [to] around.
Repeat round 1 until your work measures 5.5ins from cast on edge.
Decreases
Round 1 – [k4, p2tog] repeat [to] around (55sts)
Round 2 – [k4, p1] repeat [to] around
Round 3 – [k3, ssk] repeat [to] around (44sts)
Round 4 – knit around
Round 5 – [k2tog, k2] repeat [to] around (33sts)
Cut yarn leaving a few inches to weave in ends. Join green.
Round 6 – [k2tog, k1] repeat [to] around (22sts)
Round 7 – [k2tog] repeat [to] around (11sts)
Round 8 – [k2tog, k1] repeat [to] around to last 2sts, k2tog (7sts) Knit 5 more rounds in stockinette sts. Bind off.
LEAF
Cast on 3sts
Row 1 – purl across
Row 2 – k1, yo, k1, yo, k1 (5sts)
Row 3 – purl across
Row 4 – k2, yo, k1, yo, k2 (7sts)
Row 5 – purl across
Row 6 – k3, yo, k1, yo, k3 (9sts)
Row 7 – purl across
Row 8 – k4, yo, k1, yo, k4 (11sts)
Row 9 – purl across
Row 10 – knit across
Row 11 – purl across
Row 12 – k4, vdd, k4 (9sts)
Row 13 – purl across
Row 14 – k3, vdd, k3 (7sts)
Row 15 – purl across
Row 16 – k2, vdd, k2 (5sts)
Row 17 – purl across
Row 18 – k1, vdd, k1 (3sts)
Row 19 – P3tog (1st)
Do not bind off. Cut yarn and pull through remain stitch. Weave in this end. Use the cast on tail to tack your leaf unto the hat near the base of the stem.

TODDLER
Cast on 72st in orange. Join in the round.
Round 1 – [k4, p2] repeat [to] around.
Repeat round 1 until your work measures 6ins from cast on edge.
Decreases
Round 1 – [k4, p2tog] repeat [to] around (60sts)
Round 2 – [k4, p1] repeat [to] around
Round 3 – [k3, ssk] repeat [to] around (48sts)
Round 4 – knit around
Round 5 – [k2tog, k2] repeat [to] around (36sts)
Cut yarn leaving a few inches to weave in ends. Join green.
Round 6 – [k2tog, k1] repeat [to] around (24sts)
Round 7 – [k2tog] repeat [to] around (12sts) Round 8 – [k2tog, k1] repeat [to] around (8sts) Knit 5 more rounds in stockinette sts. Bind off.
LEAF
Cast on 3sts
Row 1 – purl across
Row 2 – k1, yo, k1, yo, k1 (5sts)
Row 3 – purl across
Row 4 – k2, yo, k1, yo, k2 (7sts)
Row 5 – purl across
Row 6 – k3, yo, k1, yo, k3 (9sts)
Row 7 – purl across
Row 8 – k4, yo, k1, yo, k4 (11sts)
Row 9 – purl across
Row 10 – knit across
Row 11 – purl across
Row 12 – k4, vdd, k4 (9sts)
Row 13 – purl across
Row 14 – k3, vdd, k3 (7sts)
Row 15 – purl across
Row 16 – k2, vdd, k2 (5sts)
Row 17 – purl across
Row 18 – k1, vdd, k1 (3sts)
Row 19 – P3tog (1st)
Do not bind off. Cut yarn and pull through remain stitch. Weave in this end. Use the cast on tail to tack your leaf unto the hat near the base of the stem.

CHILD
Cast on 78st in orange. Join in the round.
Round 1 – [k4, p2] repeat [to] around.
Repeat round 1 until your work measures 6.5ins from cast on edge.
Decreases
Round 1 – [k4, p2tog] repeat [to] around (65sts)
Round 2 – [k4, p1] repeat [to] around
Round 3 – [k3, ssk] repeat [to] around (52sts)
Round 4 – knit around
Round 5 – [k2tog, k2] repeat [to] around (39sts)
Cut yarn leaving a few inches to weave in ends. Join green.
Round 6 – [k2tog, k1] repeat [to] around (26sts)
Round 7 – [k2tog] repeat [to] around (13sts)
Round 8 – [k2tog, k1] repeat [to] around to last st, k1 (9sts) Knit 5 more rounds in stockinette sts. Bind off.
LEAF
Cast on 3sts
Row 1 – purl across
Row 2 – k1, yo, k1, yo, k1 (5sts)
Row 3 – purl across
Row 4 – k2, yo, k1, yo, k2 (7sts)
Row 5 – purl across
Row 6 – k3, yo, k1, yo, k3 (9sts)
Row 7 – purl across
Row 8 – k4, yo, k1, yo, k4 (11sts)
Row 9 – purl across
Row 10 – knit across
Row 11 – purl across
Row 12 – k4, vdd, k4 (9sts)
Row 13 – purl across
Row 14 – k3, vdd, k3 (7sts)
Row 15 – purl across
Row 16 – k2, vdd, k2 (5sts)
Row 17 – purl across
Row 18 – k1, vdd, k1 (3sts)
Row 19 – P3tog (1st)
Do not bind off. Cut yarn and pull through remain stitch. Weave in this end. Use the cast on tail to tack your leaf unto the hat near the base of the stem.

Abbreviations
K- knit
P- purl
K2tog – knit 2 together
ssk- slip, slip, knit – slip the next stitch knitwise, slip the next stitch knitwise, slip them back to the working needle and knit them together.
p3tog – purl 3 together
vdd – vertical double decrease – Insert right needle through the first 2 sts on the left needle as if to knit and slip both together to the right hand needle. Knit the next stitch. Insert the left hand needle through the front of the 2 slipped stitches and pull the slipped stitches over the knitted stitch
Download Pumpkin Spice Beanie PDF

Disclaimer: This page contains affiliate links. If you choose to make a purchase after clicking a link, I may receive a commission at no additional cost to you. Thank you for your support!