
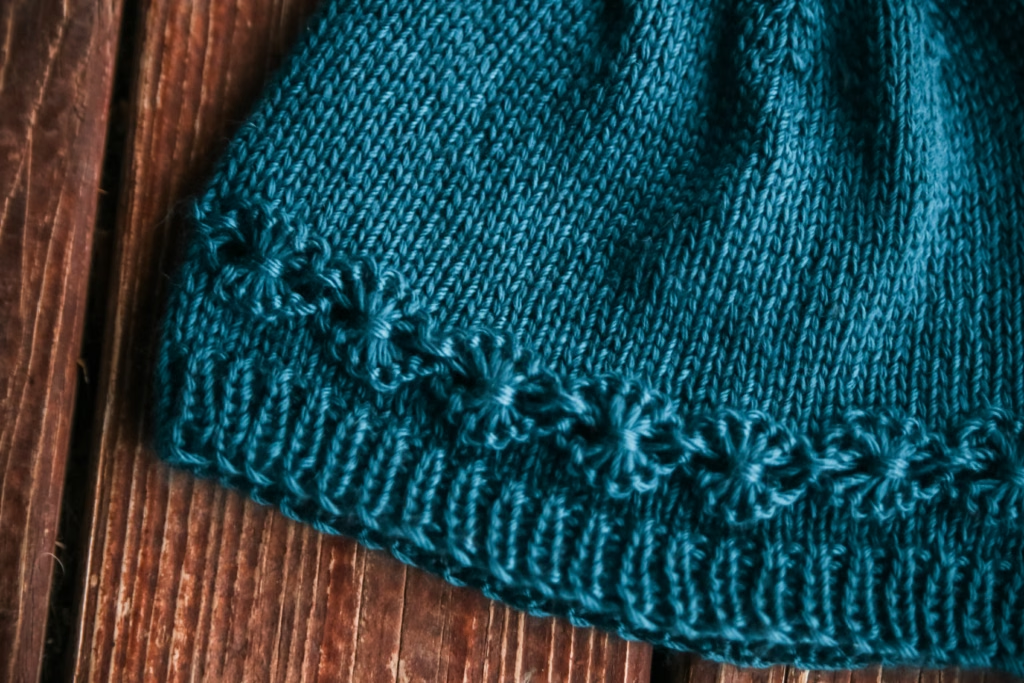
This flower stitch beanie knitting pattern adds a cheerful floral detail to my collection of free hat knitting patterns. The Daisy Beanie combines a stretchy 1×1 ribbed brim, a band of elongated daisy stitches, and smooth stockinette for a hat with just the right amount of texture.
If you want to try a decorative stitch without working an intricate pattern from brim to crown, this is a lovely project to cast on. The flowers are knitted directly into the fabric, and the stockinette sections give you plenty of straightforward knitting along the way. With sizes from baby through large adult, you can make a little floral hat or one to keep for yourself.

There is something especially pretty about a row of knitted daisies sitting just above a ribbed brim. Each flower is formed from a small group of elongated stitches, giving the hat a detail you can see and feel.
I used KnitPicks Mighty Stitch for my Daisy Beanie. The worsted-weight yarn gives those long stitches enough presence to stand out, while the simple background keeps the flowers the focus.
What materials do you need for this flower stitch beanie knitting pattern?
You will need worsted-weight yarn and needles that give you the pattern gauge. I knit mine with KnitPicks Mighty Stitch and US size 8 (5 mm) needles.
Gather these supplies before you begin:
- Yarn: Approximately 80–200 yards of worsted-weight yarn, depending on the size. I used KnitPicks Mighty Stitch.
- Needles: US size 8 (5 mm) circular needles and double-pointed needles, or the size needed to obtain gauge.
- Notions: A yarn needle for finishing and a stitch marker to mark the beginning of the round.
- Optional: A cable needle or locking stitch marker to help hold the elongated stitches while you wrap them.
For more help choosing yarn, visit my Best Yarn for Beanies guide. Think about how the yarn will feel against the forehead as well as how clearly it will show the flower detail.
A smooth yarn in a solid color is a good starting point for this design. It makes the elongated stitches easier to follow while you work and helps the finished daisies stand out.
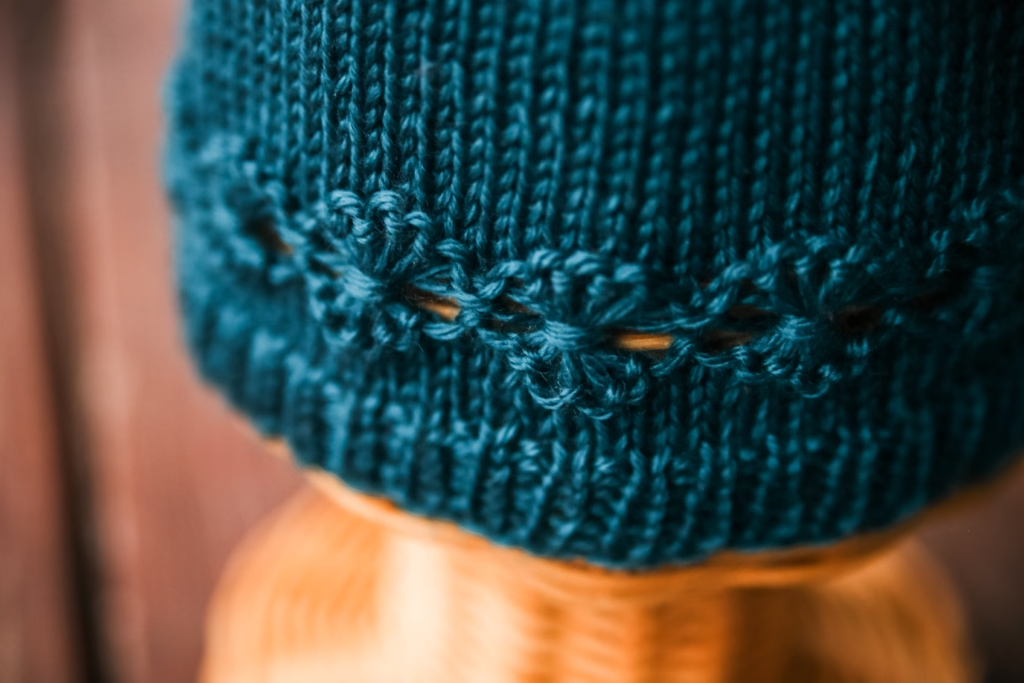
Before casting on, check your gauge against the pattern’s 20 stitches and 24 rounds per 4 inches. Swatching in the round will give you a more useful comparison for a hat that is also worked in the round.
Take a moment to look at your flower stitches in the swatch, too. You want enough length to form the petals without pulling the surrounding fabric tight.
How do you knit the daisies in the Daisy Beanie?
This flower stitch beanie knitting pattern is worked from the brim upward in the round. You begin with 1×1 ribbing, knit a short stockinette section, and then work the daisy stitch band.
The flowers come from extra wraps made while working the stitches. On the following round, you release the extra wraps to create elongated stitches, then wrap groups of those long stitches together to form the daisies.
Those extra wraps have a purpose, so take your time when you reach this part. Dropping the added wraps creates the length you need for the petals; you are keeping the actual stitches on your needle.
Keep your tension relaxed when wrapping the elongated stitches together. Pulling too tightly can bunch the flowers and draw in the fabric around them.
If holding all five long stitches feels awkward, try placing the group on a cable needle or locking stitch marker while you wrap it. That gives you a little more room to handle the yarn.
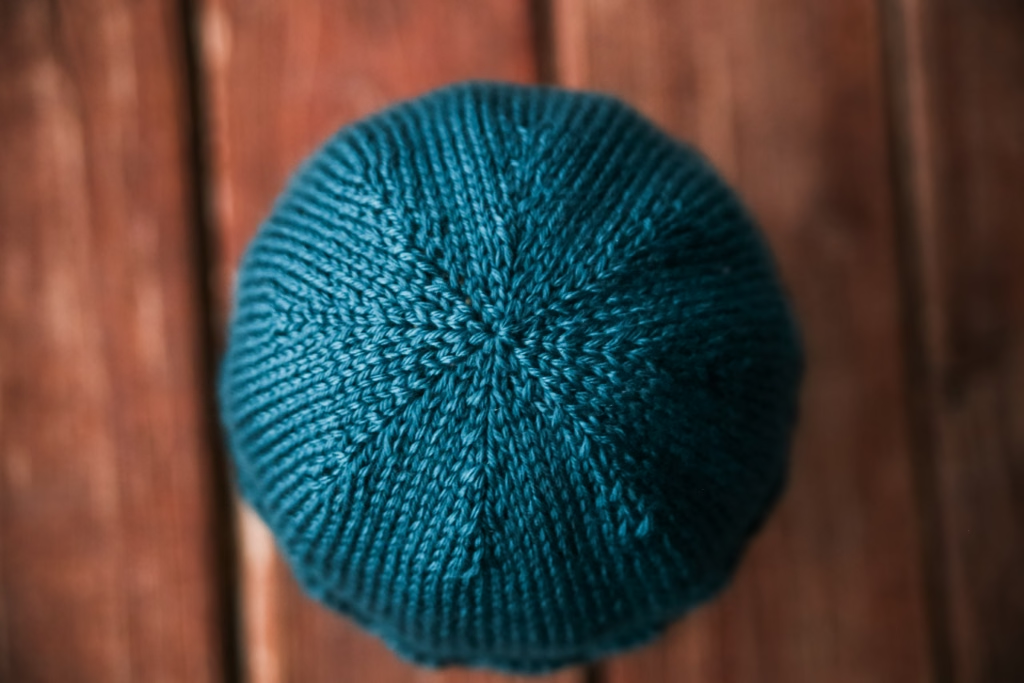
After the daisy band, you return to stockinette before shaping the crown. The smooth upper section gives the flowers room to stand out and lets you settle back into knitting around.
Who can you knit this flower stitch beanie for?
The Daisy Beanie comes in sizes from baby through large adult, making it a useful pattern for gifts as well as your own winter knitting.
For a baby hat, you could choose a gentle neutral or a soft pastel. For an adult version, try a deeper shade that makes the flower texture a subtle part of an everyday outfit.
Measure the wearer’s head and check the pattern’s sizing before choosing your size. Age labels are helpful starting points, but an actual measurement is more useful when you want a hat that fits comfortably.
The ribbed brim adds stretch around the lower edge, while the stockinette body keeps the overall shape simple. It is a pretty combination for anyone who likes a little floral detail in a practical accessory.
What should you knit next after the Daisy Beanie?
If you enjoy this floral hat, here are a few more free patterns to add to your knitting list:
- Daisy Earwarmer — Keep exploring the daisy detail with a smaller accessory.
- Sophia Beanie — Another worsted-weight hat to consider for your next cast-on.
- Everyday Beanie Worsted — A classic choice when you are in the mood for a simple everyday hat.
- Michael Beanie — Try wide broken rib for a different kind of texture.
- Lydia Beanie — Another option for your worsted-weight hat knitting list.
The Daisy Headband is a natural companion if you want another accessory with the same floral theme. You could use coordinating colors for gifts or make both so you have a choice between a headband and a full hat.
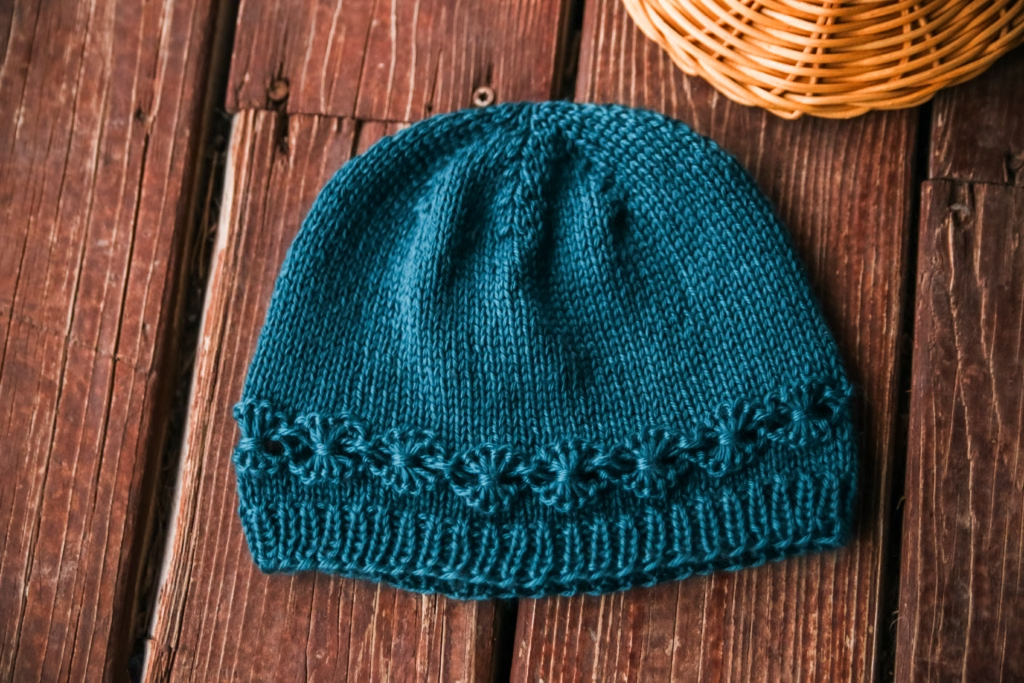
The Daisy Beanie brings together a familiar hat shape and a stitch detail that makes it feel special. You get the stretch of ribbing, the interest of knitted flowers, and plenty of smooth stockinette between the decorative band and the crown.
Daisy Beanie Free Pattern
Materials Needed: Approximately 80–200 yds / 75–185 m of worsted-weight yarn. Sample yarn: Knit Picks Mighty Stitch. US 8 (5 mm) circular needles or DPNs suitable for the chosen circumference; beginning-of-round marker; tapestry needle.
Gauge: 20 sts and 24 rounds per 4 × 4 in / 10 × 10 cm in stockinette stitch worked in the round, after blocking, using US 8 (5 mm) needles.
Sizes Newborn, Baby (Toddler, Child), Small Adult, Large Adult.
Instructions are written in this order throughout.
Calculated width, laid flat: 12, 15 (18, 21), 24, 27 cm / 4¾, 6 (7, 8¼), 9½, 10¾ in.
Stitch Key:
k — knit.
k2tog — knit 2 stitches together; 1 stitch decreased.
p — purl.
sl — slip; slip purlwise unless otherwise specified.
ssk — slip 2 stitches individually knitwise, then knit them together through the back loops; 1 stitch decreased.
st/sts — stitch/stitches.
BEANIE INSTRUCTIONS
Cast on 48, 60 (72, 84), 96, 108 sts. Place a beginning-of-round marker and join for working in the round, taking care not to twist the stitches.
Work [k1, p1] ribbing for 1 in / 2.5 cm.
Knit 5 rounds
Daisy Round 1: [Purl 5 sts, wrapping the yarn around the needle 3 times for each stitch, then p1 normally] around.
Daisy Round 2: [With yarn at the back, slip the next 5 sts purlwise to the working needle, releasing the two extra wraps from each stitch to form 5 elongated stitches. Wrap the working yarn twice around the entire group of 5 elongated stitches, from back to front, following the tutorial. Keep all 5 stitches on the working needle. Bring the yarn to the front and p1] around.
Daisy Round 3: Purl all sts.
The wraps around each group form the daisy center; they are not additional stitches. Keep the stitch count unchanged.
Continue in stockinette stitch until the hat measures approximately 9, 10 (12.5, 13), 15, 17.5 cm / 3½, 4 (5, 5), 6, 7 in from the cast-on edge.
DECREASES
Round 1: [k2tog, k8, ssk] around.
[40, 50 (60, 70), 80, 90 sts]
Rounds 2–3: Knit around.
Round 4: [k2tog, k6, ssk] around.
[32, 40 (48, 56), 64, 72 sts]
Rounds 5–6: Knit around.
Round 7: [k2tog, k4, ssk] around.
[24, 30 (36, 42), 48, 54 sts]
Round 8: Knit around.
Round 9: [k2tog, k2, ssk] around.
[16, 20 (24, 28), 32, 36 sts]
Round 10: Knit around.
Round 11: [k2tog, ssk] around.
[8, 10 (12, 14), 16, 18 sts]
Newborn only: Proceed to Finishing with 8 sts remaining.
All other sizes:
Round 12: Knit around.
Round 13: K2tog around.
[5 (6, 7), 8, 9 sts for Baby (Toddler, Child), Small Adult, Large Adult]
FINISHING
Cut yarn, leaving a tail long enough to close the crown and weave in securely. Thread the tail through the remaining stitches, remove the needles, and pull tight. Secure the yarn on the inside of the hat and weave in all ends. Block gently, arranging the daisies without stretching the brim excessively.
ROUND 2 TUTORIAL
LEFT HANDED

RIGHT HANDED

Bring the yarn to the back. Slip the next 5 stitches purlwise, releasing the two extra wraps from each stitch to create 5 elongated stitches. Wrap the working yarn twice around the entire group, from back to front. Transfer the stitches between needles as needed while wrapping, or hold the group temporarily on a cable needle or locking stitch holder. Return all 5 elongated stitches to the working needle, keeping their order unchanged. Bring the yarn to the front and purl the next stitch.
What color would you choose for your Daisy Beanie, and who would you knit it for? Let me know in the comments—I would love to hear your plans!
This post may contain affiliate links. If you make a purchase through one of my links, I may earn a small commission at no additional cost to you.