
Looking for a vintage inspired bonnet pattern that feels straight out of a sepia-toned photo? This one’s at the bottom of the post, and you’ll find even more on the photo prop pattern page.

There’s just something irresistible about a good vintage inspired bonnet pattern. It’s like stepping into a time capsule, except instead of velvet dresses and porcelain dolls, we’re talking soft merino-cashmere blends and sleepy newborn faces. That’s exactly what drew me to the Gathering Bonnet—and let me tell you, it was love at first stitch.
If you’re anything like me, you probably have a mental catalog of your favorite vintage inspired bonnet patterns, and this one quickly earned a permanent spot. Not only does it photograph like a dream, but the sweet gathered detail gives it just the right amount of old-fashioned flair without being too fussy. And best of all? It’s a free pattern!
Let me walk you through how I made it, why I chose the yarn I did, and how it all came together to create a stunning photo prop I’ll be using again and again.
Why I Fell in Love with This Vintage Inspired Bonnet Pattern
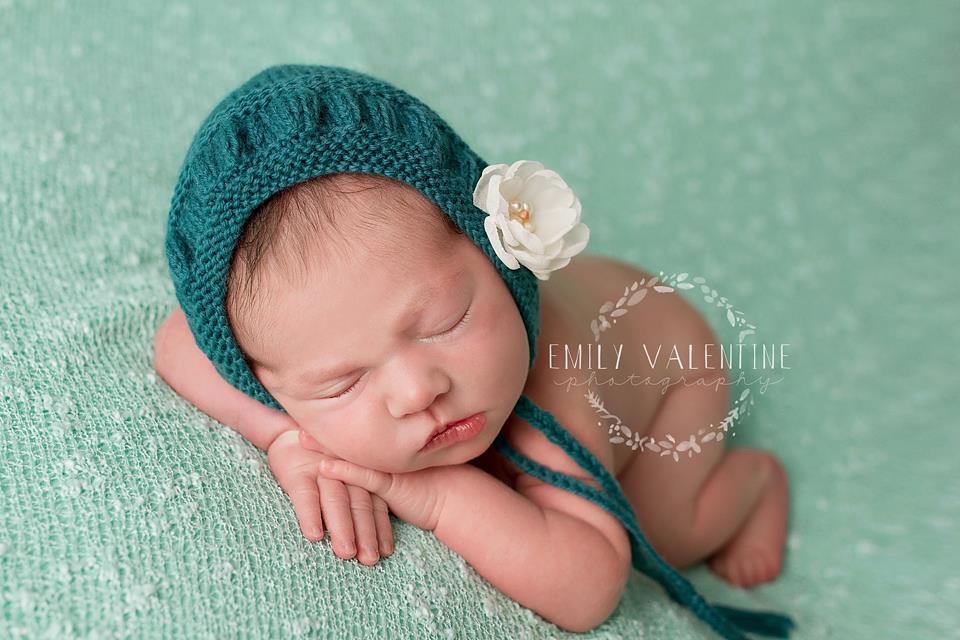
Whenever I’m prepping for a newborn photo shoot, I’m on the hunt for pieces that feel special—something that whispers nostalgia while still being modern enough to mix and match. This vintage inspired bonnet pattern checked every box. The gathered section across the forehead gives it a soft ruched look, like the heirloom bonnets tucked away in old cedar chests, but the silhouette is timeless.
It’s the kind of design that tells a story, which is probably why it works so beautifully for capturing those once-in-a-lifetime newborn moments. And yes—it’s just as cute in person as it is on camera.

The Yarn: KnitPicks Capretta (affiliate link)
The real MVP of this vintage inspired bonnet pattern is the yarn I used: KnitPicks Capretta (affiliate link). It’s one of those yarns that makes you go, “Okay… this is the good stuff.” A lovely blend of merino, cashmere, and nylon, it’s unbelievably soft—perfect for delicate newborn skin.
The subtle sheen of Capretta (affiliate link) gives the bonnet that polished, boutique look I always hope for in my photo props. And since it comes in some lovely neutral shades, you can knit a few and have options that’ll match just about any swaddle or wrap.

Let’s Talk About the Knitting Process
I’m a sucker for patterns that are straightforward but still interesting, and this vintage inspired bonnet pattern delivers on both fronts. You start by knitting the body flat, which gives you a chance to really enjoy the buttery glide of the Capretta yarn (affiliate link) on your needles. It’s smooth sailing—no complex stitch patterns or fussy shaping here.
But then—bam!—the gathered detail at the front adds just the right amount of excitement. A few well-placed rows of shaping and suddenly you’ve got that sweet vintage flair. Watching the fabric pull together into those little gathers? So satisfying. It’s like watching a ruffle bloom.
The Finishing Touches: I-Cord Ties
Of course, no vintage inspired bonnet pattern is complete without a classic set of ties. I kept it simple with an I-cord—quick, tidy, and elegant. The Capretta yarn (affiliate link) made them extra soft and squishy, which is always important when it’s going to rest against baby cheeks.
They also hold their shape well, which I really appreciate when it comes to tying a gentle bow that stays in place without needing to be tight. Functional and adorable? Yes please.

Don’t Skip the Blocking!
I know, I know—blocking isn’t the most thrilling part of a project. But when it comes to a vintage inspired bonnet pattern like this one, it makes all the difference. Capretta yarn (affiliate link) opens up so nicely after a good soak, and it gives that gathered section a soft, dreamy look that you just can’t achieve straight off the needles.
I gave mine a gentle wash in lukewarm water, shaped the gathers with care, and let it dry flat. The result? A bonnet that looked straight out of a boutique window display.

Photoshoot Ready
When it was finally time to put the bonnet to use, I could hardly wait. I paired it with a simple wrap and neutral backdrop, and wow—this vintage inspired bonnet pattern really popped. The gathered section framed the baby’s face so sweetly, and the soft halo from the Capretta yarn (affiliate link) gave the whole setup a warm, gentle feel.
There’s something really special about photographing a newborn in a handmade piece that feels like it has a story. This bonnet gave those images depth and heart, and I’ve already had a few requests to knit more!

What I’ll Do Differently Next Time (Spoiler: Not Much)
Honestly, there’s very little I’d change about knitting this vintage inspired bonnet pattern. It’s one of those patterns that just works. But I’m tempted to try it in a few deeper shades next time—a soft rose or heathered gray would be lovely, especially with the texture of the gathered front.
I might also try pairing it with a matching pair of bloomers or a little lace-trimmed wrap to really lean into the vintage look for the full set.
Final Thoughts on This Vintage Inspired Bonnet Pattern
Every once in a while, you come across a knitting project that just feels right—like it was meant to be on your needles. The Gathering Bonnet was one of those for me. It combines practicality with vintage charm in the most delightful way, and the fact that it’s a free vintage inspired bonnet pattern makes it all the sweeter.
If you’re looking for something timeless, photogenic, and truly heartwarming to knit, this is it. Whether you’re a seasoned pro or brand new to knitting photo props, I think you’ll find this vintage inspired bonnet pattern as enjoyable as I did.
You’ll find this specific pattern at the bottom of this post, but if you’re in the mood to explore even more timeless photo prop ideas, check out the rest on my photo prop pattern page.
Now go grab your needles, pour yourself a cup of something warm, and get ready to knit your new favorite baby bonnet.
Happy stitching, friend!

Materials and Info
Materials: 70-120yds fingering yarn (I used KnitPicks capretta (affiliate link)), size 3 needles (straight and dpn)
Gauge: 7sts/in ~GAUGE IS VERY IMPORTANT!!!~
Head circumference: nb (13ins). 0-3mths (14ins), 3-6mth (15ins), 6-12mths (16ins)
Stitch Key:
k – knit
p – purl
kfb – knit into the front and the back of the stitch
k2tog – knit 2 stitches together
Gathering Bonnet Pattern
Newborn
Cast on 70 stitches.
Rows 1-6 – knit across
Row 7 – k1 (kfb) across to last stitch, k1 (138sts)
Rows 8-14 – work in stockinette stitch (k all right side rows and a p all wrong side rows) starting with a wrong side row
Row 15 – k1 (k2tog) across to last stitch, k1 (70sts)
Rows 16-21 – knit across
Continue in stockinette stitch (k all right side rows and a p all wrong side rows) starting with a wrong side row until your work measures 4ins from cast on edge.
You will now start working in the round. Switch to dpn here.
Decreases
Round 1 – [k2tog, k5] repeat around (60sts)
Round 2 – knit around
Round 3 – [k2tog, k4] repeat around (50sts)
Round 4 – knit around
Round 5 – [k2tog, k3] repeat around (40sts)
Round 6 – knit around
Round 7 – [k2tog, k2] repeat around (30sts)
Round 8 – knit around
Round 9 – [k2tog, k1] repeat around (20sts)
Round 10 – [k2tog] repeat around (10sts)
Do not bind off. Cut yarn leaving appx 6-8ins. Pull tail through remaining 10sts. Weave in ends. Cut 6 strands of yarn appx 30ins long. Fold them in half and pull a loop through the front corner of the hood. Pull the ends through this loop and braid. Repeat on the other side.
0-3MTHS
Cast on 77 stitches.
Rows 1-6 – knit across
Row 7 – k1 (kfb) across to last stitch, k1 (152sts)
Rows 8-14 – work in stockinette stitch (k all right side rows and a p all wrong side rows) starting with a wrong side row
Row 15 – k1 (k2tog) across to last stitch, k1 (77sts)
Rows 16-21 – knit across
Continue in stockinette stitch (k all right side rows and a p all wrong side rows) starting with a wrong side row until your work measures 4.5ins from cast on edge.
You will now start working in the round. Switch to dpn here.
Decreases
Round 1 – [k2tog, k5] repeat around (66sts)
Round 2 – knit around
Round 3– [k2tog, k4] repeat around (55sts)
Round 4 – knit around
Round 5 – [k2tog, k3] repeat around (44sts)
Round 6 – knit around
Round 7 – [k2tog, k2] repeat around (33sts)
Round 8 – knit around
Round 9 – [k2tog, k1] repeat around (22sts)
Round 10 – [k2tog] repeat around (11sts)
Do not bind off. Cut yarn leaving appx 6-8ins. Pull tail through remaining 10sts. Weave in ends. Cut 6 strands of yarn appx 30ins long. Fold them in half and pull a loop through the front corner of the hood. Pull the ends through this loop and braid. Repeat on the other side.
3-6MTHS
Cast on 86 stitches.
Rows 1-6 – knit across
Row 7 – k1 (kfb) across to last stitch, k1 (170sts)
Rows 8-16 – work in stockinette stitch (k all right side rows and a p all wrong side rows) starting with a wrong side row
Row 17 – k1 (k2tog) across to last stitch, k1 (86sts)
Rows 18-23 – knit across
Continue in stockinette stitch (k all right side rows and a p all wrong side rows) starting with a wrong side row until your work measures 5ins from cast on edge.
You will now start working in the round. Switch to dpn here.
Decreases
Round 1 – [k2tog, k41] repeat around (84sts)
Round 2 – [k2tog, k5] repeat around (72sts)
Round 3 – knit around
Round 4– [k2tog, k4] repeat around (60sts)
Round 5 – knit around
Round 6 – [k2tog, k3] repeat around (48sts)
Round 7 – knit around
Round 8 – [k2tog, k2] repeat around (36sts)
Round 9 – knit around
Round 10 – [k2tog, k1] repeat around (24sts)
Round 11 – [k2tog] repeat around (12sts)
Do not bind off. Cut yarn leaving appx 6-8ins. Pull tail through remaining 10sts. Weave in ends. Cut 6 strands of yarn appx 30ins long. Fold them in half and pull a loop through the front corner of the hood. Pull the ends through this loop and braid. Repeat on the other side.
6-12MTHS
Cast on 96 stitches.
Rows 1-6 – knit across
Row 7 – k1 (kfb) across to last stitch, k1 (190sts)
Rows 8-16 – work in stockinette stitch (k all right side rows and a p all wrong side rows) starting with a wrong side row
Row 17 – k1 (k2tog) across to last stitch, k1 (96sts)
Rows 18-23 – knit across
Continue in stockinette stitch (k all right side rows and a p all wrong side rows) starting with a wrong side row until your work measures 5.5ins from cast on edge.
You will now start working in the round. Switch to dpn here.
Decreases
Round 1 – [k2tog, k5] repeat around (84sts)
Round 2 – knit around
Round 3– [k2tog, k4] repeat around (70sts)
Round 4 – knit around
Round 5 – [k2tog, k3] repeat around (56sts)
Round 6 – knit around
Round 7 – [k2tog, k2] repeat around (42sts)
Round 8 – knit around
Round 9 – [k2tog, k1] repeat around (28sts)
Round 10 – [k2tog] repeat around (14sts)
Do not bind off. Cut yarn leaving appx 6-8ins. Pull tail through remaining 10sts. Weave in ends. Cut 6 strands of yarn appx 30ins long. Fold them in half and pull a loop through the front corner of the hood. Pull the ends through this loop and braid. Repeat on the other side.

Gathering Bonnet PDF

Disclaimer: This page contains affiliate links. If you choose to make a purchase after clicking a link, I may receive a commission at no additional cost to you. Thank you for your support!