
This free lace bonnet pattern is a delicate newborn photo prop favorite! Find more like it on the photo prop pattern page.

There’s just something about a delicate baby bonnet that makes my heart melt. Maybe it’s the tiny stitches, the softness of the yarn, or just knowing it’s going to frame the squishy little cheeks of a brand-new baby. Whatever it is, this free lace bonnet pattern—the Eden Bonnet—has officially stolen the show in my knitting lineup.
I’ve knit a lot of baby things over the years (no surprise there!), but this bonnet quickly became a favorite. If you love lace, pretty details, and photo prop perfection, you’re in for a treat. And yep—this free lace bonnet pattern is waiting for you at the bottom of this post. If you want to explore more adorable photo prop knits, you can browse the whole collection right here.

Why I Fell for the Eden Bonnet
The Eden Bonnet wasn’t just another bonnet on my needles—it was love at first lace repeat. The flowery vine motif is charming without being over-the-top, and the design has that heirloom quality I always gravitate toward in newborn knits. Plus, it’s knit flat, which makes for a wonderfully relaxing project with crisp, even stitches.
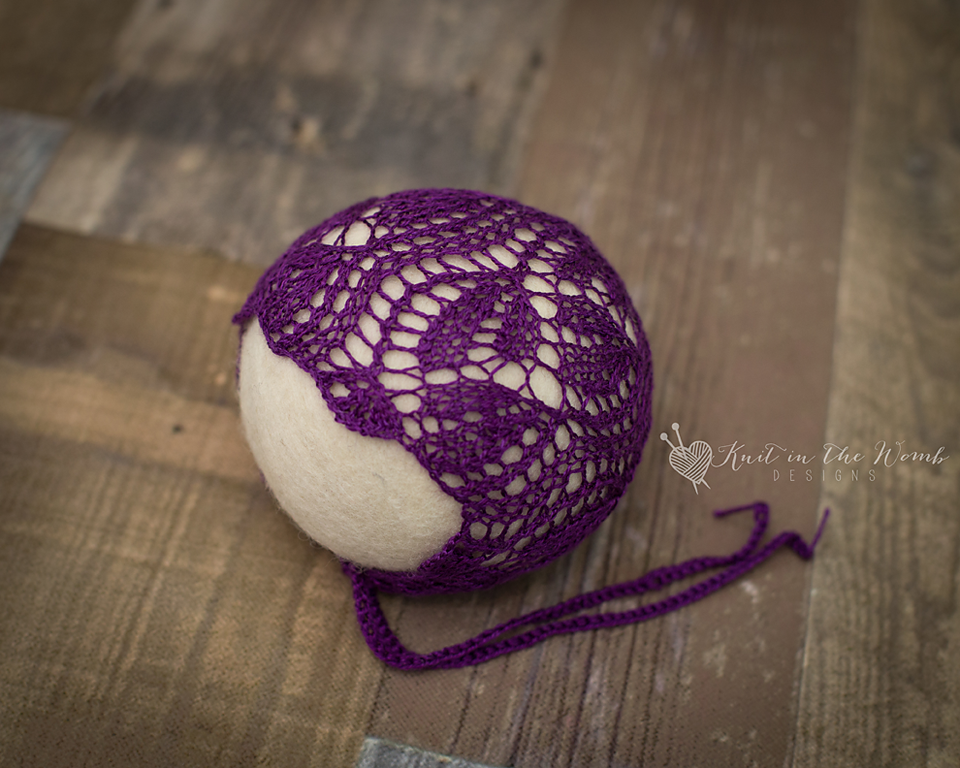
From the moment I saw the sample photo, I knew it needed to be in my pattern collection. It practically whispered, Knit me.

My Go-To Yarn for This Free Lace Bonnet Pattern
Now let’s talk about yarn—because the free lace bonnet pattern deserves something extra special. I used KnitPicks Luminance (affiliate link) for mine, and let me just say: this yarn is the definition of dreamy. It’s 100% silk, which means it’s not only buttery soft, but it also has this gorgeous sheen that lights up every lace stitch.
What really made KnitPicks Luminance (affiliate link) shine was how it hugged the flowery vine motif. Every little curve of lace just popped, giving the bonnet that delicate, airy look that’s perfect for newborn photography. Honestly, it felt like I was knitting with liquid sunshine.

Casting On: Getting Started with the Eden Bonnet
I always get a little thrill when I cast on something new—especially when it involves lace. With this free lace bonnet pattern, the rows fly by once you get into the rhythm of the repeats. It’s one of those projects where the pattern starts to grow right before your eyes, row after row of dainty stitches forming into little flowers and vines.
And even though the design looks intricate (hello, photo prop magic!), it’s totally beginner-friendly with just enough detail to keep things interesting.

Let’s Talk About That Flowery Vine Motif
This motif is the star of the show—and the reason this free lace bonnet pattern feels so special. It’s elegant without being fussy and adds just the right amount of texture to the bonnet. Watching it come to life as I knit felt a bit like watching spring unfold in slow motion. Each flower and vine curled into place, stitch by stitch.
The flowery vines are framed beautifully by the clean edges of the bonnet, and they make the whole thing feel just a little fancy. If you love feminine baby knits with graceful details, this is going to be your jam.

Finishing Touches: Blocking Is a Must
One quick note: don’t skip the blocking! Seriously. I know, I know—it’s tempting to call it done once the last stitch is bound off. But trust me, blocking brings this free lace bonnet pattern to life. It opens up the lace and really defines that vine motif. I used a gentle soak and laid it flat to dry, and the transformation was so satisfying.

Tips for Knitting This Free Lace Bonnet Pattern
If you’re about to dive into this free lace bonnet pattern, here are a few things I’d pass along:
Use stitch markers if lace patterns tend to get a little fuzzy for you. They’re a total lifesaver.
Pick a high-sheen yarn like KnitPicks Luminance (affiliate link) – The shine highlights the lace beautifully and feels so luxurious.
Take your time with the lace – It’s not hard, but a little extra attention to the chart (or written instructions) will go a long way.
Block it when you’re done – I’ll say it again because it matters that much. A blocked lace bonnet looks 100% more finished.

The Finished Bonnet—And All the Feels
When I finished the Eden Bonnet and held it up to the light, I might’ve gasped a little. It’s just so soft, so delicate, and so perfect. The sheen of KnitPicks Luminance (affiliate link) gave it a gentle shimmer, and the lace looked like something straight out of a baby heirloom collection.
I pictured it on a sleepy newborn in a wicker basket, or cradled in mama’s arms, that sweet little bonnet softly framing her tiny face. It’s one of those knits that instantly feels like it’s meant for something meaningful.

Why This Free Lace Bonnet Pattern Is One of My Favorites
Not all bonnets are created equal—and this free lace bonnet pattern has officially earned a top spot in my go-to list for photo props. It’s sweet, timeless, and gives off major hand-me-down vibes in the best possible way. Plus, it’s a joy to knit.
There’s something about baby lace that just gets me. Maybe it’s the combo of intricate stitches and soft yarn, or maybe it’s the fact that you can finish a project in a weekend and feel like you just knit a tiny treasure. Either way, this one’s a keeper.
Ready to Knit Your Own?
If you’re ready to cast on this free lace bonnet pattern, you’ll find the Eden Bonnet waiting for you at the bottom of this post. I can’t wait for you to experience the joy of knitting it—and maybe even snapping some precious photos once it’s done.
And if you’re on the hunt for more adorable, delicate photo prop patterns, don’t forget to check out my full collection right here.
Happy knitting, my lace-loving friends! Let me know in the comments if you try the Eden Bonnet—I’d love to hear how it goes for you!

Materials and Info
MATERIALS: 60-100yds of lace weight (size 0) yarn (I used Knitpicks Luminance), size 3 (3.25mm) straight needles, yarn needle
Gauge: 7sts/in after blocking ~GAUGE IS VERY IMPORTANT~
Stitch Key:
st – stitch
p2tog – purl 2 together
k – knit
p – purl
k2tog – knit 2 together
yo – yarn over
psso – pass slipped stitch over
sl – slip
ssk – slip, slip, knit slipped sts tog
ssp – slip, slip, purl slipped sts tog
Head circumference: newborn (13ins), Sitter (16ins)
Eden Bonnet Pattern
NEWBORN
Cast on 72sts
Row 1 (right side) – k2 [k1, yo, k2tog, yo, k2tog, k2tog, k2tog, k2, yo, k3, yo, ssk, yo, k1] repeat from [to] across to last 2 sts, k2
Row 2 – k2, purl to last 2 sts, k2
Row 3 – k2 [k1, yo, k2tog, k3tog, k3tog, yo, k1, yo, k2, ssk, yo, ssk, yo, k1] repeat from [to] across to last 2 sts, k2 (64sts)
Row 4 – k2 [p10, p2tog, p3] repeat from [to] across to last 2 sts, k2 (60sts)
Row 5 –k2 [k1, yo, k3tog, yo, k3, yo, k2, ssk, yo, ssk, yo, k1] repeat from [to] across to last 2 sts, k2 (64sts)
Row 6 – k2, purl to last 2 sts, k2
Row 7 – k2 [k1, yo, k2tog, yo, k1, yo, k2, ssk, yo, k2, ssk, yo, ssk, yo, k1] repeat from [to] across to last 2 sts, k2 (72sts)
Row 8 – k2, purl to last 2 sts, k2
Row 9 – k2 [k1, yo, k2tog, yo, k3, yo, k2, ssk, ssk, ssk, yo, ssk, yo, k1] repeat from [to] across to last 2 sts, k2
Row 10 – k2, purl to last 2 sts, k2
Row 11 – k2 [k1, yo, k2tog, yo, k2tog, k2, yo, k1, yo, sl1, k2tog, psso, sl1, k2tog, psso, ssk, yo, k1] repeat from [to] across to last 2 sts, k2 (64sts)
Row 12 – k2 [p3, ssp, p10] repeat from [to] across to last 2 sts, k2 (60sts)
Row 13 – k2 [k1, yo, k2tog, yo, k2tog, k2, yo, k3, yo, sl1, k2tog, psso, yo, k1] repeat from [to] across to last 2 sts, k2 (64sts)
Row 14 – k2, purl to last 2 sts, k2
Row 15 – k2 [k1, yo, k2tog, yo, k2tog, k2, yo, k2tog, k2, yo, k1, yo, ssk, yo, k1] repeat from [to] across to last 2 sts, k2 (72sts)
Row 16 – k2, purl to last 2 sts, k2
Repeat rows 1-16 one more time.
Decreases
Row 1 – k1 [k2tog, k5] repeat from [to] across to last 1 sts, k1 (62sts)
Row 2 – purl across
Row 3 – k1 [k2tog, k4] repeat from [to] across to last 1 sts, k1 (52sts)
Row 4 – purl across
Row 5 – k1 [k2tog, k3] repeat from [to] across to last 1 sts, k1 (42sts)
Row 6 – purl across
Row 7 – k1 [k2tog, k2] repeat from [to] across to last 1 sts, k1 (32sts)
Row 8 – purl across
Row 9 – k1 [k2tog, k1] repeat from [to] across to last 1 sts, k1 (22sts)
Row 10 – k1 [k2tog] repeat from [to] across to last 1 sts, k1 (12sts)
Do not bind off. Cut yarn leaving appx 8-10ins. Pull tail through remaining 12sts. Sew back seam. Your bonnet will be very small. It will NEED to be blocked. Pictures of pre-blocking and how to block can be found at the end of the pattern. Cut 6 pieces of yarn approximately 30ins long. Fold them in half and pull a loop through the front corner of the hood. Pull the ends through this loop. OR use 1 piece loop the same way and chain with a size d crochet hook for appx 10ins

SITTER
Cast on 89sts
Row 1 (right side) – k2 [k1, yo, k2tog, yo, k2tog, k2tog, k2tog, k2, yo, k3, yo, ssk, yo, k1] repeat from [to] across to last 2 sts, k2
Row 2 – k2, purl to last 2 sts, k2
Row 3 – k2 [k1, yo, k2tog, k3tog, k3tog, yo, k1, yo, k2, ssk, yo, ssk, yo, k1] repeat from [to] across to last 2 sts, k2 (79sts)
Row 4 – k2 [p10, p2tog, p3] repeat from [to] across to last 2 sts, k2 (74sts)
Row 5 –k2 [k1, yo, k3tog, yo, k3, yo, k2, ssk, yo, ssk, yo, k1] repeat from [to] across to last 2 sts, k2 (79sts)
Row 6 – k2, purl to last 2 sts, k2
Row 7 – k2 [k1, yo,k2tog, yo, k1, yo, k2, ssk, yo, k2, ssk, yo, ssk, yo, k1] repeat from [to] across to last 2 sts, k2 (89sts)
Row 8 – k2, purl to last 2 sts, k2
Row 9 – k2 [k1, yo, k2tog, yo, k3, yo, k2, ssk, ssk, ssk, yo, ssk, yo, k1] repeat from [to] across to last 2 sts, k2
Row 10 – k2, purl to last 2 sts, k2
Row 11 – k2 [k1, yo, k2tog, yo, k2tog, k2, yo, k1, yo, sl1, k2tog, psso, sl1, k2tog, psso, ssk, yo, k1] repeat from [to] across to last 2 sts, k2 (79sts)
Row 12 – k2 [p3, ssp, p10] repeat from [to] across to last 2 sts, k2 (74sts)
Row 13 – k2 [k1, yo, k2tog, yo, k2tog, k2, yo, k3, yo, sl1, k2tog, psso, yo, k1] repeat from [to] across to last 2 sts, k2 (79sts)
Row 14 – k2, purl to last 2 sts, k2
Row 15 – k2 [k1, yo, k2tog, yo, k2tog, k2, yo, k2tog, k2, yo, k1, yo, ssk, yo, k1] repeat from [to] across to last 2 sts, k2 (89sts)
Row 16 – k2, purl to last 2 sts, k2
Repeat rows 1-16 2 more times.
Decreases
Row 1 – k1 k2tog, k6
Row 2 – purl across
Row 3 – k1 k2tog, k5
Row 4 – purl across
Row 5 – k1 k2tog, k4
Row 6 – purl across
Row 7 – k1 k2tog, k3
Row 8 – purl across
Row 9 – k1 k2tog, k2
Row 10 – purl across
Row 11 – k1 k2tog, k1
Row 12 – p1 p2tog
Do not bind off. Cut yarn leaving appx 8-10ins. Pull tail through remaining 11sts. Sew back seam. Your bonnet will be very small. It will NEED to be blocked. Pictures of pre-blocking and how to block can be found at the end of the pattern. Cut 6 pieces of yarn approximately 30ins long. Fold them in half and pull a loop through the front corner of the hood. Pull the ends through this loop. OR use 1 piece loop the same way and chain with a size d crochet hook for appx 10ins

BLOCKING
Before blocking your bonnet will look very tiny and kind of sloppy.
There are 2 ways to block your work. My favorite way is to pin the work using rust free pins with a gentle amount of tension. I use a 12-13in circumference Styrofoam ball for newborn and a 16in circumference for sitter. I like to get the smooth ones version. I get them from local craft shops (ie, Michaels, Joanns). I will then use my clothing steamer. The beauty of using a steamer is it dries instantly and you also can watch the fibers relax so you know it’s working. Once dry unpin and enjoy your beautiful work. The other way to block is to fill your sink with room temperature water. Without rubbing or wringing GENTLY soak your finished piece in the water. Adding a touch of wool wash (I love kookaburra) will help clean and relax the fiber. Once the finished piece is completely wet through, lay it flat on a dry towel. Gently roll up the towel and GENTLY press out excess water. Now you will pin it and allow it to dry.

Eden Bonnet PDF

Disclaimer: This page contains affiliate links. If you choose to make a purchase after clicking a link, I may receive a commission at no additional cost to you. Thank you for your support!