
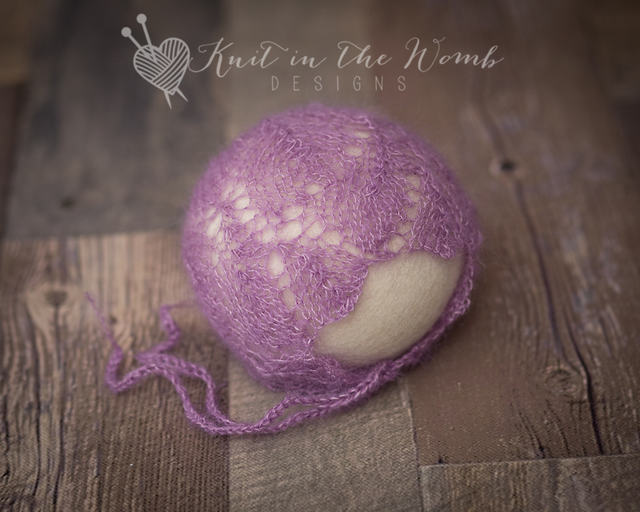
This mohair lace bonnet pattern is a dreamy photo prop! Find this one at the bottom and more on the photo prop pattern page.

If there’s one thing I can’t resist as a knitting designer and photographer, it’s a sweet little bonnet that looks like it fluttered down from heaven. The Evangeline Bonnet fits that vision perfectly. This mohair lace bonnet pattern is delicate, whimsical, and just the right amount of fancy for a newborn photo shoot. It’s part of a matching set that includes a wrap—but let’s be honest, that bonnet steals the show.
You’ll find this mohair lace bonnet pattern at the bottom of this post, and if you’re on the hunt for more baby photo prop ideas, head over to the photo prop pattern page to scroll through my full collection.

Why I Fell in Love with This Mohair Lace Bonnet Pattern
When I started dreaming up this set, I knew I wanted something light and airy—something that whispered softness and innocence without screaming “I took three days to make this.” The Evangeline Bonnet practically designed itself. The mohair lace bonnet pattern has this wing-like motif that feels like a little halo around a baby’s head (minus any mystical references, of course).
I used KnitPicks Aloft (affiliate link) for both the bonnet and wrap. It’s a blend of super kid mohair and silk that gives off the prettiest little halo. It’s floaty and fine, and it adds just the right amount of softness without overpowering the lacework. KnitPicks Aloft (affiliate link) is also light and warm, making it ideal for delicate newborn skin during those cozy wrapped-up photo sessions.

What Makes This Mohair Lace Bonnet Pattern Special?
Let’s talk about the stitch pattern. It’s not complicated, but it looks like it could be—which is my favorite kind of knitting. The lace forms a wing-like texture that glides from the brim up to the crown. It’s knit in the round, so there’s no seaming, and the decreases swirl together beautifully at the top.
Here’s what I especially love about this mohair lace bonnet pattern:
- It looks like angel wings, but no over-the-top frill
- The yarn does half the work—thanks to KnitPicks Aloft (affiliate link), it has this built-in softness that makes the stitches pop
- It’s practical: The bonnet has ties to keep it on during wriggly photo sessions (because let’s be real, newborns are wiggle pros)
And while the Evangeline Wrap is the supporting actor, it totally deserves an honorable mention.

More on the Yarn: KnitPicks Aloft (affiliate link)
You know how picky I am about yarn for photo props. It has to look good on camera, feel gentle on a baby’s skin, and still be sturdy enough to hold its shape. That’s why I keep coming back to KnitPicks Aloft (affiliate link).
Here’s why it’s a top choice for this mohair lace bonnet pattern:
- Softness: That mohair and silk blend is buttery smooth
- Drape: The finished pieces have a flowy, elegant feel
- Weight: It’s featherlight—so the bonnet won’t overwhelm a tiny newborn head
- Colors: There’s a whole range of soft hues that photograph beautifully
If you’re making this mohair lace bonnet pattern to give as a gift or use as a keepsake, KnitPicks Aloft (affiliate link) helps you hit that balance between luxurious and heirloom-worthy.

The Wrap That Goes With It
Even though this blog post is all about the mohair lace bonnet pattern, the wrap deserves a little spotlight. It’s knit flat, which means no shaping—just cozy, relaxing rows of lace. The same motif that’s in the bonnet carries through the wrap, tying the whole look together.
Use it to:
- Wrap baby up snug like a little burrito
- Layer in a basket for texture
- Lay over a backdrop for a gentle halo of fluff
It’s flexible, simple, and makes your photos look polished and intentional without a lot of effort. And again, KnitPicks Aloft (affiliate link) gives it that luxurious vibe that makes people ask, “Did you seriously knit that?”

Tips for a Flawless Knit
If you’re excited to dive into this mohair lace bonnet pattern, here are a few little tips from me to you:
- Swatch first! It’s mohair. It stretches. Know what your gauge is before casting on.
- Block it like a pro—the lace opens up beautifully after a light wet block. Use pins and let it dry fully for maximum detail.
- Weave in ends carefully so nothing pokes baby’s skin. I always recommend a yarn needle with a rounded tip.
- If you need a sub for KnitPicks Aloft (affiliate link), go for something with a mohair/silk blend to keep that light and airy feel.
Great for Gifts, Keepsakes, and Photo Shoots
The best part of this mohair lace bonnet pattern? It’s just as practical as it is beautiful. Whether you’re gifting it to a mom-to-be, adding it to your photography prop stash, or knitting it as a keepsake for your own baby, it holds special meaning.
I’ve had photographers tell me this set became their most-requested newborn outfit, and moms love that it’s soft and simple. It’s timeless enough to be passed down, and small enough that it doesn’t feel like a giant time investment. Win-win.

Let’s Wrap It Up (See What I Did There?)
I’ve knit a lot of bonnets in my time, but this mohair lace bonnet pattern holds a soft spot in my heart. From the delicate yarn to the lacy wing-like details, everything about it just works. It’s elegant without being fussy, detailed without being complicated, and it adds that special something to every newborn photo.
And don’t forget—this mohair lace bonnet pattern is at the bottom of this post, and the rest of my photo prop designs are hanging out on the photo prop pattern page, just waiting for you to browse and cast on.
Whether you’re knitting this for your own baby, a client, or a loved one, I hope it brings you just as much joy as it brought me.
Happy knitting!
Let me know in the comments—what’s your favorite yarn to use for newborn photo props? I’m always looking for new ones to try!

Materials and Info
Materials: 300-350 yds of lace weight (size 0) mohair yarn (I used knitpicks aloft), size 6 (4mm) straight needles, yarn needle, 2 stitch markers
Gauge: 4.5sts/in ~GAUGE IS VERY IMPORTANT~
Abbreviation Key:
K – knit
P – purl
yo – yarn over
k2tog – knit 2 together
ssk – slip slip knit (slip sts purlwise)
sl – slip st knitwise
psso – pass slipped stitch over
tbl – through back loop
Head circumference: nb (13ins). 0-3mths (14ins), 3-6mth (15ins), 6- 12mths (16ins)
Evangeline Bonnet Pattern
NEWBORN
Cast on 52sts.
Row 1 – k2, [k1, yo, k4, k3togtbl, k4, yo] repeat from [to] across to last 2 sts,
k2
Row 2 (and all even rows) – k2, purl to last 2 sts, k2
Row 3 – k2, [k2, yo, k3, k3togtbl, k3, yo, k1] repeat from [to] across to last 2
sts, k2
Row 5 – k2 [k3, yo, k2, k3togtbl, k2, yo, k2] repeat from [to] across to last 2
sts, k2
Row 7 – k2 [k4, yo, k1, k3togtbl, k1, yo, k3] repeat from [to] across to last 2
sts, k2
Row 9 – k2 [k5, yo, k3togtbl, yo, k4] repeat from [to] across to last 2 sts, k2
Row 11 – k2 [k3togtbl, k4, yo, k1, yo, k4] repeat from [to] across to last 2 sts,
k2
Row 13 – k2 [k3togtbl, k3, yo, k3, yo, k3] repeat from [to] across to last 2 sts,
k2
Row 15 – k2 [k3togtbl, k2, yo, k5, yo, k2] repeat from [to] across to last 2 sts,
k2
Row 17 – k2 [k3togtbl, k1, yo, k7, yo, k1] repeat from [to] across to last 2 sts,
k2
Row 19 – k2 [k3togtbl, yo, k9, yo] repeat from [to] across to last 2 sts, k2
Row 20 – repeat row 2
Continue working rows 1-20 until your work measures 4ins from the cast on
edge ending after completing a right side row.
DECREASES
Row 1 – p1, p2tog, purl to last 3 sts, p2tog, p1 (50sts)
Place one stitch marker on either end of the row just completed.
Row 1 – k1 [k2tog, k4] repeat [to] across to last sts, k1(42sts)
Row 2 – purl across
Row 3 – k1 [k2tog, k3] repeat [to] across to last sts, k1 (34sts)
Row 4 – purl across
Row 5 – k1 [k2tog, k2] repeat [to] across to last sts, k1 (26sts)
Row 6 – purl across
Row 7 – k1 [k2tog, k1] repeat [to] across to last sts, k1 (18sts)
Row 8 – purl across
Row 8 – k1 [k2tog] repeat [to] across to last st, k1 (10sts)
Do not bind off. Cut yarn and pull through remaining stitches. Using this end
sew the crown together to your stitch markers. (I like to use the mattress stitch
since it is nearly invisible). Cut 6 pieces of yarn approximately 30ins long.
Fold them in half and pull a loop through the front corner of the hood. Pull the
ends through this loop.
Pattern © Amanda Morse, Knit in the Womb 2015 www.knitinthewomb.etsy.com. Distribution of this
pattern is prohibited. Please do not copy except for personal use. Permission IS given to sell what you
make from this pattern but please give me credit.
0-3MTH
Cast on 56sts.
Row 1 – k4, [k1, yo, k4, k3togtbl, k4, yo] repeat from [to] across to last 4 sts,
k4
Row 2 (and all even rows) – k2, purl to last 2 sts, k2
Row 3 – k4, [k2, yo, k3, k3togtbl, k3, yo, k1] repeat from [to] across to last 4
sts, k4
Row 5 – k4 [k3, yo, k2, k3togtbl, k2, yo, k2] repeat from [to] across to last 4
sts, k4
Row 7 – k4 [k4, yo, k1, k3togtbl, k1, yo, k3] repeat from [to] across to last 4
sts, k4
Row 9 – k4 [k5, yo, k3togtbl, yo, k4] repeat from [to] across to last 4 sts, k4
Row 11 – k4 [k3togtbl, k4, yo, k1, yo, k4] repeat from [to] across to last 4 sts,
k4
Row 13 – k4 [k3togtbl, k3, yo, k3, yo, k3] repeat from [to] across to last 4 sts,
k4
Row 15 – k4 [k3togtbl, k2, yo, k5, yo, k2] repeat from [to] across to last 4 sts,
k4
Row 17 – k4 [k3togtbl, k1, yo, k7, yo, k1] repeat from [to] across to last 4 sts,
k4
Row 19 – k4 [k3togtbl, yo, k9, yo] repeat from [to] across to last 4 sts, k4
Row 20 – repeat row 2
Continue working rows 1-20 until your work measures 4.5ins from the cast on
edge ending after completing a right side row.
DECREASES
Place one stitch marker on either end of the row just completed.
Row 1 – k1[k2tog, k4] repeat [to] across to last st, k1 (47sts)
Row 2 – purl across
Row 3 – k1 [k2tog, k3] repeat [to] across to last st, k1 (38sts)
Row 4 – purl across
Row 5 – k1 [k2tog, k2] repeat [to] across to last st, k1 (29sts)
Row 6 – purl across
Row 7 – k1 [k2tog, k1] repeat [to] across to last st, k1 (20sts)
Row 8 – purl across
Row 9 – k1 [k2tog] repeat [to] across to last st, k1 (11sts)
Do not bind off. Cut yarn and pull through remaining stitches. Using this end
sew the crown together to your stitch markers. (I like to use the mattress stitch
since it is nearly invisible). Cut 6 pieces of yarn approximately 30ins long.
Fold them in half and pull a loop through the front corner of the hood. Pull the
ends through this loop.
Pattern © Amanda Morse, Knit in the Womb 2015 www.knitinthewomb.etsy.com. Distribution of this
pattern is prohibited. Please do not copy except for personal use. Permission IS given to sell what you
make from this pattern but please give me credit.
3-6MTH
Cast on 64sts.
Row 1 – k2, [k1, yo, k4, k3togtbl, k4, yo] repeat from [to] across to last 2 sts,
k2
Row 2 (and all even rows) – k2, purl to last 2 sts, k2
Row 3 – k2, [k2, yo, k3, k3togtbl, k3, yo, k1] repeat from [to] across to last 2
sts, k2
Row 5 – k2 [k3, yo, k2, k3togtbl, k2, yo, k2] repeat from [to] across to last 2
sts, k2
Row 7 – k2 [k4, yo, k1, k3togtbl, k1, yo, k3] repeat from [to] across to last 2
sts, k2
Row 9 – k2 [k5, yo, k3togtbl, yo, k4] repeat from [to] across to last 2 sts, k2
Row 11 – k2 [k3togtbl, k4, yo, k1, yo, k4] repeat from [to] across to last 2 sts,
k2
Row 13 – k2 [k3togtbl, k3, yo, k3, yo, k3] repeat from [to] across to last 2 sts,
k2
Row 15 – k2 [k3togtbl, k2, yo, k5, yo, k2] repeat from [to] across to last 2 sts,
k2
Row 17 – k2 [k3togtbl, k1, yo, k7, yo, k1] repeat from [to] across to last 2 sts,
k2
Row 19 – k2 [k3togtbl, yo, k9, yo] repeat from [to] across to last 2 sts, k2
Row 20 – repeat row 2
Continue working rows 1-20 until your work measures 5ins from the cast on
edge ending after completing a right side row.
DECREASES
Row 1 – p1, p2tog,purl to last 3 sts, p2tog, p1 (62sts)
Place one stitch marker on either end of the row just completed.
Row 2 – k1 [k2tog, k4] repeat [to] across to last sts, k1(52sts)
Row 3 – purl across
Row 4 – k1 [k2tog, k3] repeat [to] across row (42sts)
Row 5 – purl across
Row 6 – k1 [k2tog, k2] repeat [to] across row (32sts)
Row 7 – purl across
Row 8 – k1 [k2tog, k1] repeat [to] across row (22sts)
Row 9 – purl across
Row 10 – k1 [k2tog] repeat [to] across to last sts, k1 (12sts)
Do not bind off. Cut yarn and pull through remaining stitches. Using this end
sew the crown together to your stitch markers. (I like to use the mattress stitch
since it is nearly invisible). Cut 6 pieces of yarn approximately 30ins long.
Fold them in half and pull a loop through the front corner of the hood. Pull the
ends through this loop.
Pattern © Amanda Morse, Knit in the Womb 2015 www.knitinthewomb.etsy.com. Distribution of this
pattern is prohibited. Please do not copy except for personal use. Permission IS given to sell what you
make from this pattern but please give me credit.
6-12MTH
Cast on 68sts.
Row 1 – k4, [k1, yo, k4, k3togtbl, k4, yo] repeat from [to] across to last 4 sts,
k4
Row 2 (and all even rows) – k2, purl to last 2 sts, k2
Row 3 – k4, [k2, yo, k3, k3togtbl, k3, yo, k1] repeat from [to] across to last 4
sts, k4
Row 5 – k4 [k3, yo, k2, k3togtbl, k2, yo, k2] repeat from [to] across to last 4
sts, k4
Row 7 – k4 [k4, yo, k1, k3togtbl, k1, yo, k3] repeat from [to] across to last 4
sts, k4
Row 9 – k4 [k5, yo, k3togtbl, yo, k4] repeat from [to] across to last 4 sts, k4
Row 11 – k4 [k3togtbl, k4, yo, k1, yo, k4] repeat from [to] across to last 4 sts,
k4
Row 13 – k4 [k3togtbl, k3, yo, k3, yo, k3] repeat from [to] across to last 4 sts,
k4
Row 15 – k4 [k3togtbl, k2, yo, k5, yo, k2] repeat from [to] across to last 4 sts,
k4
Row 17 – k4 [k3togtbl, k1, yo, k7, yo, k1] repeat from [to] across to last 4 sts,
k4
Row 19 – k4 [k3togtbl, yo, k9, yo] repeat from [to] across to last 4 sts, k4
Row 20 – repeat row 2
Continue working rows 1-20 until your work measures 5.5ins from the cast on
edge ending after completing a right side row.
DECREASES
Place one stitch marker on either end of the row just completed.
Row 1 – k1 [k2tog, k4] repeat [to] across to last sts, k1(57sts)
Row 2 – purl across
Row 3 – k1 [k2tog, k3] repeat [to] across row (46sts)
Row 4 – purl across
Row 5 – k1 [k2tog, k2] repeat [to] across row (35sts)
Row 6 – purl across
Row 7 – k1 [k2tog, k1] repeat [to] across row (24sts)
Row 8 – purl across
Row 9 – k1 [k2tog] repeat [to] across to last sts, k1 (13sts)
Do not bind off. Cut yarn and pull through remaining stitches. Using this end
sew the crown together to your stitch markers. (I like to use the mattress stitch
since it is nearly invisible). Cut 6 pieces of yarn approximately 30ins long.
Fold them in half and pull a loop through the front corner of the hood. Pull
the ends through this loop.

Evangeline Wrap Pattern
Cast on 62sts.
Row 1 – k1, [k1, yo, k4, k3togtbl, k4, yo] repeat from [to] across to last st, k1
Row 2 (and all even rows) –purl across
Row 3 – k1, [k2, yo, k3, k3togtbl, k3, yo, k1] repeat from [to] across to last st, k1
Row 5 – k1 [k3, yo, k2, k3togtbl, k2, yo, k2] repeat from [to] across to last st, k1
Row 7 – k1 [k4, yo, k1, k3togtbl, k1, yo, k3] repeat from [to] across to last st, k1
Row 9 – k1 [k5, yo, k3togtbl, yo, k4] repeat from [to] across to last st, k1
Row 11 – k1 [k3togtbl, k4, yo, k1, yo, k4] repeat from [to] across to last st, k1
Row 13 – k1 [k3togtbl, k3, yo, k3, yo, k3] repeat from [to] across to last st, k1
Row 15 – k1 [k3togtbl, k2, yo, k5, yo, k2] repeat from [to] across to last st, k1
Row 17 – k1 [k3togtbl, k1, yo, k7, yo, k1] repeat from [to] across to last st, k1
Row 19 – k1 [k3togtbl, yo, k9, yo] repeat from [to] across to last st, k1
Row 20 – repeat row 2
Continue working rows 1-20 until your work measures 30ins (or desired length) from the cast on edge ending after completing a purl row. Bind off loosely. You will need to lightly block the wrap straight. The pattern natural creates a diagonal effect but blocking cures that.
A note about length: I like my length to be about 30ins long. I feel it is long enough to wrap and have a flowy end but not so long that you can’t tuck it in if you like. It is also the perfect length for the “egg” wrap. It’s not bulky and there isn’t a lot of length to tuck in after you have the baby wrapped. Two other very popular lengths are 36ing and 40ins. What length you choose is 100% up to you. Play with it and have fun! It would also look awesome as just a layering piece. For that you could go shorter, maybe 20-24ins.
Evangeline Bonnet and Wrap PDF
Disclaimer: This page contains affiliate links. If you choose to make a purchase after clicking a link, I may receive a commission at no additional cost to you. Thank you for your support!