
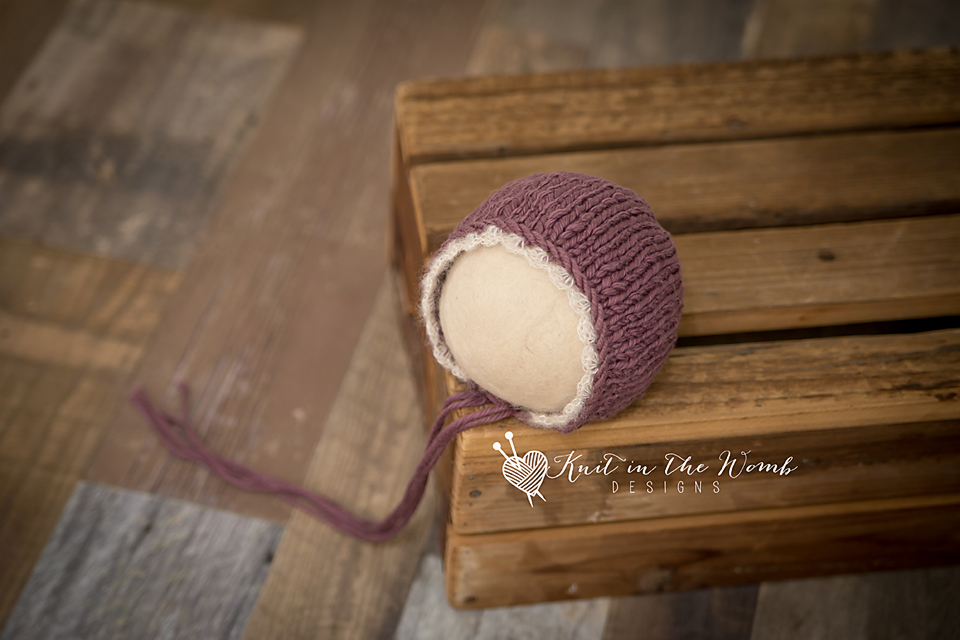
This free bulky knit bonnet pattern is the sweetest photo prop! Find this one below and more at my photo prop pattern page.

If there’s one thing I never get tired of, it’s squishy yarn and tiny bonnets. This free bulky knit bonnet pattern is a perfect blend of both—soft, textured cotton with a touch of airy lace, designed specifically for newborn photography. I’ve knit a lot of bonnets over the years, but the Naomi Bonnet holds a special place in my heart. It’s quick, fun, and comes out looking like something from a vintage baby book—if that baby book also happened to have a rustic photo shoot vibe.
And just so you know, the Naomi Bonnet pattern is at the bottom of this post. If you’re looking for more options, hop over to my full photo prop pattern page for all my favorite free bulky knit bonnet patterns and more!
Why I Made This Free Bulky Knit Bonnet Pattern
Knitting has always been my way to unwind—some people meditate, I make baby bonnets. When I sat down to design this free bulky knit bonnet pattern, I wanted something simple enough to finish in one cozy evening but pretty enough to pull out for a special newborn shoot.
I was inspired by those timeless baby bonnets you’d see in old family albums, but I wanted to add a little texture and charm. So I reached for a chunky cotton yarn and a fluffy lace edging to bring it all together.
The Yarn: Soft, Chunky, and Full of Personality
For the main part of the bonnet, I used KnitPicks Billow (affiliate link), which is hands-down one of my favorite bulky cotton yarns.
This yarn is thick-and-thin, meaning the stitch texture ends up looking perfectly imperfect. It makes every bonnet feel like a one-of-a-kind piece, even when I’ve knit it a dozen times. And as you might have guessed, yes—KnitPicks Billow (affiliate link) is an affiliate link that helps support my blog when you shop through it.

Adding Some Lace with KnitPicks Aloft
To add a little vintage flair, I finished the face edge with a soft mohair lace. KnitPicks Aloft (affiliate link) is light as a cloud and gives the bonnet just a touch of shine. It’s a blend of super kid mohair and silk, which makes it feel extra luxurious without being too delicate to use.
The lace edge is crocheted and then sewn to the bonnet. And even though this is a free bulky knit bonnet pattern, that dainty trim pulls the whole look together and makes it feel extra special. If you’ve never worked with Aloft before, you’re in for a treat—KnitPicks Aloft (affiliate link) floats through your fingers and turns even the simplest trim into something beautiful.
A Note on Baby Safety
As cute as this bonnet is, please remember: never leave baby unattended in any knit photo prop. These bonnets are for supervised newborn photography only.
Easy Enough for a Beginner, Cute Enough for a Keepsake
This free bulky knit bonnet pattern is worked flat and then seamed up the back. You’ll knit the main body, crochet the lace edge (or skip it if you’re not into crochet), and add a couple ties to finish. That’s it!
Even with the lace, this is a very doable knit for beginners—and if you’ve been knitting for a while, you’ll love how quickly it comes together. The texture from the KnitPicks Billow (affiliate link) does a lot of the visual work, and the lace from KnitPicks Aloft (affiliate link) is just icing on the cake.

Perfect for Newborn Photography
I made this free bulky knit bonnet pattern with photographers in mind. It fits snugly on babies around 6–10 lbs, with just the right amount of stretch and structure. The bulkier yarn creates depth and dimension in photos, while the lace trim adds softness and delicacy that flatters every sweet baby face.
The bonnet looks especially dreamy when paired with a swaddle or textured wrap. I’ve seen it used in professional shoots on rustic blankets, inside baskets, or curled next to stuffed animals. The color palette of KnitPicks Billow (affiliate link) works beautifully in neutral photo settings.
A Handmade Gift to Treasure
If you’re like me and love gifting your knits, this free bulky knit bonnet pattern makes a perfect baby shower gift or addition to a newborn welcome basket. I gave one to a photographer friend and she messaged me the next day saying it was her new favorite prop. And honestly? I was a little jealous I didn’t keep that one for myself!
There’s just something sweet about knitting for babies. You’re not just making a thing—you’re wrapping them up in love and warmth (and yes, a little yarn fuzz).
Why I’ll Keep Coming Back to This Free Bulky Knit Bonnet Pattern
Even though I’ve knit dozens of bonnets, this one keeps finding its way back on my needles. Between the rustic feel of the KnitPicks Billow (affiliate link) and the soft halo of KnitPicks Aloft (affiliate link), it’s exactly the kind of project I love—simple, textured, beautiful.
And let’s not forget: this free bulky knit bonnet pattern is also a quick win. In just a couple of hours, you’ve got a photo-ready prop that looks like it came from a boutique.
Where to Find More Free Bulky Knit Bonnet Patterns
If you’re loving the look of this Naomi Bonnet, you’ll want to explore even more cozy and creative baby patterns on my photo prop pattern page. I’ve gathered all my favorite free bulky knit bonnet patterns and props in one place so you can browse, download, and cast on whenever inspiration strikes.
Ready to Knit the Naomi Bonnet?
You’ve made it to the good part—the Naomi Bonnet pattern is right here at the bottom of the post. This free bulky knit bonnet pattern includes step-by-step instructions, and you can easily customize the lace edge or yarn choice to fit your own style.
Whether you’re knitting for your baby, a friend, or your favorite newborn photographer, this bonnet is sure to make someone smile.
Happy knitting, friend!

Materials and Info
Materials: 1 skein of Knitpicks Billow (bulky size 5), 10 (6mm) straight needles and dpn, yarn needle, stitch markers, size 3.25mm crochet hook, a few yards of lace weight mohair
Gauge: appx 3.5st/in – GAUGE IS VERY IMPORTANT!!!!
Sizes (appx finished measurement laid flat): newborn –(5x5ins), 0-3mths (5.5×5.5ins), 3-6mth (6x6ins), 6-12mths (6.5×6.5ins), Toddler (7x7ins)
Abbreviations:
K – knit
P – purl
k2tog – knit 2 together
sc – single crochet
sl – slip st
dc- double crochet
ch – chain

Naomi Bonnet Pattern
Newborn
Cast on 39sts
Row 1: k3, purl across to last 3 sts, k3
Row 2: knit across
Repeat rows 1 and 2 until your work measures 3.5ins from cast on edge ending after working a knit row.
Join in the round.
Decreases
Round 1 -(k2tog k11) repeat around (36sts)
Round 2 – (k2tog k4) repeat around (30sts)
Round 3 – knit around
Round 4- (k2tog k3) repeat around (24sts)
Round 5 – knit around
Round 6- (k2tog k2) repeat around (18sts)
Round 7- (k2tog k1) repeat around (12sts)
Round 8- (k2tog) repeat around (6sts)
Do NOT bind off. Cut yarn and pull through the remaining sts. Weave in ends. Cut 1 strand of yarn appx 24ins long. Fold it in half and pull a loop through the front corner of the hood. Pull the ends through this loop and secure. Repeat on the other side.
Edging: (sc, ch2, dc2) all in first st, [skip next st, (sc, ch2, dc2) all in next st)] repeat [to] across the front edge of your bonnet. Finish off by sl1 in last st.
0-3months
Cast on 43sts
Row 1: k3, purl across to last 3 sts, k3
Row 2: knit across
Repeat rows 1 and 2 until your work measures 4ins from cast on edge ending after working a knit row.
Join in the round.
Decreases
Round 1 -k2tog, knit around (42sts)
Round 2 – (k2tog k4) repeat around (35sts)
Round 3 – knit around
Round 4- (k2tog k3) repeat around (28sts)
Round 5 – knit around
Round 6- (k2tog k2) repeat around (21sts)
Round 7- (k2tog k1) repeat around (14sts)
Round 8- (k2tog) repeat around (7sts)
Do NOT bind off. Cut yarn and pull through the remaining sts. Weave in ends. Cut 1 strand of yarn appx 24ins long. Fold it in half and pull a loop through the front corner of the hood. Pull the ends through this loop and secure. Repeat on the other side.
Edging: (sc, ch2, dc2) all in first st, [skip next st, (sc, ch2, dc2) all in next st)] repeat [to] across the front edge of your bonnet. Finish off by sl1 in last st.
3-6months
Cast on 46sts
Row 1: k3, purl across to last 3 sts, k3
Row 2: knit across
Repeat rows 1 and 2 until your work measures 4.5ins from cast on edge ending after working a knit row.
Join in the round.
Decreases
Round 1 -k1 (k2tog, k13) repeat (to) around (42sts)
Round 2 – (k2tog k4) repeat around (35sts)
Round 3 – knit around
Round 4- (k2tog k3) repeat around (28sts)
Round 5 – knit around
Round 6- (k2tog k2) repeat around (21sts)
Round 7- (k2tog k1) repeat around (14sts)
Round 8- (k2tog) repeat around (7sts)
Do NOT bind off. Cut yarn and pull through the remaining sts. Weave in ends. Cut 1 strand of yarn appx 24ins long. Fold it in half and pull a loop through the front corner of the hood. Pull the ends through this loop and secure. Repeat on the other side.
Edging: (sc, ch2, dc2) all in first st, [skip next st, (sc, ch2, dc2) all in next st)] repeat [to] across the front edge of your bonnet. Finish off by sl1 in last st.
6-12months
Cast on 51sts
Row 1: k3, purl across to last 3 sts, k3
Row 2: knit across
Repeat rows 1 and 2 until your work measures 5ins from cast on edge ending after working a knit row.
Join in the round.
Decreases
Round 1 – (k2tog, k15) repeat around (48sts)
Round 2 – (k2tog k4) repeat around (40sts)
Round 3 – knit around
Round 4- (k2tog k3) repeat around (32sts)
Round 5 – knit around
Round 6- (k2tog k2) repeat around (24sts)
Round 7- (k2tog k1) repeat around (16sts)
Round 8- (k2tog) repeat around (8sts)
Do NOT bind off. Cut yarn and pull through the remaining sts. Weave in ends. Cut 1 strand of yarn appx 24ins long. Fold it in half and pull a loop through the front corner of the hood. Pull the ends through this loop and secure. Repeat on the other side.
Edging: (sc, ch2, dc2) all in first st, [skip next st, (sc, ch2, dc2) all in next st)] repeat [to] across the front edge of your bonnet. Finish off by sl1 in last st.
Toddler
Cast on 55sts
Row 1: k3, purl across to last 3 sts, k3
Row 2: knit across
Repeat rows 1 and 2 until your work measures 5.5ins from cast on edge ending after working a knit row.
Join in the round.
Decreases
Round 1 – k2tog, knit around (48sts)
Round 2 – (k2tog k4) repeat around (40sts)
Round 3 – knit around
Round 4- (k2tog k3) repeat around (32sts)
Round 5 – knit around
Round 6- (k2tog k2) repeat around (24sts)
Round 7- (k2tog k1) repeat around (16sts)
Round 8- (k2tog) repeat around (8sts)
Do NOT bind off. Cut yarn and pull through the remaining sts. Weave in ends. Cut 1 strand of yarn appx 24ins long. Fold it in half and pull a loop through the front corner of the hood. Pull the ends through this loop and secure. Repeat on the other side.
Edging: (sc, ch2, dc2) all in first st, [skip next st, (sc, ch2, dc2) all in next st)] repeat [to] across the front edge of your bonnet. Finish off by sl1 in last st.
Naomi Bonnet PDF

Disclaimer: This page contains affiliate links. If you choose to make a purchase after clicking a link, I may receive a commission at no additional cost to you. Thank you for your support!