
This free cable bonnet pattern is at the bottom—find more photo props at my photo prop pattern page!

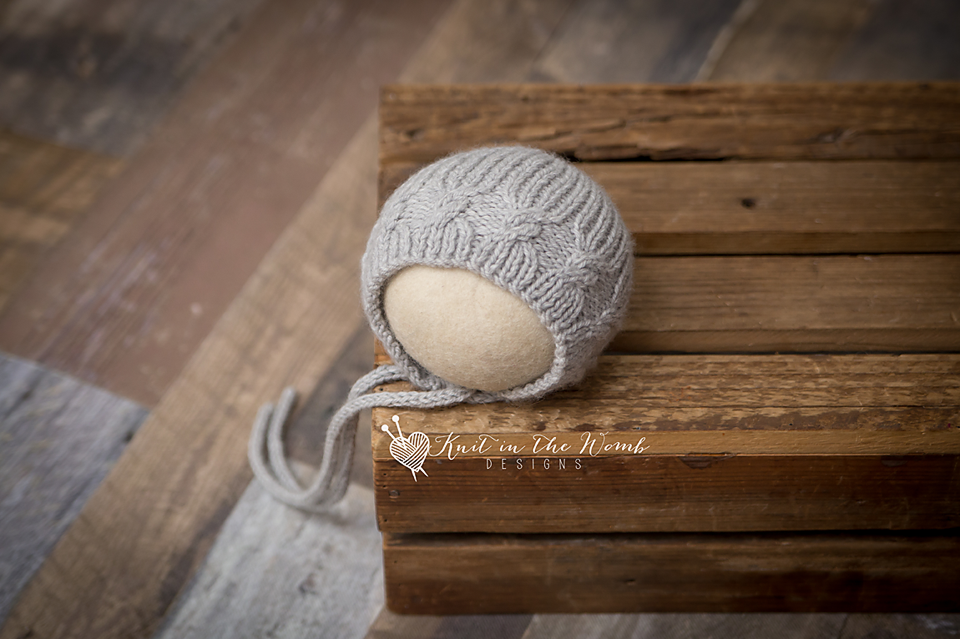
I don’t know about you, but there’s something especially satisfying about finishing a project that’s both beautiful and functional—bonus points if it’s teeny tiny and adorable. That’s exactly what I found when I knit up this free cable bonnet pattern, the Nicolas Bonnet. It’s become one of my favorite photo props to date, and today I’m sharing all the cozy details.
If you’re just here for the pattern, you’ll find this free cable bonnet pattern at the very bottom of this post. If you’re looking for even more adorable newborn makes, be sure to check out all my photo prop patterns right here!

Why I Fell in Love with This Free Cable Bonnet Pattern
From the moment I cast on, I knew this free cable bonnet pattern was going to be a keeper. It’s part of my Nicolas collection, which also includes a matching hat and cowl—hello, dreamy photo set! But what really sold me was the way it paired elegant texture with such a soft and snuggly yarn: KnitPicks Capra (affiliate link).
There’s something so sweet about knitting for newborns. Maybe it’s the itty-bitty stitches, or maybe it’s knowing your handiwork will help capture those once-in-a-lifetime newborn photos. Either way, this free cable bonnet pattern checks all the boxes: cute, practical, and heartfelt.

The Star Yarn: KnitPicks Capra (affiliate link)
Let’s talk yarn. I chose KnitPicks Capra (affiliate link) for this project, and oh my… it was a dream to work with. It’s an 85% merino wool and 15% cashmere blend that somehow manages to be both cozy and cloud-like. The stitch definition? Chef’s kiss. And the softness is exactly what you want against a newborn’s delicate skin.
I can’t help but gush about KnitPicks Capra (affiliate link). Every time I knit with it, it’s like my project gets an automatic upgrade. Bonus—it blocks beautifully and brings out every little cable in this free cable bonnet pattern.

What Makes This Free Cable Bonnet Pattern So Special?
Let me give you the rundown: the Nicolas Bonnet has the kind of thoughtful design that makes you feel like a pro while you knit it. The construction is intuitive (hello, minimal seaming!), the texture is rich but not overdone, and the fit is snug without being tight.
The pattern starts with a sweet little band that frames baby’s face, then works up into a softly shaped crown. It’s one of those pieces that looks intricate but is totally doable—even if you’re not a cabling wizard. Trust me, if you can knit, purl, and follow basic instructions, you can knit this free cable bonnet pattern.

My Knitting Experience with the Nicolas Bonnet
This free cable bonnet pattern was such a peaceful knit. I made mine over a weekend, sipping tea and watching reruns. Honestly, it was one of those projects where you lose track of time (in the best way). The rhythm of the cables, paired with the buttery glide of KnitPicks Capra (affiliate link), made the whole thing feel extra indulgent.
One of my favorite parts was knitting the I-cord ties at the end. Something about finishing a bonnet with neat little ties just gives me all the cozy vibes. And when I blocked it? Perfect. The cables popped, the edges lay flat, and I was one happy knitter.

Matching Set? Yes Please.
Here’s a little tip from me to you: if you love matching sets as much as I do, make the Nicolas Hat, Nicolas Headband and Nicolas Cowl to go along with your bonnet. This free cable bonnet pattern is part of that trio, and all three pieces complement each other so well. It’s a picture-perfect set for newborn photos or even a thoughtful handmade gift set for a new baby.
When I gave the full set to a friend who had just had her first baby, she was over the moon. She immediately scheduled a photoshoot and texted me pictures with heart emojis. Seeing her little one snuggled in the full Nicolas set? Worth every stitch.

Tips for Knitting Your Free Cable Bonnet Pattern
Before you grab your needles, here are a few quick tips that helped me along the way:
- Choose quality yarn: I absolutely recommend KnitPicks Capra (affiliate link). The softness, the drape, the stitch definition—chef’s kiss. You won’t regret it.
- Swatch it out: Yes, I know. Swatching isn’t the most exciting part of knitting, but it’s worth it—especially when you want a perfect newborn fit.
- Block your bonnet: Don’t skip this step! Blocking helps even out your cables and gives your bonnet that polished, pro look.
- Follow the shaping closely: This free cable bonnet pattern has beautiful shaping, but it requires just a little attention to detail. Totally worth it.

Let’s Talk Color!
I used a soft, classic neutral for mine, but I’d love to see this free cable bonnet pattern in all kinds of colors. Think dusty rose, gentle sage, or even a bold mustard. KnitPicks Capra (affiliate link) has such a pretty color palette—you really can’t go wrong.
If you’re knitting this as a photo prop, think about how the color will show up in photos. Soft pastels and naturals always work well. But hey, no rule says baby bonnets can’t be bright!
Final Thoughts on the Free Cable Bonnet Pattern
Knitting this free cable bonnet pattern was just plain fun. From the moment I picked up my skein of KnitPicks Capra (affiliate link), I knew this was going to be a project I’d want to make again. It’s quick, it’s beautiful, and it’s got just the right amount of detail to keep things interesting.
Whether you’re looking for your next baby shower gift, stocking up on newborn photo props, or just want to try something new, I highly recommend giving this free cable bonnet pattern a try.
And again, if you’re looking for more sweet photo props like this, don’t forget to check out my photo prop pattern page. But if you’re ready to dive into this exact bonnet, just scroll on down—you’ll find this free cable bonnet pattern at the bottom of the post.
Happy Knitting!
I’d love to hear if you make this free cable bonnet pattern—tag me in your finished projects or drop a comment to share your thoughts. There’s something so joyful about knitting for newborns, and I hope this little pattern brings that joy right into your hands.
Now go grab that skein of KnitPicks Capra (affiliate link), and get started. Those sweet baby photos aren’t going to knit themselves!

Materials and Info
Materials: appx 60-120yd dk weight yarn (I used knitpicks capra) size 6 (4mm) straight needles or size needed to obtain gauge), Cable needle, size 6 (4mm) dpn for the icord ties if so desired , yarn needle
Gauge: appx 5sts/inch in stockinette st Gauge is very important!
Sizes (appx head circumference) [appx finished size laid flat] : newborn (13ins) [5x5ins], infant (14.5 ins) [5.25×5.25ins], sitter (16ins) [6.5×6.5ins], toddler (17ins) [7.25×7.25ins]
Stitch Key
K – knit p – purl
K2tog – knit 2 stitches together
t2f – slide next st onto cable needle, hold in front, p next st, k st from cable needle
t2b – slide next st onto cable needle, hold in back, k next st, p st from cable needle
c5f – slide next 2 sts onto cable needle, hold in front, k next 3 sts, k2 sts from cable needle
Note: The cast on may seem huge but the ribbing and cables will shrink your fabric down a lot. I prefer to do i-cord ties (personal preference) you can do them however you please though. Also, I am left handed so your cables may go the opposite direction as the model image.

Nicolas Bonnet Pattern
NEWBORN
Long Tail Cast on 71sts
Row 1 (ws)– p1k1 to last st, p1
Row 2 (rs) – k1p1 to last st, k1
Repeat rows 1 and 2 1 more time then repeat row 1.
Row 6 – k1, p1, k1, p1 [t2f, k1, p1, k1, t2b, p1] repeat [to] across to last 3 sts, k1, p1,k1
Row 7 – p1, k1, p1, k1 [k1, p5, k2] repeat [to] across to last 3 sts, p1, k1,p1
Row 8 – k1, p1, k1, p1, [p1, c5f, p2] repeat [to] across to last 3 sts, k1, p1,k1
Row 9 – repeat row 7
Row 10 – k1, p1, k1, p1, [p1, k5, p2] repeat [to] across to last 3 sts, k1, p1,k1
Row 11 – repeat row 7
Row 12 – repeat row 8
Row 13 – p1, k1, p1, k1, [k1, p2, k1, p2, k2] Repeat [to] across to last 3 sts, p1, k1,p1
Row 14 – k1, p1, k1, p1, [t2b, k1, p1, k1, t2f, p1] repeat [to] across to last 3 sts, k1, p1,k1
Row 15 – repeat row 1
Row 16 – repeat row 2
Continue working in k1p1 ribbing until your work measures appx. 3.5ins from cast on edge. Finish after completing a wrong side row.
DECREASES
Row 1 (right side) – k1[k2tog, work in established k1,p1 pattern for 5sts] repeat [to] across (61sts)
Row 2 – work in established pattern across
Row 3 – k1[k2tog, work in established k1,p1 pattern for 4sts] repeat [to] across (51sts)
Row 4 – work in established pattern across
Row 5 – k1[k2tog, work in established k1,p1 pattern for 3sts] repeat [to] across (41sts)
Row 6 – work in established pattern across
Row 7 – k1[k2tog, work in established k1,p1 pattern for 2sts] repeat [to] across (31sts)
Row 8 – work in established pattern across
Row 9 – k1[k2tog, work in established k1,p1 pattern for 1sts] repeat [to] across (21sts)
Row 10 – work in established pattern across
Row 11 – k1[k2tog] repeat [to] across (11sts)
Do not bind off. Cut yarn leaving appx -10ins. Pull yarn through remaining stitches and cinch the back tight. Using this end sew the crown together to your stitch markers. (I like to use the mattress stitch since it is nearly invisible). Pick up 3sts along the front corner of your bonnet and work an i-cord for 12ins. Do the same on the opposite front corner.
Weave in ends and block.
INFANT
Long Tail Cast on 79sts
Row 1 (ws)– p1k1 to last st, p1
Row 2 (rs) – k1p1 to last st, k1
Repeat rows 1 and 2 1 more time then repeat row 1.
Row 6 – k1, p1, k1, p1 [t2f, k1, p1, k1, t2b, p1] repeat [to] across to last 3 sts, k1, p1,k1
Row 7 – p1, k1, p1, k1 [k1, p5, k2] repeat [to] across to last 3 sts, p1, k1,p1
Row 8 – k1, p1, k1, p1, [p1, c5f, p2] repeat [to] across to last 3 sts, k1, p1,k1
Row 9 – repeat row 7
Row 10 – k1, p1, k1, p1, [p1, k5, p2] repeat [to] across to last 3 sts, k1, p1,k1
Row 11 – repeat row 7
Row 12 – repeat row 8
Row 13 – p1, k1, p1, k1, [k1, p2, k1, p2, k2] Repeat [to] across to last 3 sts, p1, k1,p1
Row 14 – k1, p1, k1, p1, [t2b, k1, p1, k1, t2f, p1] repeat [to] across to last 3 sts, k1, p1,k1
Row 15 – repeat row 1
Row 16 – repeat row 2
Continue working in k1p1 ribbing until your work measures appx. 4ins from cast on edge. Finish after completing a wrong side row.
DECREASES
Row 1 (right side) – k1[k2tog, work in established k1,p1 pattern for 5sts] repeat [to] across to last st, k1 (68sts)
Row 2 – work in established pattern across
Row 3 – k1[k2tog, work in established k1,p1 pattern for 4sts] repeat [to] across to last st, k1 (57sts)
Row 4 – work in established pattern across
Row 5 – k1[k2tog, work in established k1,p1 pattern for 3sts] repeat [to] across to last st, k1 (46sts)
Row 6 – work in established pattern across
Row 7 – k1[k2tog, work in established k1,p1 pattern for 2sts] repeat [to] across to last st, k1 (35sts)
Row 8 – work in established pattern across
Row 9 – k1[k2tog, work in established k1,p1 pattern for 1sts] repeat [to] across to last st, k1 (24sts)
Row 10 – work in established pattern across
Row 11 – k1[k2tog] repeat [to] across (13sts)
Do not bind off. Cut yarn leaving appx -10ins. Pull yarn through remaining stitches and cinch the back tight. Using this end sew the crown together to your stitch markers. (I like to use the mattress stitch since it is nearly invisible). Pick up 3sts along the front corner of your bonnet and work an i-cord for 12ins. Do the same on the opposite front corner.
Weave in ends and block.
SITTER
Long Tail Cast on 87sts
Row 1 (ws)– p1k1 to last st, p1
Row 2 (rs) – k1p1 to last st, k1
Repeat rows 1 and 2 1 more time then repeat row 1.
Row 6 – k1, p1, k1, p1 [t2f, k1, p1, k1, t2b, p1] repeat [to] across to last 3 sts, k1, p1,k1
Row 7 – p1, k1, p1, k1 [k1, p5, k2] repeat [to] across to last 3 sts, p1, k1,p1
Row 8 – k1, p1, k1, p1, [p1, c5f, p2] repeat [to] across to last 3 sts, k1, p1,k1
Row 9 – repeat row 7
Row 10 – k1, p1, k1, p1, [p1, k5, p2] repeat [to] across to last 3 sts, k1, p1,k1
Row 11 – repeat row 7
Row 12 – repeat row 8
Row 13 – p1, k1, p1, k1, [k1, p2, k1, p2, k2] Repeat [to] across to last 3 sts, p1, k1,p1
Row 14 – k1, p1, k1, p1, [t2b, k1, p1, k1, t2f, p1] repeat [to] across to last 3 sts, k1, p1,k1
Row 15 – repeat row 1
Row 16 – repeat row 2
Continue working in k1p1 ribbing until your work measures appx. 5ins from cast on edge. Finish after completing a wrong side row.
DECREASES
Row 1 (right side) – k1, k2tog work in established pattern across to last 3sts, k2tog, k1 (85sts)
Row 2 -k1[k2tog, work in established k1,p1 pattern for 5sts] repeat [to] across (73sts)
Row 3 – work in established pattern across
Row 4 – k1[k2tog, work in established k1,p1 pattern for 4sts] repeat [to] across (61sts)
Row 5 – work in established pattern across
Row 6 – k1[k2tog, work in established k1,p1 pattern for 3sts] repeat [to] across (49sts)
Row 7 – work in established pattern across
Row 8 – k1[k2tog, work in established k1,p1 pattern for 2sts] repeat [to] across (37sts)
Row 9 – work in established pattern across
Row 10 – k1[k2tog, work in established k1,p1 pattern for 1sts] repeat [to] across (25sts)
Row 11 – work in established pattern across
Row 12 – k1[k2tog] repeat [to] across (13sts)
Do not bind off. Cut yarn leaving appx -10ins. Pull yarn through remaining stitches and cinch the back tight. Using this end sew the crown together to your stitch markers. (I like to use the mattress stitch since it is nearly invisible). Pick up 3sts along the front corner of your bonnet and work an i-cord for 12ins. Do the same on the opposite front corner.
Weave in ends and block.
TODDLER
Long Tail Cast on 95sts
Row 1 (ws)– p1k1 to last st, p1
Row 2 (rs) – k1p1 to last st, k1
Repeat rows 1 and 2 1 more time then repeat row 1.
Row 6 – k1, p1, k1, p1 [t2f, k1, p1, k1, t2b, p1] repeat [to] across to last 3 sts, k1, p1,k1
Row 7 – p1, k1, p1, k1 [k1, p5, k2] repeat [to] across to last 3 sts, p1, k1,p1
Row 8 – k1, p1, k1, p1, [p1, c5f, p2] repeat [to] across to last 3 sts, k1, p1,k1
Row 9 – repeat row 7
Row 10 – k1, p1, k1, p1, [p1, k5, p2] repeat [to] across to last 3 sts, k1, p1,k1
Row 11 – repeat row 7
Row 12 – repeat row 8
Row 13 – p1, k1, p1, k1, [k1, p2, k1, p2, k2] Repeat [to] across to last 3 sts, p1, k1,p1
Row 14 – k1, p1, k1, p1, [t2b, k1, p1, k1, t2f, p1] repeat [to] across to last 3 sts, k1, p1,k1
Row 15 – repeat row 1
Row 16 – repeat row 2
Continue working in k1p1 ribbing until your work measures appx. 5.75ins from cast on edge. Finish after completing a right side row.
DECREASES
Row 1 (wrong side) – k1, k2tog work in established pattern across to last 3sts, k2tog, k1 (93sts)
Row 2 – k1[k2tog, work in established k1,p1 pattern for 5sts] repeat [to] across (80sts)
Row 3 – work in established pattern across
Row 4 – k1[k2tog, work in established k1,p1 pattern for 4sts] repeat [to] across (67sts)
Row 5 – work in established pattern across
Row 6 – k1[k2tog, work in established k1,p1 pattern for 3sts] repeat [to] across (54sts)
Row 7 – work in established pattern across
Row 8 – k1[k2tog, work in established k1,p1 pattern for 2sts] repeat [to] across (41sts)
Row 9 – work in established pattern across
Row 10 – k1[k2tog, work in established k1,p1 pattern for 1sts] repeat [to] across (28sts)
Row 11 – work in established pattern across
Row 12 – k1[k2tog] repeat [to] across (15sts)
Do not bind off. Cut yarn leaving appx -10ins. Pull yarn through remaining stitches and cinch the back tight. Using this end sew the crown together to your stitch markers. (I like to use the mattress stitch since it is nearly invisible). Pick up 3sts along the front corner of your bonnet and work an i-cord for 12ins. Do the same on the opposite front corner.
Weave in ends and block.
Nicolas Bonnet PDF

Disclaimer: This page contains affiliate links. If you choose to make a purchase after clicking a link, I may receive a commission at no additional cost to you. Thank you for your support!