
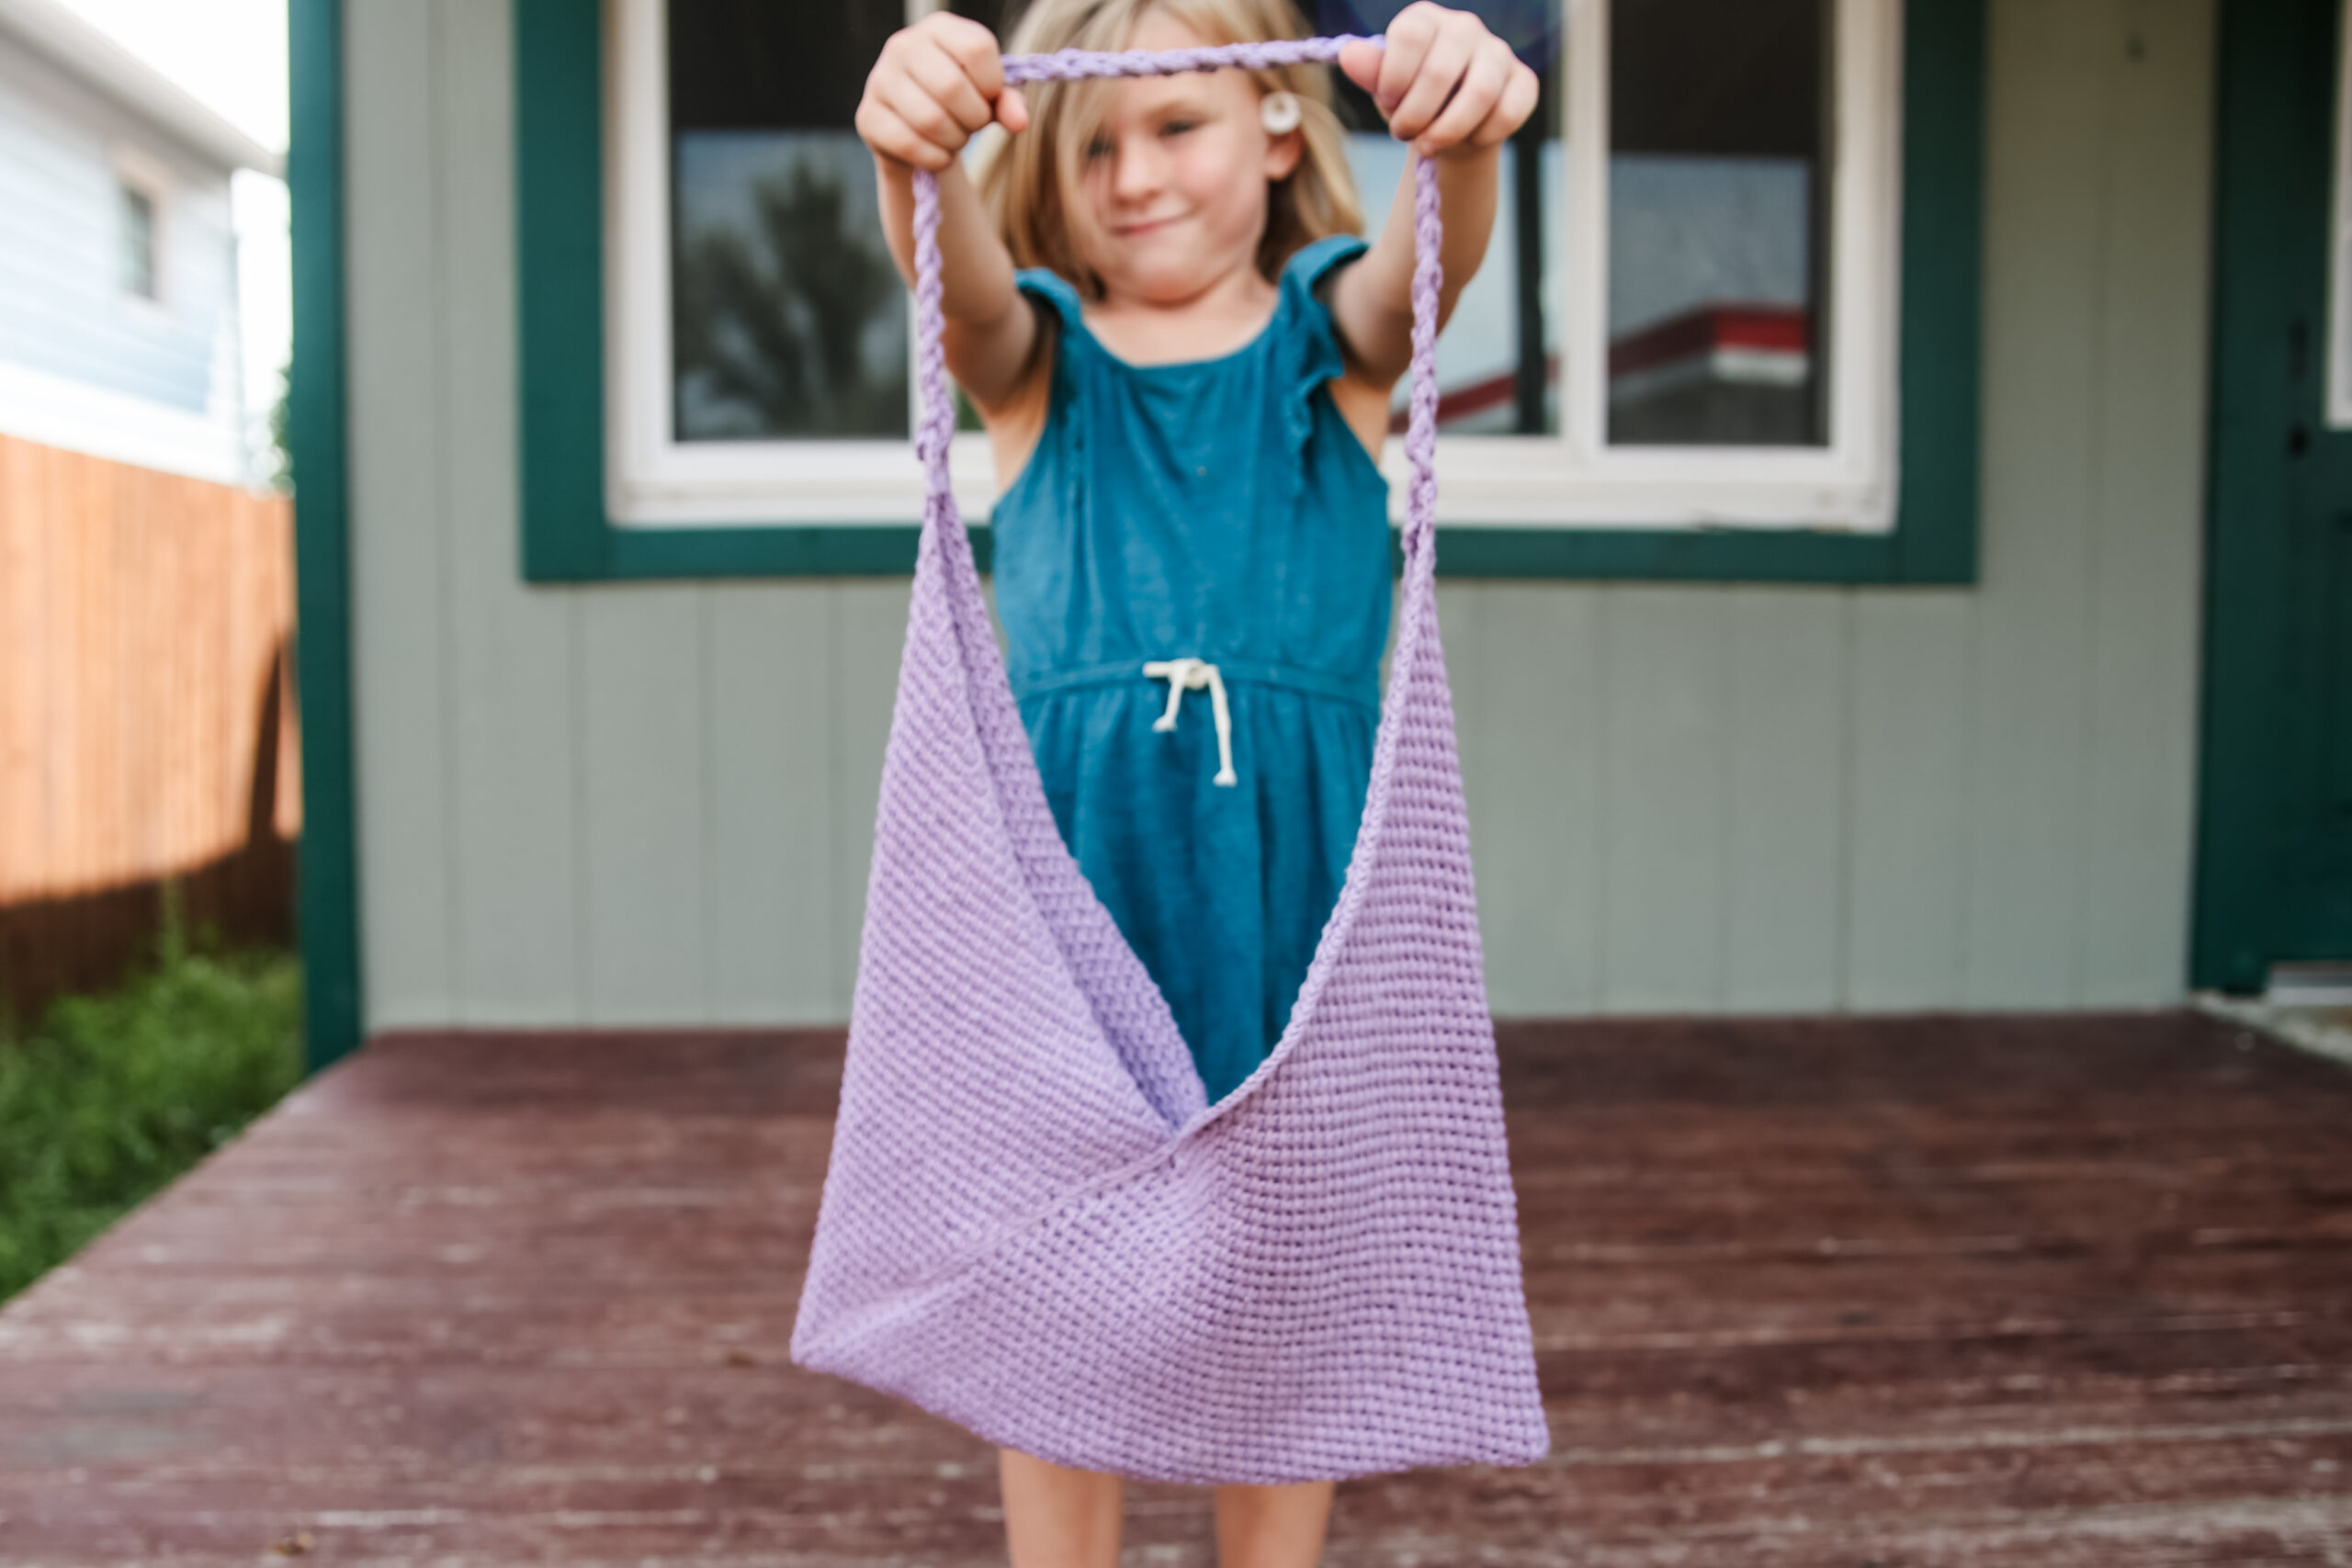
This knit tote bag pattern is my go-to for practical beauty! Find this one at the bottom and more on the tote, bag & purse pattern page.

As a homeschooling mom and an all-day-everyday knitter, I’m constantly on the lookout for a pattern that checks both boxes: functional and fabulous. That’s exactly what I found in this knit tote bag pattern—the Rosebud Bag. It’s one of those projects that had me saying, “Okay, I need another bag,” even though my closet already tells a different story.
From the clever construction to the finished piece that’s now my daily carry-all, this knit tote bag pattern quickly rose to the top of my “favorites” list. Let me walk you through why you’re going to want to drop everything and cast this one on.
Discovering the Rosebud Knit Tote Bag Pattern
I’ll be honest, I’m a sucker for a smart design. And this knit tote bag pattern? It’s genius. Instead of the usual knit-in-the-round or pieced construction, the entire bag is knit as a flat rectangle. Yep, just a single panel. Then the magic happens—well, the folding happens—and suddenly, you’re staring at a totally functional tote bag.
It’s basically knitting-meets-origami in the best way. Plus, the slip-stitch pattern creates this lovely tight weave that looks fancy but is secretly super beginner-friendly. And it’s strong. Like “carry all your library books plus snacks” strong.

The Yarn I Chose (and Why I Love It)
I used KnitPicks CotLin (affiliate link) for this project, and it was a perfect match for this knit tote bag pattern. CotLin is a blend of Tanguis cotton and linen (affiliate link), which makes it not only strong and breathable but also soft and drapey. That’s a pretty dreamy combo for a bag that needs structure but also wants to look good doing it.
And the color? I went with the “Whisper” colorway (affiliate link)—a soft, romantic shade that reminded me of the roses from my wedding bouquet. It felt sentimental and practical all at once. Isn’t that what we all want in a knitting project?
Knitting the Rosebud Bag
Once I cast on, I was hooked. The slip-stitch pattern used in this knit tote bag pattern creates this dense, textured fabric that honestly looks store-bought. But it’s totally doable—even if you’re not a seasoned stitch-sorcerer. (Okay, not “sorcery,” let’s just say stitch-savvy.)
There’s something super satisfying about watching that tight weave come together. And I loved how meditative the rhythm became. Slip, knit, slip, knit… before I knew it, I had a rectangle large enough to fold into something fabulous.
Folding It Up: Where the Fun Begins
Okay, here’s the part that totally delighted me—folding the rectangle to form the actual bag. This step of the knit tote bag pattern felt like knitting magic without breaking any rules. I followed the folding instructions, stitched up the sides, and boom: a bag!
There’s something incredibly satisfying about watching flat knitting become 3D. It’s like those childhood paper crafts, but make it fiber art.

Add Some Flair: The I-Cord Handle
Let’s talk handles. The I-cord chain stitch handle on this knit tote bag pattern is both sturdy and stylish. I love knitting I-cords anyway—they’re quick, tidy, and make everything feel finished. But for this bag, the I-cord really ties everything together (pun totally intended).
The handle was fun to knit, easy to attach, and adds just the right pop of texture against the slip-stitch body. It feels great in the hand and holds up beautifully, even when my bag is full of notebooks, a water bottle, and—let’s be honest—at least one emergency granola bar.
Optional Magnetic Snap (and Why I Added It) (affiliate link)
I’m usually a fan of simple open-top bags, but I decided to go the extra step with this knit tote bag pattern and add the optional magnetic snap (affiliate link). Best decision ever.
It was a quick little addition, but it made the bag feel more secure—especially when I use it as a purse or take it to church. No more tipping my bag and watching my phone slide out in slow motion!
The Final Result: A Daily Essential
The finished Rosebud Bag turned out better than I imagined. It’s soft but strong, pretty but practical, and just the right size to be useful without feeling bulky. Thanks to the CotLin yarn (affiliate link), it has the ideal balance of structure and drape.
This knit tote bag pattern has earned a permanent spot in my everyday rotation. It comes with me to homeschool co-op, Bible study, the farmer’s market—you name it. And yes, it still looks just as lovely as the day I cast off.
Why You Should Try This Knit Tote Bag Pattern
If you’re itching to cast on something fresh, this knit tote bag pattern is calling your name. Here’s why it’s worth your needles:
- Minimal shaping – it’s just a rectangle!
- Slip-stitch texture – easy to memorize but looks impressive.
- Practical design – works as a tote, a purse, or even a gift bag.
- Customization options – change the handle length, add a closure (affiliate link), play with colors.
- Durable finish – thanks to CotLin yarn (affiliate link), it stands up to everyday use.
I’m already planning to make another one in a bolder shade—maybe a summer-ready coral or a classic navy. Honestly, I wouldn’t be surprised if I knit one for every season. And maybe a few for gifts.
Ready to Make Yours?
If you’re feeling inspired, you can grab the Rosebud knit tote bag pattern at the bottom of this post. If you want to browse more fun and functional designs, check out all my tote, bag & purse patterns here. You’ll find even more options to fuel your bag obsession!
Happy knitting, friends! Let me know if you cast on—I’d love to see your version of the Rosebud.

Materials and Info
MATERIALS AND INFO
Materials: Approximately 3 skein of KnitPicks Cotlin, needle, stitch markers, optional magnet closures
Needle Size: 5(US) 3.75mm needles
Gauge (tension): 24sts to make 10cm across (row gauge does not matter here), using size 5(US) 3.75mm needles working in pattern stitch
Finished Chest Measurement: 34.5cms across x 36cms tall with a 53cms braided icord handle
METHOD
This pattern single rectangle folded to create the bag. There is a video tutorial included on how to fold the bag.
ROSEBUD STITCH PATTERN
Row 1 (right side row) – Sl1, (sl1 purlwise with yarn in back, k1, yo, psso) repeat (to) across to last st, k1
Row 2 – Purl across
Row 3 – sl1, (k1, sl1 purlwise with yarn in back, k1, yo, psso) repeat (to) across to last 2sts, k2
Row 4 – purl across
ABBREVIATIONS
k – knit
P – purl
pm – place marker
sm – slip marker
k2tog -knit 2 stitches together
psso – pass slipped stitch over
yo – yarn over
st – stitch
sl – slip stitch

Rosebud Bag Pattern
MAIN BODY OF BAG
Cast on 186 sts
Work in rosebud stitch pattern for 16cms.
Bind off.
Your rectangle should measure approximately 36×15.5cms.
FOLDING THE BAG
Lay your finished work wrong side facing up.
Fold the bottom left corner up and the top right corner down.
See fig 1

Now fold the right side up, lining up with the left edge that was folded over. See fig2

Sew the seams on both the front and back. I like to use a mattress stitch center of the bind off/cast on edge but a whip stitch works beautifully too.
If you would like a video tutorial of this you can find one on youtube here.
I-CORD LOOP (make 2)
Work an i-cord for 10 rows leaving a long enough tail on the cast on and bind off to sew the loop to the top of the folded corners.

HANDLE
Work an i-cord and finger chain stitch until the handle measures 53cms. Or you can make 3 icords and braid them together if you do not know how to make a chain stitch (which is a crochet term).
Using the end, sew the braid to the loop you sewed on in the previous step.

FINISHING
Weave in all ends. If desired you can add a magnetic snap to keep it closed. You can find the snaps here.
Rosebud Bag PDF

Disclaimer: This page contains affiliate links. If you choose to make a purchase after clicking a link, I may receive a commission at no additional cost to you. Thank you for your support!
Thanks for the pattern!
FYI, the title page upper right hand corner title says “cardigan” , not bag
Thank you! Not sure how that got missed!!!
Hey people!!!!!
Good mood and good luck to everyone!!!!!