
Looking for a free photo prop shorts pattern? The full pattern is at the bottom, and more photo props are at this link!

Let’s talk about one of the sweetest, squishiest little knits you can whip up for a newborn photo session—a free photo prop shorts pattern that’s loaded with ruffles, texture, and charm. Whether you’re a seasoned knitter or just love the idea of contributing something handmade to a special photo shoot, these ruffle shorts are an absolute must-knit. They’re playful, cozy, and let’s be real—everything looks better with baby rolls and ruffles.
I’ve always loved creating special knits for newborn photography, and this free photo prop shorts pattern has quickly become one of my favorites. It’s simple to customize, super photogenic, and gives off that handmade-with-love vibe that store-bought props just can’t match. Plus, you’ll find the full pattern for these ruffle shorts at the bottom of this post—but if you’re looking for more patterns like this, I’ve rounded up several more on my photo prop pattern page.
But before you dive into this free photo prop shorts pattern, let’s chat a bit about what makes these little cuties such a hit.
Why Ruffle Shorts Are the Star of the Show
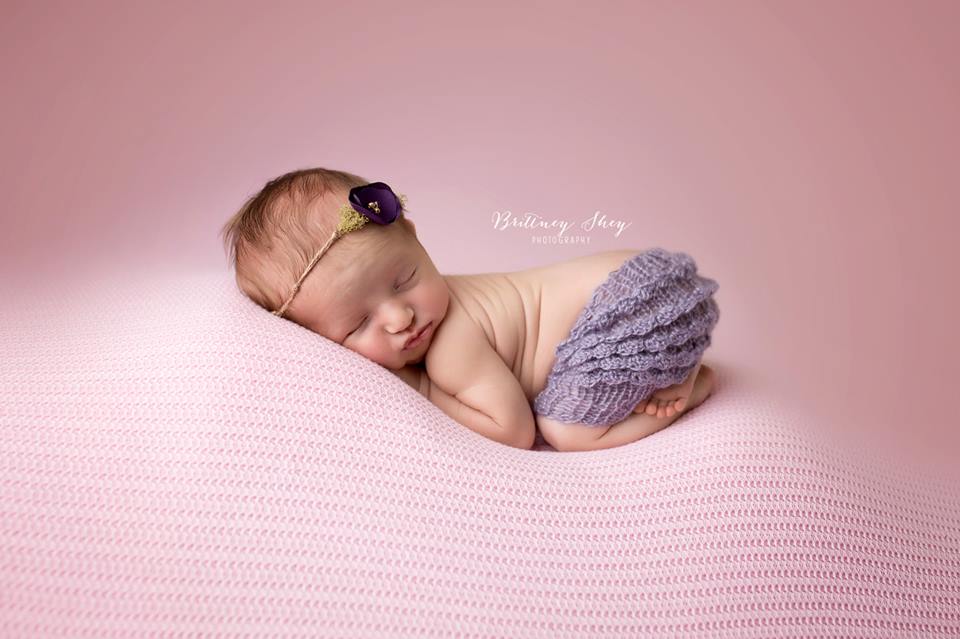
There’s just something extra special about ruffle shorts in newborn photos. The layers! The softness! The perfect way they accent those chunky little thighs! This free photo prop shorts pattern was designed with all of that in mind. The ruffles add dimension and interest, making them ideal for photographers who want to capture textures and sweet little details.
They work beautifully on their own or paired with a simple bonnet or headband. I’ve even seen them styled with nothing else at all—just baby skin and ruffles, and it’s picture-perfect. Want a prop that’s gender-neutral but still fun and playful? This free photo prop shorts pattern has you covered. Change the yarn color, add a bow, or mix in a lace detail, and you’ve got a completely new look every time.
What You’ll Need to Make Your Free Photo Prop Shorts Pattern Shine
Choosing the right yarn is key. For these shorts, soft and breathable yarns are the way to go. I like using something with a cotton blend or bamboo for that smooth touch against baby’s delicate skin. If you’re a wool lover, go for something extra gentle like merino wool—just make sure it’s marked as baby-safe and not itchy.
This free photo prop shorts pattern also works great in solids or hand-dyed yarns. Pastels are always a safe bet for newborn photos, but I’ve had fun playing with brighter colors, too. Don’t be afraid to experiment a little! The color choice can completely change the vibe of your final photos.
For tools, I recommend circular needles for a nice, seamless knit. You’ll also want stitch markers, a yarn needle, scissors, and a good cup of coffee or tea—because we all know knitting and cozy beverages go hand in hand.

Knitting Tips for the Perfect Ruffles
Let’s talk construction. The free photo prop shorts pattern starts with a simple base—just a classic pair of knit shorts in stockinette stitch. From there, we get to the fun part: ruffles.
To make them, you’ll pick up stitches around the leg openings and work a series of increases to build out the frilly texture. You can go big and fluffy with multiple layers or keep it subtle with just one. Either way, they’re going to look amazing on camera.
Pro tip: use a smaller needle size for the waistband to get that snug, stay-put fit. You can even add a little knit-in drawstring or soft elastic for extra security during those wiggly baby moments. And don’t forget to block! Blocking helps your ruffles lay just right and gives the shorts that polished, professional finish.
Personalize Your Free Photo Prop Shorts Pattern
This is where you can really let your creativity shine. Add a bow. Try contrasting ruffle layers. Use variegated yarn for a watercolor effect. There’s so much room to play with this free photo prop shorts pattern.
If you’re knitting for a specific theme—like a spring session or holiday shoot—you can coordinate colors and add seasonal embellishments. Think soft florals, tiny heart buttons, or even little lace appliqués. I love seeing how a basic pattern like this one can be transformed again and again with just a few tweaks.

Baby Safety Reminder
While these shorts are adorable, we’ve got to talk safety for a second. If you’re planning to pair these ruffle shorts with a bonnet (which is a common styling choice), please remember: never leave a baby unattended while wearing the bonnet, especially due to the length of the ties. The shorts themselves are safe and cozy, but bonnets with ties should only be used during supervised photo sessions.
Washing and Caring for Your Ruffle Shorts
You’ve spent time knitting this beautiful piece, so let’s keep it looking great. Most free photo prop shorts pattern projects will call for delicate yarn, so hand washing is best. Use cool water and a gentle detergent. Lay flat to dry to avoid stretching or misshaping those perfect ruffles.
After a wash and block, these shorts are ready for action—and trust me, they’ll be getting lots of use once photographers and parents get a peek!

Why I Keep Coming Back to This Free Photo Prop Shorts Pattern
Every time I knit a pair of these shorts, I fall in love all over again. They’re fast, fun, and always turn out adorable. Whether I’m gifting them, using them for photography, or just building out my stash of handmade baby props, this free photo prop shorts pattern delivers every single time.
And if you’re new to knitting for newborn photography, shorts are a great place to start. They’re a quick knit with big payoff, and they photograph beautifully.
Ready to Make Your Own?
Alright, now that we’ve covered the ins and outs, the tips and tricks, and why I love this free photo prop shorts pattern so much, it’s time to cast on! You’ll find the pattern instructions at the very bottom of this post, so scroll on down when you’re ready.
But before you go, don’t forget—if you want more adorable knits just like this, check out my full photo prop pattern collection. There are bonnets, beanies, bloomers—you name it.
Here’s to squishy ruffles, happy stitches, and the joy of knitting something that’ll be part of a family’s most treasured memories. Happy knitting, and I hope you adore this free photo prop shorts pattern as much as I do!

Materials and Info For Your Free Photo Prop Shorts Pattern
Materials: 1 skein of Paton Lace (size 2), and size 9 (5.5mm) needles, size e (3.5mm) crochet hook (or 2 yards of lace edging of choice)
Gauge: 3.5sts/ins (gauge is very important)
Stitch Key
K – knit
P – purl
yo – yarn over
k2tog – knit 2 together
ssk – slip slip knit (slip sts purlwise)
sl – slip st knitwise
psso – pass slipped stitch over
(crochet abbreviations)
sl – slip st
ch – chain
dc – double chain
sc – single chain
Waist Circumference: nb (13ins). 0-3mths (14ins), 3-6mth (15ins), 6- 12mths (16ins), toddler (17ins)

Ruffle Shorts Pattern
Newborn
Cast on 44sts. Join in the round. Place marker at beginning of round.
Work in a k1p1 ribbing (k1p1 around on each round) for 6 rounds
Work in stockinette st for 3 rounds.
Ridge Round: p13, k19, p12
knit 3 rounds
Work (1 ridge round, 3 rounds knit) until you have a totally of 5 ridge rounds.
Work a short round as follows – knit 12, yo, turn your work, purl 23, yo, turn your work, knit to first yo, knit yo and next st together, knit to 1st before next yo, ssk using your yo as the second knit sts in the ssk, work to the end of the round.
Knit 1 round
Work a short round.
Continue working in stockinette st until work measures appx 5ins from cast on edge.
Gusset
Round 1: [place marker m1 k1 m1 place marker (the stitches between these markers are your gusset stitches) k21] repeat once more (48sts) the
Round 2: knit around
Cut yarn leaving appx 8-10ins. Slip the last 21sts you worked onto a st holder or scrap piece of yarn. Kitchener st the gusset stitches from the front and back together.(tutorial at the end of pattern)
Legs
Round 1 – knit 21sts, pick up 1st on the gusset (22sts)
Work in k1p1 for 6rounds.
Bind off using your favorite stretchy bind off.
Pick up the 21sts on your stitch holder and repeat from round 1 of legs.
Ruffles
You can simply sew a piece of lace on each set of ridges or crochet as follows:
Row 1: [ch1 (sc, ch2, dc2)] all in the first st of the ridge row. Work in every other ridge st.
Repeat on the next ridge row.
Weave in all ends.
0-3MTHS
Cast on 48sts. Join in the round. Place marker at beginning of round.
Work in a k1p1 ribbing (k1p1 around on each round) for 6 rounds
Work in stockinette st for 4 rounds.
Ridge Round: p14, k21, p13
knit 3 rounds
Work (1 ridge round, 3 rounds knit) until you have a totally of 5 ridge rounds.
Work a short round as follows – knit 13, yo, turn your work, purl 25, yo, turn your work, knit to first yo, knit yo and next st together, knit to 1st before next yo, ssk using your yo as the second knit sts in the ssk, work to the end of the round.
Knit 1 round
Work a short round.
Continue working in stockinette st until work measures appx 5.5ins from cast on edge.
Gusset
Round 1: [place marker m1 k1 m1 place marker (the stitches between these markers are your gusset stitches) k23] repeat once more (52sts) the
Round 2: knit around
Cut yarn leaving appx 8-10ins. Slip the last 23sts you worked onto a st holder or scrap piece of yarn. Kitchener st the gusset stitches from the front and back together.(tutorial at the end of pattern)
Legs
Round 1 – knit 23sts, pick up 1st on the gusset (24sts)
Work in k1p1 for 6rounds.
Bind off using your favorite stretchy bind off.
Pick up the 23sts on your stitch holder and repeat from round 1 of legs.
Ruffles
You can simply sew a piece of lace on each set of ridges or crochet as follows:
Row 1: [ch1 (sc, ch2, dc2)] all in the first st of the ridge row. Work in every other ridge st.
Repeat on the next ridge row.
Weave in all ends.
3-6MTHS
Cast on 52sts. Join in the round. Place marker at beginning of round.
Work in a k1p1 ribbing (k1p1 around on each round) for 7 rounds
Work in stockinette st for 4 rounds.
Ridge Round: p15, k23, p14
knit 3 rounds
Work (1 ridge round, 3 rounds knit) until you have a totally of 5 ridge rounds.
Work a short round as follows – knit 14, yo, turn your work, purl 27, yo, turn your work, knit to first yo, knit yo and next st together, knit to 1st before next yo, ssk using your yo as the second knit sts in the ssk, work to the end of the round.
Knit 1 round
Work a short round.
Continue working in stockinette st until work measures appx 6ins from cast on edge.
Gusset
Round 1: [place marker m1 k1 m1 place marker (the stitches between these markers are your gusset stitches) k25] repeat once more (56sts) the
Round 2: knit around
Cut yarn leaving appx 8-10ins. Slip the last 25sts you worked onto a st holder or scrap piece of yarn. Kitchener st the gusset stitches from the front and back together.(tutorial at the end of pattern)
Legs
Round 1 – knit 25sts, pick up 1st on the gusset (26sts)
Work in k1p1 for 7rounds.
Bind off using your favorite stretchy bind off.
Pick up the 25sts on your stitch holder and repeat from round 1 of legs.
Ruffles
You can simply sew a piece of lace on each set of ridges or crochet as follows:
Row 1: [ch1 (sc, ch2, dc2)] all in the first st of the ridge row. Work in every other ridge st.
Repeat on the next ridge row.
Weave in all ends.
6-12MTHS
Cast on 56sts. Join in the round. Place marker at beginning of round.
Work in a k1p1 ribbing (k1p1 around on each round) for 7 rounds
Work in stockinette st for 5 rounds.
Ridge Round: p16, k25, p15
knit 3 rounds
Work (1 ridge round, 3 rounds knit) until you have a totally of 6 ridge rounds.
Work a short round as follows – knit 15, yo, turn your work, purl 29, yo, turn your work, knit to first yo, knit yo and next st together, knit to 1st before next yo, ssk using your yo as the second knit sts in the ssk, work to the end of the round.
Knit 1 round
Work a short round.
Continue working in stockinette st until work measures appx 6.5ins from cast on edge.
Gusset
Round 1: [place marker m1 k1 m1 place marker (the stitches between these markers are your gusset stitches) k27] repeat once more (60sts) the
Round 2: knit around
Cut yarn leaving appx 8-10ins. Slip the last 27sts you worked onto a st holder or scrap piece of yarn. Kitchener st the gusset stitches from the front and back together.(tutorial at the end of pattern)
Legs
Round 1 – knit 27sts, pick up 1st on the gusset (28sts)
Work in k1p1 for 7rounds.
Bind off using your favorite stretchy bind off.
Pick up the 27sts on your stitch holder and repeat from round 1 of legs.
Ruffles
You can simply sew a piece of lace on each set of ridges or crochet as follows:
Row 1: [ch1 (sc, ch2, dc2)] all in the first st of the ridge row. Work in every other ridge st.
Repeat on the next ridge row.
Weave in all ends.
TODDLER
Cast on 60sts. Join in the round. Place marker at beginning of round.
Work in a k1p1 ribbing (k1p1 around on each round) for 8 rounds
Work in stockinette st for 5 rounds.
Ridge Round: p17, k27, p16
knit 3 rounds
Work (1 ridge round, 3 rounds knit) until you have a totally of 6 ridge rounds.
Work a short round as follows – knit 16, yo, turn your work, purl 31, yo, turn your work, knit to first yo, knit yo and next st together, knit to 1st before next yo, ssk using your yo as the second knit sts in the ssk, work to the end of the round.
Knit 1 round
Work a short round.
Continue working in stockinette st until work measures appx 7ins from cast on edge.
Gusset
Round 1: [place marker m1 k1 m1 place marker (the stitches between these markers are your gusset stitches) k29] repeat once more (64sts) the
Round 2: knit around
Cut yarn leaving appx 8-10ins. Slip the last 29sts you worked onto a st holder or scrap piece of yarn. Kitchener st the gusset stitches from the front and back together.(tutorial at the end of pattern)
Legs
Round 1 – knit 29sts, pick up 1st on the gusset (30sts)
Work in k1p1 for 8rounds.
Bind off using your favorite stretchy bind off.
Pick up the 29sts on your stitch holder and repeat from round 1 of legs.
Ruffles
You can simply sew a piece of lace on each set of ridges or crochet as follows:
Row 1: [ch1 (sc, ch2, dc2)] all in the first st of the ridge row. Work in every other ridge st.
Repeat on the next ridge row.
Weave in all ends.
Ruffle Shorts PDF
Disclaimer: This page contains affiliate links. If you choose to make a purchase after clicking a link, I may receive a commission at no additional cost to you. Thank you for your support!