
Grab your needles! This adorable free baby romper knitting pattern is at the end—find even more cuties on my romper pattern page.

Who doesn’t adore a squishy baby wrapped up in something handmade? I sure do! With baby number seven, you’d think I’d run out of ideas, but nope—I was more inspired than ever. The warmer weather called for something comfy, breezy, and ridiculously cute, so I created this delightful free baby romper knitting pattern. This sweet little romper became an instant favorite, and now I’m sharing the knitting love with you.
Inspiration for This Free Baby Romper Knitting Pattern
My babies have always been my greatest creative spark. Watching my littlest bundle grow inspired me to create something that was both practical and adorable. The idea of a romper just clicked—it’s perfect for summer adventures, easy diaper changes, and endless photo ops.
This romper had to be comfortable for my active little girl, so I reached for my favorite summer yarn: Premier Yarns Cotton Fair (affiliate link). It’s a dream for knitting warm-weather baby clothes since it’s soft, breathable, and perfect against delicate skin. With that yarn in hand, my free baby romper knitting pattern was underway.
Designing the Perfect Free Baby Romper Knitting Pattern
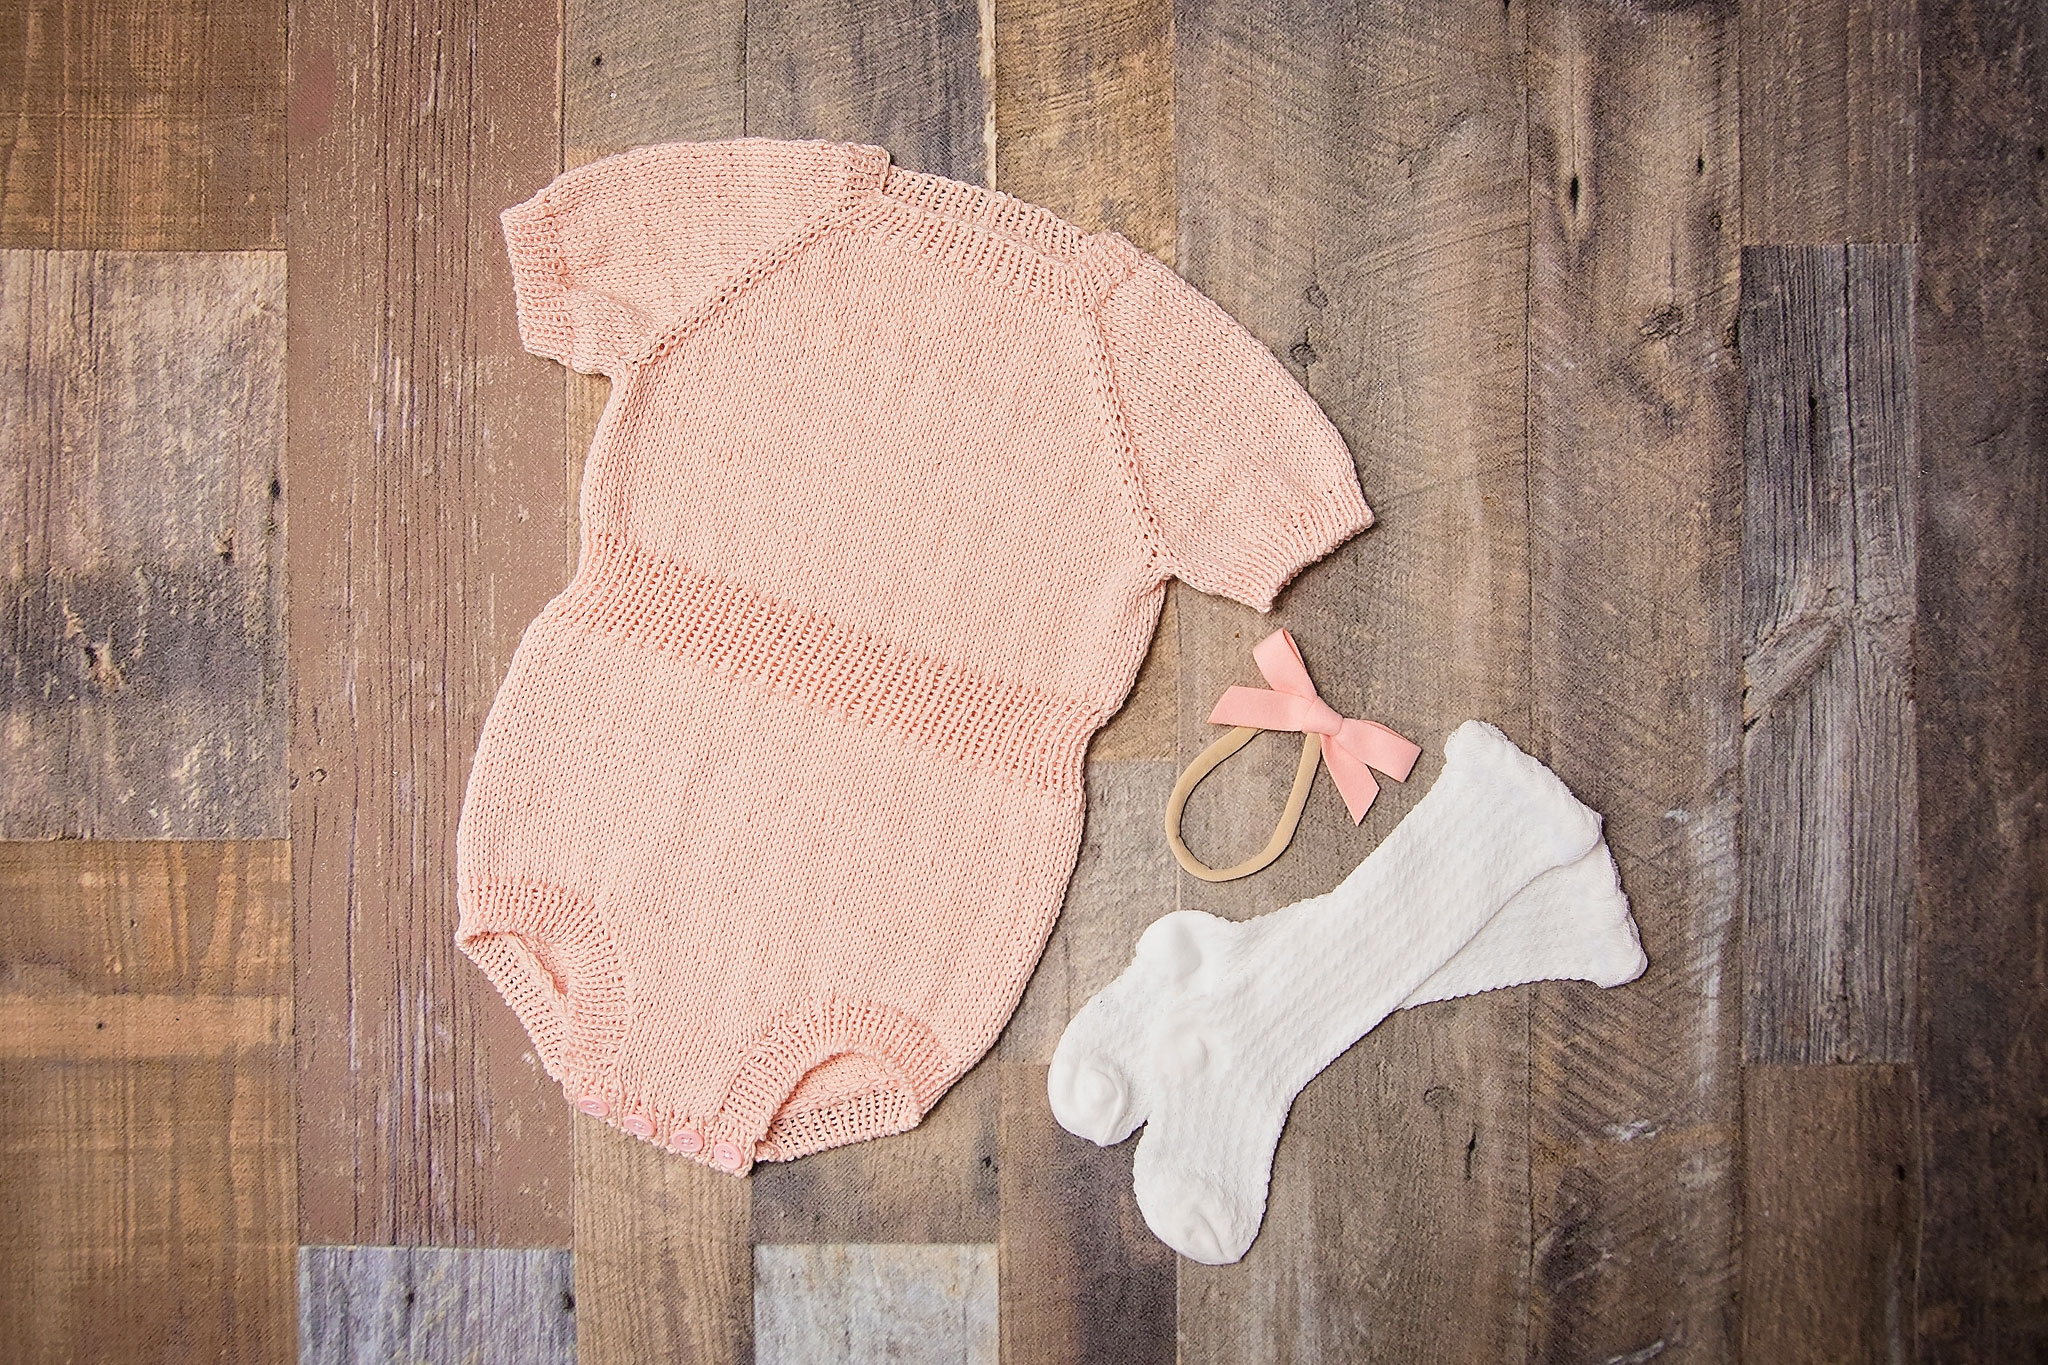
As a busy mom, I love knitting patterns that are beginner-friendly, but still stylish enough to show off on social media. I kept this free baby romper knitting pattern simple yet charming, complete with adjustable straps (because babies grow so fast!), adorable front buttons, and subtle texture for a sweet touch.
My favorite detail? Definitely those buttons down the front! Trust me, when you’re wrestling a wiggly baby during diaper changes, you’ll thank me. The romper’s leg openings also strike that perfect balance—loose enough for comfort, yet snug enough to stay put.
And remember that awesome yarn choice I mentioned earlier? Premier Yarns Cotton Fair (affiliate link) is not just comfy—it’s also easy-care! You can machine wash and dry it, because who has time for hand-washing with a house full of kids?
Tips for Knitting with Cotton Yarn for Your Free Baby Romper Knitting Pattern
Cotton yarn is my go-to summer pick, but I’ll admit—it takes a bit of getting used to. If you’re new to knitting with cotton, here are my best tips:
- Use Sharp Needles: Cotton yarn tends to split easily, but sharp needles keep you snag-free.
- Watch Your Tension: Cotton doesn’t stretch much, so consistent tension is key. Definitely swatch before diving into your free baby romper knitting pattern.
- Blocking is Your Friend: Wet-blocking your finished romper will smooth out stitches, making your project look professional (even if you’re secretly watching cartoons while you knit!).
Style Ideas for Your Free Baby Romper Knitting Pattern
One of the best parts about handmade clothing is creating unique styles. This free baby romper knitting pattern lends itself to endless adorable outfits. Here are a few of my favorite ways to style it:
- Playful Comfort: Layer it over a cute onesie with a sun hat. Instant playground cuteness!
- Dressed Up: Add a sweet cardigan and booties—perfect for family photos or special gatherings.
- Beach-Ready: Throw it over a swimsuit with tiny sandals. You’ll have the cutest baby on the beach.
Whatever your style, this romper is your new best friend. Plus, Premier Yarns Cotton Fair (affiliate link) comes in tons of gorgeous colors, so you’ll have fun mixing things up!
Making Memories with a Free Baby Romper Knitting Pattern
Knitting for my kids is about more than just clothes—it’s weaving love into every stitch. When you knit this free baby romper knitting pattern, you’re not just creating clothing. You’re crafting memories, keepsakes, and stories you’ll cherish forever.
This romper has already captured some of my family’s sweetest moments, and I know it’ll do the same for yours. Years from now, you’ll see this tiny romper tucked away in a keepsake box and smile, remembering warm summer days and squishy baby cuddles.
Get Knitting Your Own Free Baby Romper Knitting Pattern!
Ready to start knitting? Fantastic! I’ve placed this exact free baby romper knitting pattern at the bottom of this post, but if you’re hungry for even more romper cuteness, make sure you visit my romper pattern page. I’ve got a whole bunch more waiting for you there!
Knitting for babies is seriously one of life’s great joys. Whether you’re a seasoned pro or a knitting newbie, I designed this romper to bring a bit of happiness into your crafting time. The simplicity, adorable factor, and practicality make this pattern one you’ll reach for again and again.
Share Your Free Baby Romper Knitting Pattern Creations!
Nothing makes my heart happier than seeing your knitted treasures! Once you’ve knit up this free baby romper knitting pattern, snap some adorable pics and share them with me. Tag me on social media or drop a comment below—I’d absolutely love to celebrate your handmade goodness.
I hope this pattern brings as much joy to your knitting needles as it did to mine. Now, grab your Premier Yarns Cotton Fair (affiliate link), find a cozy spot, and get ready for some seriously cute knitting.
Happy knitting, friends!

Materials and Info
Yarn – 1 (1, 1) (2, 2) 2 Premier yarns Cotton Fair (100g 317yd)
Gauge – 26x34sts per 4x4in or 10x10cm
Needles – 3 (3.25mm) dpn and circular 5 (3.75mm) circular
Notions – stitch markers, buttons
Finished size 0-3m (3-6m, 6-12m) (12-18m, 12-24m) 2-3y
Chest Measurements: 38 (40.5, 43) (45.5, 48) 50.5cms or 15 (16, 17) (18, 19) 20ins
Note: choose size based on chest measurement for best fit
ABBREVIATIONS
K – knit
P – purl
PM – place marker
SM – slip marker
k2tog – knit 2 stiches together
YO – yarn over
SSK – slip next stitch, slip next stitch, knit slipped stitches together
M1L – With left needle pick up strand between 2 stitches front to back. Knit through back loop
M1R – With left needle pick up strand between 2 stitches back to front. Knit through front loop
W&T – Wrap and Turn (if you don’t know how to do a w&t short row I highly advise checking out youtube or just using your favorite short row instead.)

Summer Romper Pattern
NECK
Cast on 66 (72, 78) (84, 90) 96 stitches with smaller needles using your favorite stretchy cast on for 1×1 ribbing and join to work in the round, being careful not to twist. Place a marker at the beginning of your round.
Work 6 rounds in 1×1 ribbing (k1, p1 around).
Set up round – switch to larger size needles – k11(12,13) (14,15) 16sts, pm, k11 (12,13) (14,15) 16sts, pm, k22 (24,26) (28, 30) 32sts, pm, k11(12,13) (14,15) 16sts, pm, k11 (12,13) (14,15) 16sts, pm (this marker is your start of round marker)
Raglan round 1 – (knit to 1 stitch before marker, m1r, k1, sm, k1, m1l) repeat (to) 3 more times, knit to marker
Raglan round 2 – knit around
Repeat raglan rounds 1 and 2 13 (13,15) (16, 17) 17 more times for a total of 14 (14, 16) (17, 18) 18 raglan increases. 178 (184, 206) (220, 234) 240sts
BODY
Now divide the sts into sleeves and body, while at the same time casting on new sts at each underarm, as follows: remove beginning of round marker, Knit 25 (26, 29) (31, 33) 34 sts (right side of back), remove marker, place the next 39 (40, 45) (48, 51) 52 sts on a stitch holder, (right sleeve), remove marker, cast on 2sts place beginning of round marker (from here out this will be the beginning of round), cast on 2 sts for the armhole using the backward loop method, knit 50 (52, 58) (62, 66) 68 sts (front), place the next 39 (40, 45) (48, 51) 52) sts on a stitch holder (left sleeve), cast on 2 new sts, place marker, cast on 2 sts for the armhole using the backward loop method, knit 25 (26, 29) (31, 33) 34) sts (left side of back). There are now 108 (112, 124) (132, 140) 144 sts on the needles for the body.
The beginning of the round is now in the middle of the new sts cast on for the right armhole.
Work in the round in stockinette stitch until the romper measures 2.5 (5, 6.25) (7.5, 8) 8.5cm 1 (2, 2.5) (3, 3.25) 3.5 ins from the underarm.
Work the waistband by working a 1×1 ribbing (k1p1 around) for 3 (3, 3.5) (3.5, 4) 4cms or 1.25 (1.25, 1.5) (1.5, 1.75) 1.75ins.
Knit for 2.5cm or 1in.
Start short rows by starting at the beginning of round marker as follows: Knit to 5 sts before the beginning of round marker, w&t. Purl to 5 sts before side marker, w&t. Continue working short rows as established from * to *, while turning 5 sts before the last turn each time until a total of 4 (4,5) (5,5) 5 turns have been worked on either side. Knit back to start of round marker knitting each wrap to their wrapped stitches. Work another round in stockinette stitch knitting all wraps to their wrapped stitches.
Continue in the round in stockinette stitch until the romper measures 18 (20, 22) (23, 24) 25.5cms or 7.25 (8, 8.75) (9.25, 9.75) 10.25ins from the under arm cast on.
LEGS
Start at the beginning of round marker bind off 16 sts, knit 22 (24, 30) (34, 38) 40 sts and place these stitches on a stitch holder, bind off 16 sts remove marker, *k1, k2tog, knit to last 3 sts, ssk, k1. Turn. You will now start working back and forth rows on the back stitch. You should now have 52 (54, 60) (64, 68) 70 back stitches.
Back Decrease Row 1 (ws) – p1 (p2togtbl) purl to last 3 sts, p2tog, p1
Back Decrease Row 2 (rs) – k1 k2tog, knit to last 3 sts, ssk, k1
Work back decrease rows 1 and 2 until you have 14 (14, 14) (16, 16) 16 sts remaining on the back, a total of 20 (21, 24) (25, 27) 28 decrease rows.
Place remaining back stitches on a stitch holder. Cut yarn leaving 6-8ins to weave in ends.
Pick up front stitches with right side facing.
Front Decrease Row 1 – k1 k2tog, knit to last 3 sts, ssk, k1
Front Decrease Row 2 – purl across
Work front decrease rows 1 and 2 until you have 14 (14, 14) (16, 16) 16 sts remaining on the back, a total of 4 (5, 8) (9, 11) 12 decrease rows. End after completing a row 2.
Work a further 13 (11, 9) (7, 5, 5) rows in stockinette stitch.
Place remaining front stitches on a stitch holder. DO NOT cut yarn.
With right side facing pick up and knit 62 (64, 70) (72, 76) 78sts using your smaller needles along left leg side (NOT the middle between the leg part). Work 7 rows of k1, p1 ribbing.
Bind off using your favorite stretchy 1×1 ribbing bind off.
Repeat on other leg.
With smaller needles, pick up and knit 6sts on right leg front ribbing, knit the 14 (14, 14) (16, 16) 16 sts from front between leg on your stitch holder, pick up and knit 6sts on left leg front ribbing. 26 (26, 26) (28, 28) 28sts
Work 3 rows of k1p1 ribbing.
Buttonhole row (size 0-3mth, 3-6mth, 6-12mth)– k1, p1, k1, yo, k2tog, p1, k1, p1, k1, yo, k2tog, p1, k1, p1, k1, yo, k2tog, p1, k1, p1, k1, yo, k2tog, p1, k1, p1
Buttonhole row (size 12-18mth, 18-24mth, 2-3y)– k1, p1, k1, p1 k2tog, yo, k1, p1, k1, p1, k2tog, yo, k1, p1, k1, p1, k2tog, yo, k1,p1, k1, p1, k2tog, yo, k1,p1, k1, p1
Work 3 rows of k1p1 ribbing.
Bind off.
With smaller needles pick up and knit 6sts on left leg back ribbing, knit the 14 (14, 14) (16, 16) 16 sts from back between leg on your stitch holder, pick up and knit 6sts on right leg back ribbing. 26 (26, 26) (28, 28) 28sts
Work 7 rows of k1p1 ribbing.
Bind off.
SLEEVES
With larger needles place on hold stitches for the first sleeve onto larger double-pointed
needles. Pick up and knit 5 (4, 5) (4, 5) 4 sts along the sts that were cast on at the underarm when working the body.
There are now a total of 44 (44, 50) (52, 56) 56sts on the needle.
Work in the round in stockinette stitch until the sleeve measures 2 (2, 2.5) (2.5, 3) 3cms or .75 (.75, 1) (1, 1.25) 1.25ins.
Change to smaller double-pointed needles and work 6 rounds of k1, p1 ribbing.
Bind off using your favorite stretchy k1p1 bind off.
Work the other sleeve identically.
Weave in all ends, add buttons between the legs, and block gently. I like to use a clothing steamer for blocking but with cotton be sure not to stretch. Blocking is just to finish and even out the stitching
Summer Romper PDF

Disclaimer: This page contains affiliate links. If you choose to make a purchase after clicking a link, I may receive a commission at no additional cost to you. Thank you for your support!