
If you’re looking for a free knit bonnet pattern that is sweet, lightweight, and just interesting enough to keep your needles moving, the Lydia Bonnet is a lovely little project. It has a classic fitted shape, delicate texture, and simple i-cord ties that give it that timeless handmade look.
The pattern includes sizes from newborn through toddler and uses fingering-weight yarn, so it works up into a soft bonnet without a lot of bulk. The textured stitch pattern adds plenty of interest while the shaped crown gives the bonnet a neat, comfortable fit.
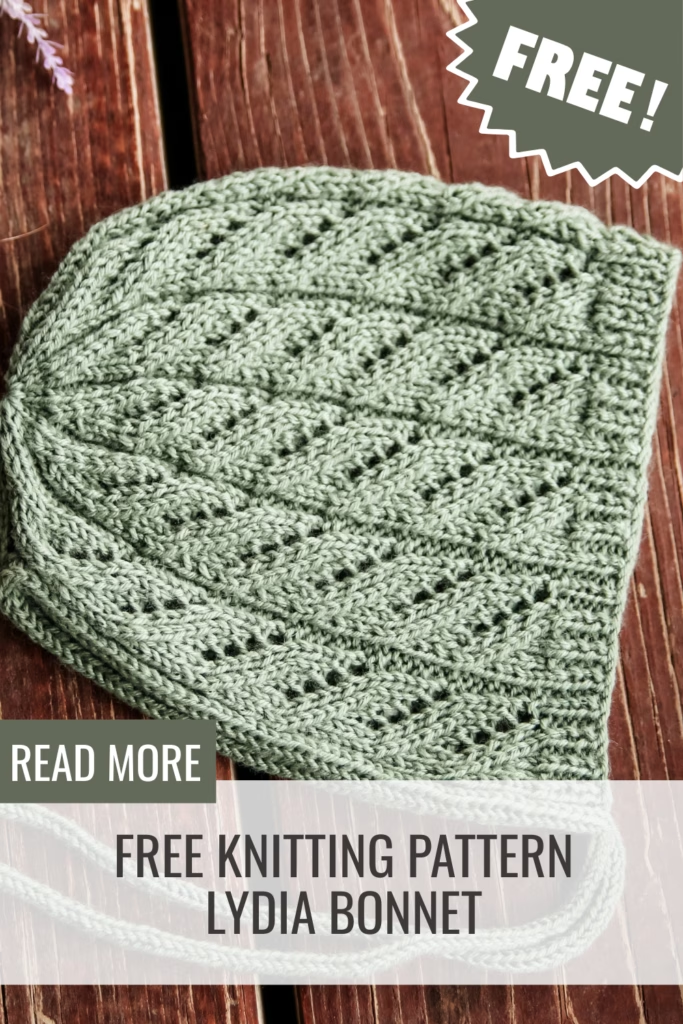
This is one of those small projects that feels special without requiring a huge yarn commitment. You only need about 60–100 yards, depending on the size, making it a great choice for a partial skein or a yarn you have been saving for just the right project.
What Do You Need to Knit the Lydia Bonnet?
For the sample, I used KnitPicks Mighty Stitch Fingering with 3 mm needles. The pattern gauge is 28 stitches and 40 rows over 4 inches, so it is worth taking a few minutes to check your gauge before getting started.
You will need:
- 60–100 yards of fingering-weight yarn
- 3 mm circular needles
- 3 mm double-pointed needles
- Yarn needle
I’ll be sharing a full review of KnitPicks Mighty Stitch Fingering on Tuesday, including more about how it worked for this bonnet.
The Lydia Bonnet comes in four sizes: newborn, infant, baby, and toddler, fitting head circumferences from approximately 12–18 inches. Whenever possible, I recommend choosing your size based on the child’s actual head measurement rather than age alone.
How Is This Free Knit Bonnet Pattern Made?
The Lydia Bonnet starts with a simple 1×1 ribbed edge and is worked flat through the main textured section.
The stitch pattern uses basic knit and purl stitches along with yarn overs and decreases to create the pretty vertical texture. Once the bonnet reaches the correct length, the stitches are joined in the round and decreased to shape the crown.
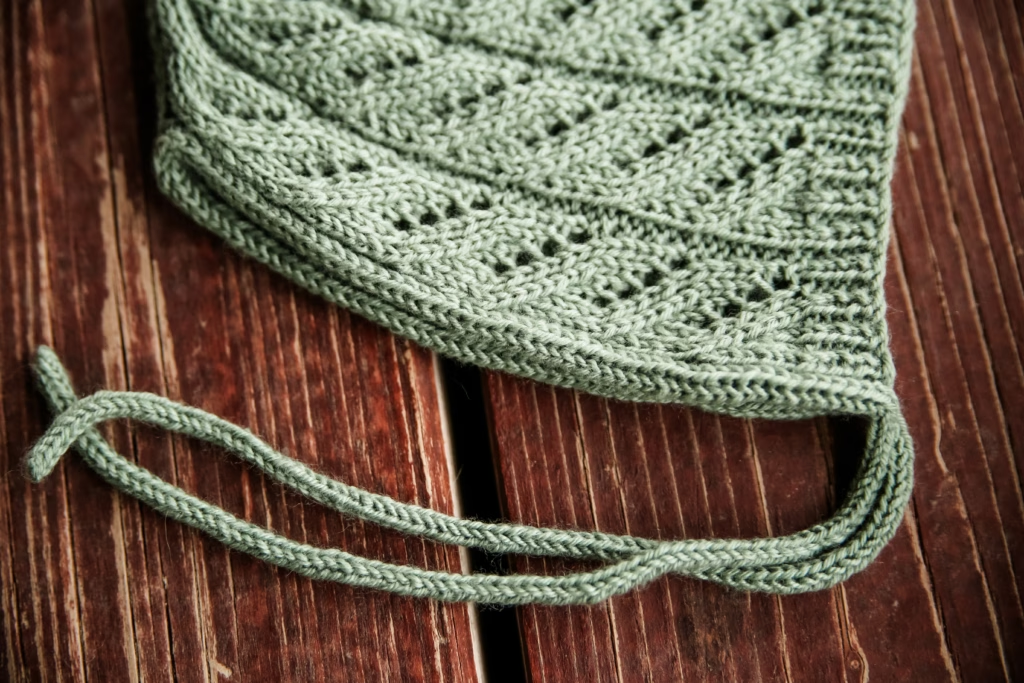
The finishing touch is an applied i-cord edge with matching i-cord ties. If applied i-cord is new to you, don’t let it scare you off. Once you see the technique in action, it is much easier to understand.
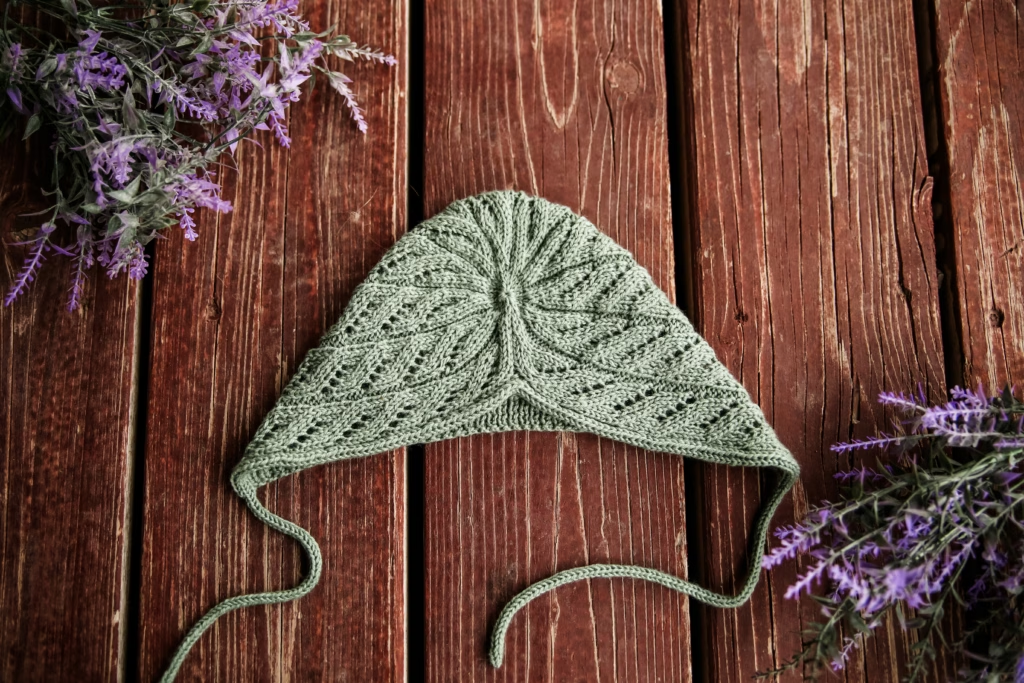
When your crown decreases are finished, the remaining stitches are pulled closed rather than bound off. After that, the i-cord edging and ties are added and the ends are woven in.
You can easily change the look of this bonnet simply by changing the color. A soft neutral gives it a traditional feel, while a brighter or richer shade makes the same texture look completely different.
Looking for More Free Bonnet Knitting Patterns?
If you enjoyed the Lydia Bonnet, you might also like:
Each one has its own texture and personality, so there are plenty of options when you are in the mood for another quick little headwear project.
Lydia Bonnet Free Pattern
Yarn – 60-100yds or 1 skein KnitPicks Mighty Stitch Fingering (100g 437yd)
Gauge – 28sts & 40 rows to make 10cm square, using size 2(US) 3mm needles
Needles – 2 (3mm) circular and dpn
Sizes – newborn, (infant, baby), toddler
Head Measurement:
Newborn – 12-14in/30-35cm
Infant – 14-16in/ 35–40 cm
Baby – 15–17 in / 38–43 cm
Toddler – 16–18 in / 41–46 cm
Other –yarn needle
.
Abbreviations can be found on the last page.
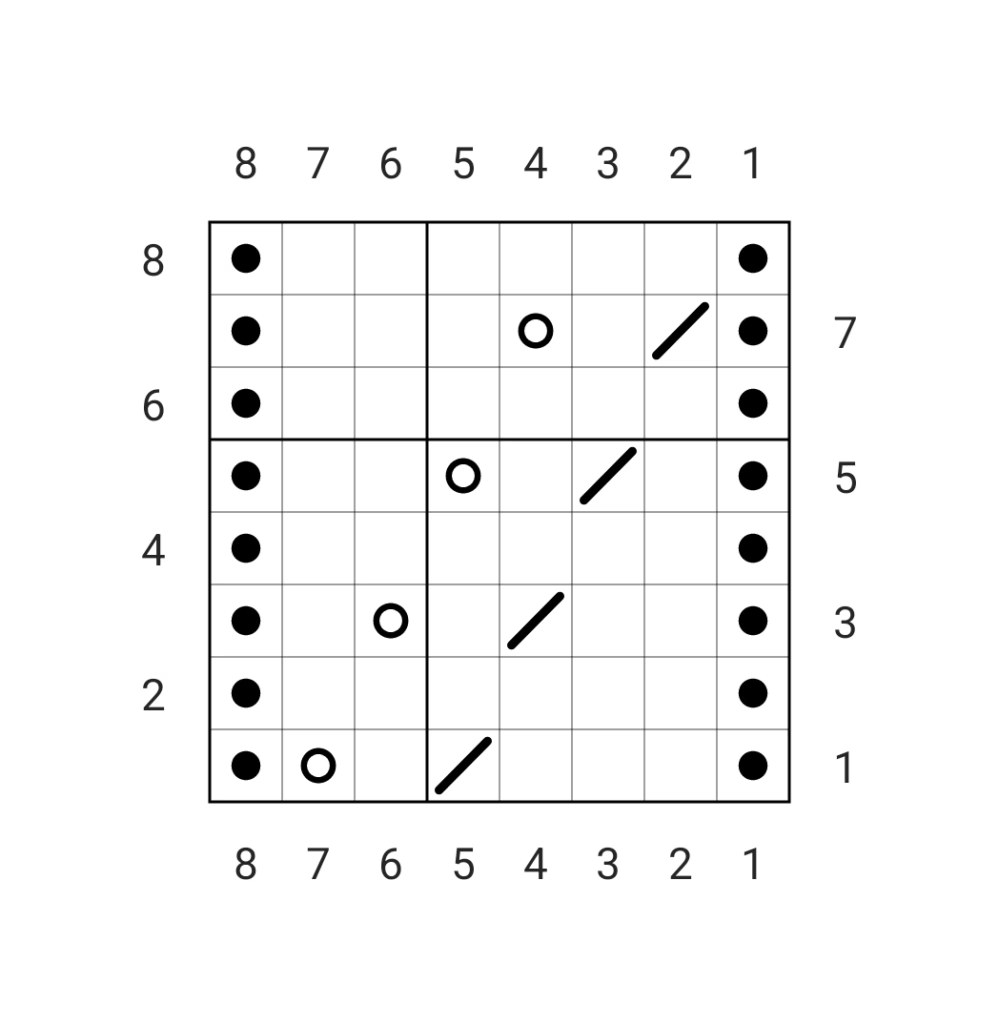
Stitch Pattern
Row 1 – p1, k3, k2tog, k1, yo, p1
Row 2 – k1, p6, k1
Row 3 – p1, k2, k2tog, k1, yo, k1, p1
Row 4 – k1, p6, k1
Row 5 – p1, k1, k2tog, k1, yo, k2, p1
Row 6 – k1, p6, k1
Row 7 – p1, k2tog, k1, yo, k3, p1
Row 8 – k1, p6, k1
BODY
Cast on 74 (82, 90) 98 sts. I used the long tail cast on.
Work in 1×1 rib for.75ins or 2cms
You will now start the body of the bonnet using the chart above. There is 1 salvage stitch at each end of the row. Always knit this stitch. This will look as follows:
K1, work the charted stitch pattern 9 (10, 11) 12 times, K1.
Repeat rows 1-8 of the stitch pattern until your work measures appx 3.5in (4.25, 5) 5.5/8.75 (10.5, 12.5) 14cm ending after completing a row 7.
Join in the Round.
Next round – p2tog, k6, [p2, k6] 8 (9, 10) 11 times, p2tog
72 (80, 88) 96 sts
Transfer sts to dpn.
DECREASES
Round 1 – [p1, k3, k2tog, k1, p1] Repeat [to] around {63 (70, 77) 84 sts}
Round 2 – [p1, k5, p1] repeat [to] around
Round 3 – [p1, k2, k2tog, k1, p1] Repeat [to] around {54 (60, 66) 72 sts}
Round 4 – [p1, k4, p1] repeat [to] around
Round 5 – [p1, k1, k2tog, k1, p1] Repeat [to] around {45 (50, 55) 60 sts}
Round 6 – [p1, k3, p1] repeat [to] around
Round 7 – [p1, k2tog, k1, p1] Repeat [to] around {36 (40, 44) 48 sts}
Round 8 – [p1, k2, p1] repeat [to] around
Round 9 – [k2tog, ssk] Repeat [to] around {18 (20, 22) 24 sts}
Round 10 – knit around
Round 11 – [k2tog] Repeat [to] around {9 (10, 11) 12 sts}
Do not bind off. Cut a tail appx 6-8ins long. Using a yarn needle, pull through remaining stitches and cinch sts closed tightly. Weave in ends.
I-cord Ties: Cast on 3sts on double pointed needles and work appx 9-10ins for personal use and 12-14ins for photography use of i-cord. Begin applied i-cord edging by using the length of i-cord you have already worked. Do so by knitting 2 icord sts, slip the last st, dip the needle into the edge of the back loop of the bonnet, and bringing the yarn around to knit, pick up a stitch in your salvage edge. Knit the last stitch of Icord together with the picked up stitch of the bonnet. Once you have picked up and knit across salvage edge stitches, work an additional length of i-cord that matches the other tie.
If you are struggling with the applied icord youtube is beneficial here. Just search applied icord. I have a left-handed video for this here.
Weave in ends.
ABBREVIATIONS
k – knit
k2tog -knit 2 stitches together
P – purl
p2tog -purl 2 stitches together
ssk – slip next st knitwise, slip next st knitwise, place stitches back onto left needle, knit both slipped sts together
yo – yarn over
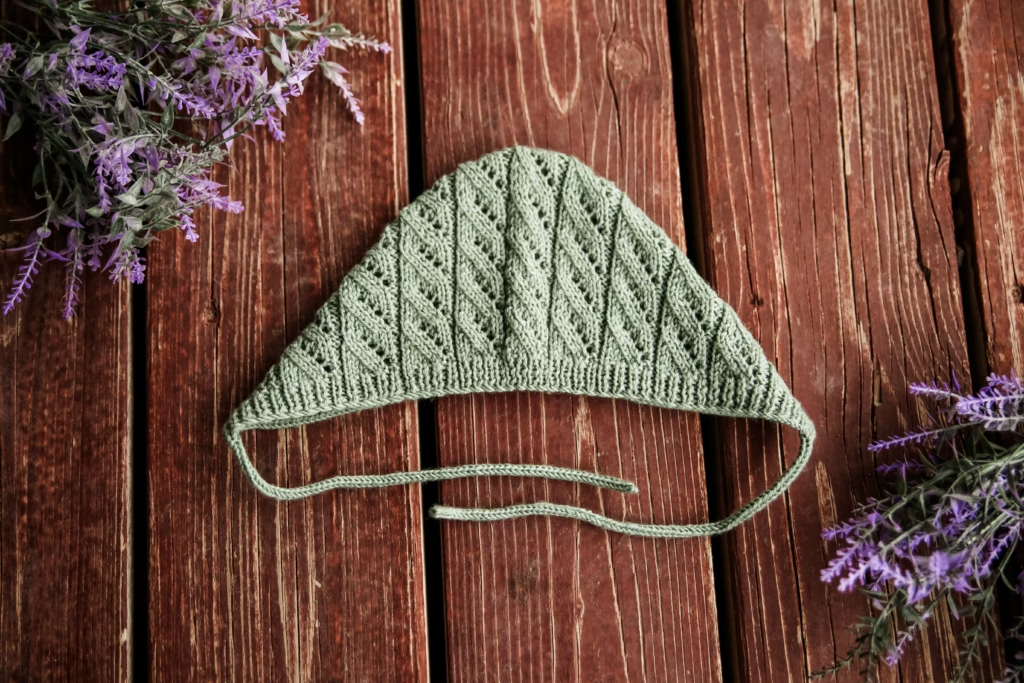
I hope you enjoy knitting the Lydia Bonnet! If you make one, leave me a comment and tell me which size you knit and what yarn color you chose.
This post may contain affiliate links. If you purchase something through one of these links, I may earn a small commission at no additional cost to you. Thank you for supporting my work and helping me continue to share free knitting patterns.