
This free mitered square tote bag knitting pattern turns colorful garter-stitch squares into a roomy bag for your next knitting project or everyday extras. The Lodge Tote combines modular knitting, a simple garter edging, and knitted handles for a practical finish. If useful projects are your favorite kind, you can find more ideas on my Tote Bag and Purse Patterns page.
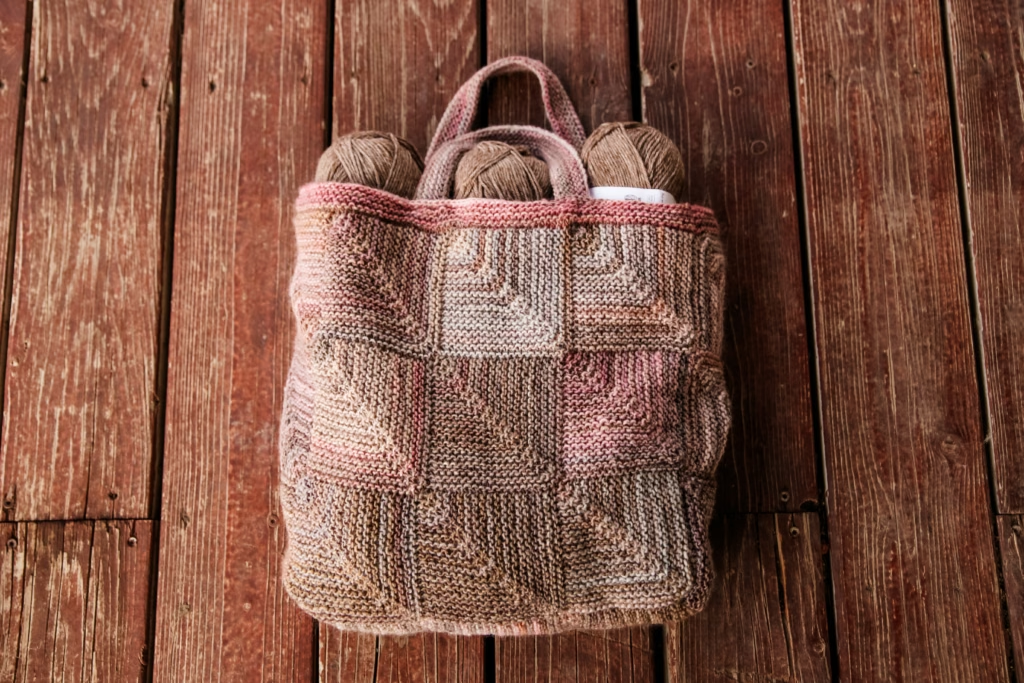
I used Hobbii Winter Glow for mine, and the color changes make each square interesting to knit. You build the fabric by connecting the squares as you go, then seam the sides and bottom to create the tote. An optional fabric lining adds structure, making this a lovely choice for a large project bag.
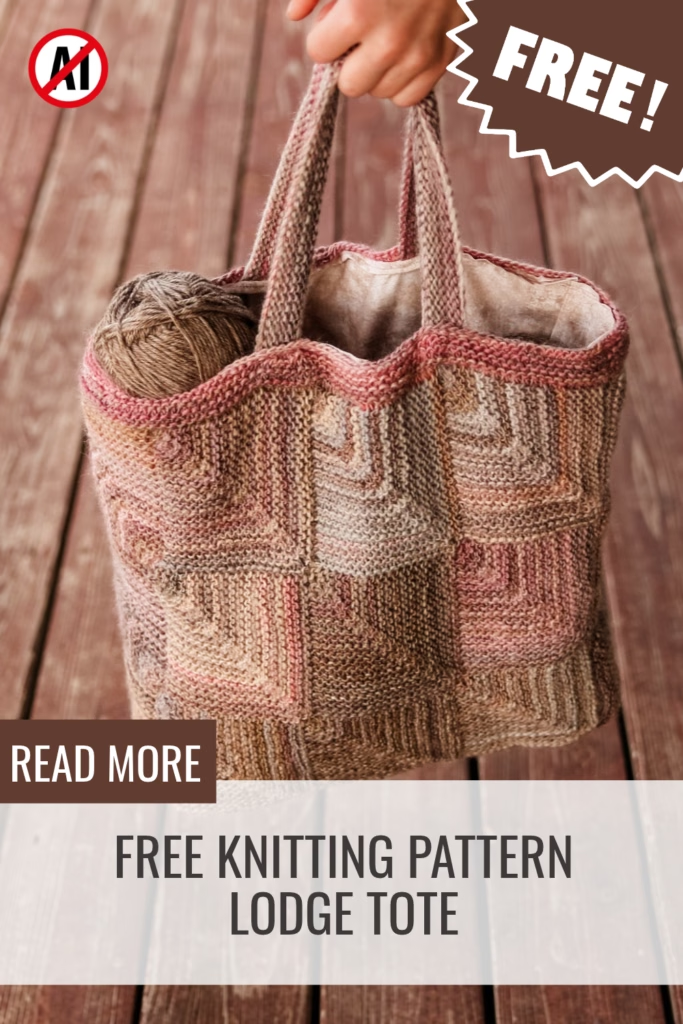
There is something very satisfying about finishing one square and immediately seeing where the next one belongs. Those little sections add up to a generously sized tote with plenty of texture and color.
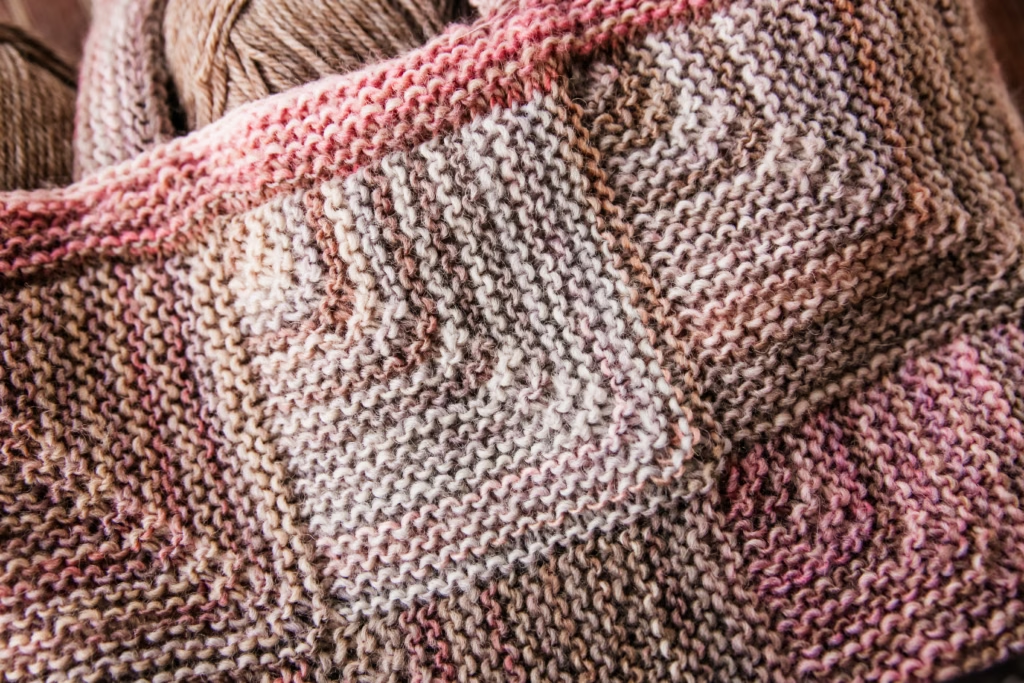
The garter ridges keep the fabric simple while the mitered shaping gives each square its distinctive direction. With a color-changing yarn, you get plenty to look at without planning a separate color for every block.
What Materials Do You Need for This Mitered Square Tote Bag Knitting Pattern?
For the Lodge Tote, I used approximately 740–750 yards of Hobbii Winter Glow in colorway 10. The pattern lists 766 yards per 200 g ball, so the original yarn quantity fits within one ball, though checking your gauge and leaving room for finishing is always a good idea.
Premier Spun Colors would work great for this project too. Knit a complete square with your chosen yarn before starting the bag, and check both its measurements and how the fabric feels. You want garter stitch with enough substance for a tote.
Gather these supplies before you begin:
- Approximately 740–750 yards of Hobbii Winter Glow, or a suitable substitute.
- US 7 (4.5 mm) circular needle, approximately 20 inches long, for the bag.
- US 3 (3.25 mm) straight needles for the handles.
- Stitch markers.
- A yarn needle for seaming and weaving in ends.
- Optional lining fabric, sewing thread, a sewing needle, and scissors.
The smaller needles are intentional for the handles. Working with two strands held together on those needles creates a dense fabric that gives the handles more strength and structure.
If you are comparing fibers for this project or another knitted purse, my Best Yarn for Knitted Bags: 6 Great Options for Purses, Totes, and Crossbody Bags walks through the things I consider when choosing bag yarn.
Each completed mitered square should measure approximately 4 × 4 inches / 10 × 10 cm. Check your square after treating it the way you plan to treat the finished bag, since changes in gauge affect the overall size.
For this project, the color changes are part of the fun. Letting the yarn move through its colors gives the connected squares their own combinations as the tote grows.
How Is the Lodge Tote Knitted?
The Lodge Tote begins with garter-stitch mitered squares worked flat. Decreases near the center shape each square, and stitches picked up along the edges connect new squares to the ones already completed.
That means you build the main fabric as one connected piece. Follow the pattern schematic as you work so each square lands in the right place for the finished tote.
Once the squares are complete, sew the sides and bottom together. I like mattress stitch for the seams, but a simple whip stitch works too.
Next, pick up stitches around the opening and work the garter edging in the round. Remember that garter stitch worked in the round alternates knit rounds and purl rounds. The top band measures approximately 1 inch / 2.5 cm deep.
The two handles are knitted separately with the yarn held double, then sewn to the inside of the garter band. Take your time attaching them securely and checking their placement before sewing.
Should You Add a Lining to Your Knitted Tote?
I added a lining to mine because I plan to use it as a project bag. A fabric lining gives the tote more support and helps keep smaller items from working their way through the knitted fabric.
You can also leave the lining out if you prefer a softer tote with more give for market-bag-style use. Think about what you want to carry and how much structure you would like.
If you are adding a lining, plan for it before seaming the bag. The flat knitted piece makes a useful guide for cutting the fabric, with seam allowances added as directed in the pattern.
What Should You Knit Next?
If you enjoyed watching the Lodge Tote take shape, here are a few more patterns to add to your list:
- Free Knitting Pattern – Lodge Cardigan — try another project built around mitered squares.
- Cable Crossbody Bag — switch to cables for your next knitted bag.
- Peter Purse — another practical purse to make in a favorite color.
- Rosebud Bag — keep your bag-knitting plans going with another free pattern.
The Lodge Cardigan is an especially fun next step if the modular construction was your favorite part. For another accessory, the three bag patterns give you different looks to explore.
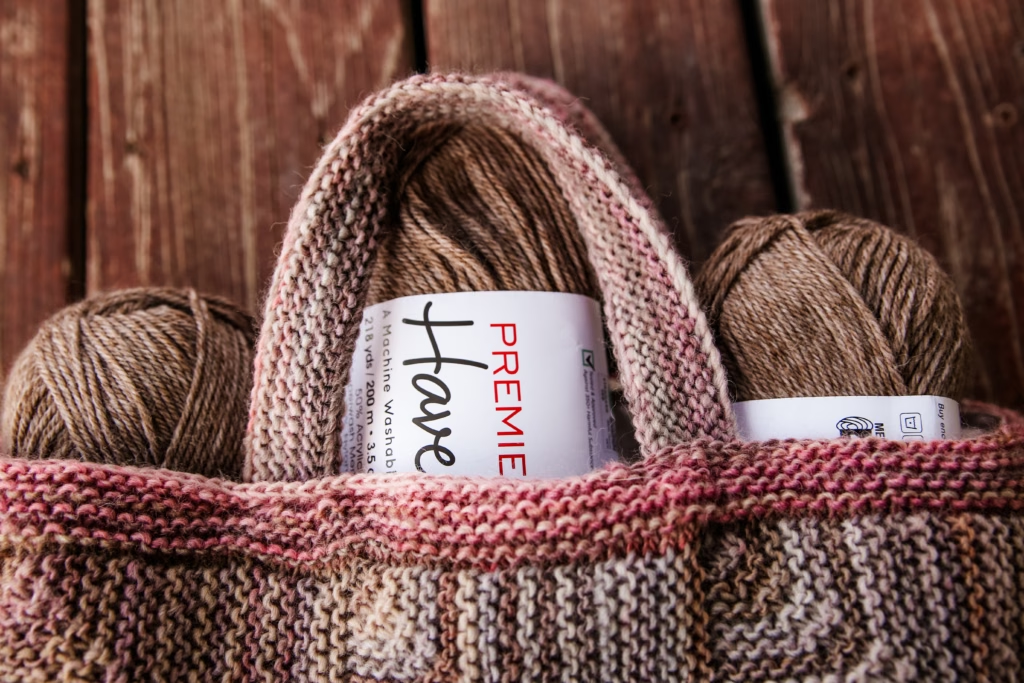
The Lodge Tote brings together colorful yarn, textured garter stitch, and one-square-at-a-time progress. Finish yours with a lining for more support, or enjoy the flexibility of the knitted fabric on its own.
Lodge Tote Free Pattern
MATERIALS AND INFO
Yarn: Approximately 740–750 yds / 675–685 m of Hobbii Winter Glow in colorway 10 (766 yds / 700 m per 200 g). This amount includes both handles. Allow additional yarn for swatching or adjustments.
Notions: Tapestry needle and stitch markers. Optional: lining fabric, sewing needle, and matching thread.Needle Size: 7(US) 4.5mm (20in) circular needle for the bag and size 3 (3.25mm) straight needles for the handles
Gauge (tension): Each completed square should measure approximately 10 × 10 cm / 4 × 4 in. using size 7(US) 4.5mm needles working in garter stitch
Finished Measurements: Approximately 12 in / 30.5 cm wide × 13 in / 33 cm high, including the top band, × 4 in / 10 cm deep, excluding handles.
METHOD
This tote is made from 27 joined mitered garter-stitch squares worked flat. Stitches for each new square are picked up from completed squares, cast on, or a combination of both, creating one connected piece. The piece is folded and seamed to form the bag, then a garter-stitch band is worked around the opening. Two handles are worked separately with yarn held double on smaller needles and sewn to the bag. An optional fabric lining provides additional support and helps limit stretching.

First Square
Cast on 40 sts.
Row 1 (WS): K20, pm, k20.
Row 2 (RS): Knit to 2 sts before marker, k2tog, sm, ssk, knit to end.
Row 3 (WS): Knit all sts.
Work Rows 2–3 a total of 19 times. [2 sts remain]
Remove the marker and k2tog. Cut yarn, leaving a 4–5 in / 10–12.5 cm tail. Pull the yarn through the remaining stitch to secure.

Second Square
With the RS facing, pick up and knit 20 sts evenly along the top edge of the first square, then cast on 20 sts using the knitted cast-on method. [40 sts]
Work Row 1 of the First Square instructions, then work Rows 2–3 a total of 19 times. Finish as for the First Square. See Fig. 2.

Third Square
Cast on 20 sts using the knitted cast-on method, then, with the RS facing, pick up and knit 20 sts evenly along the side edge of the first square, following Fig. 3. [40 sts]
Work Row 1 of the First Square instructions, then work Rows 2–3 a total of 19 times. Finish as for the First Square.
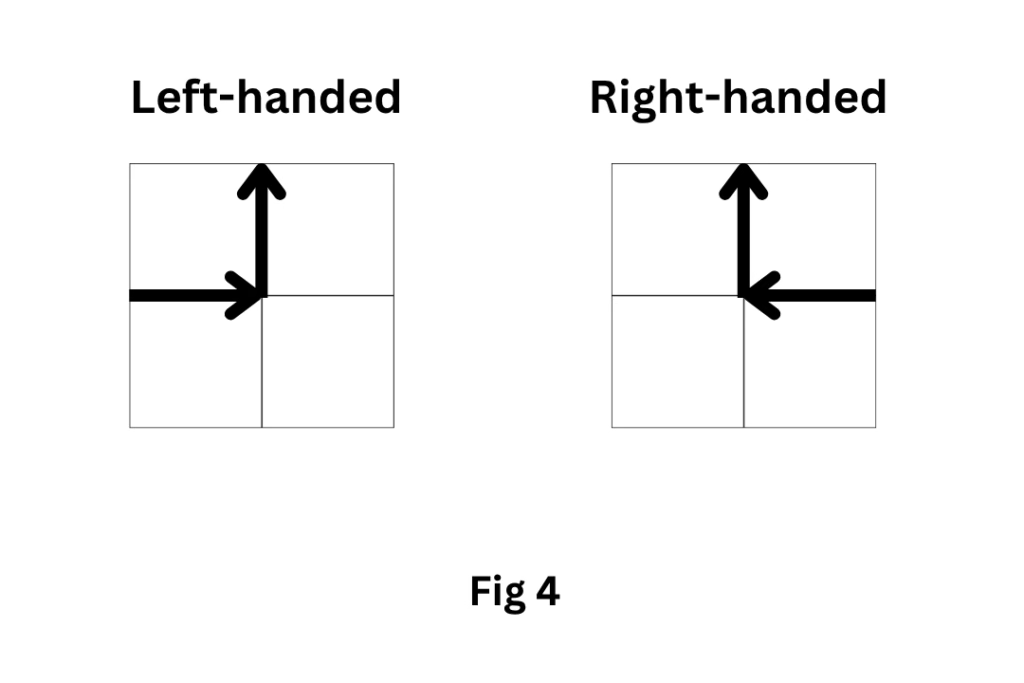
To work a square between two completed squares, follow the appropriate left-handed or right-handed diagram in Fig. 4. With the RS facing, pick up and knit 20 sts along the adjoining edge of one square and 20 sts along the adjoining edge of the other square. [40 sts]
Work Row 1 of the First Square instructions, then work Rows 2–3 a total of 19 times. Finish as for the First Square.
Continue adding squares, following the schematic, until you have completed 27 squares. Keep the RS of the work facing you when picking up stitches.
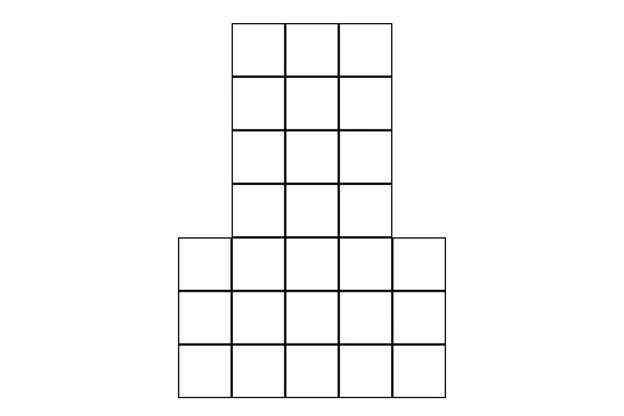
As shown in the schematic, the bottom three rows contain five squares each. The upper four rows contain three squares each, centered above the middle three squares of the lower section.
Each box represents one completed square measuring approximately 4 × 4 in / 10 × 10 cm.
Seams
Block the completed piece to the square measurements given in the gauge section.
If adding a lining, use the blocked piece as your template before seaming. Add a ¼ in/0.5 cm seam allowance around the edges that will be sewn together. At the edges that will form the bag opening, add 1¼ in / 3 cm to allow for the top band and a turned-under edge.
To fold the bag, identify the central row of three squares immediately above the wider five-square section. This row forms the base. The central three-by-three-square panels on either side of the base form the front and back. The one-square-wide extensions on the wider panel form the sides.
Fold the front and back upward along the long edges of the base. Fold the side panels inward. Sew the short lower edge of each side panel to the corresponding short edge of the base, then sew its remaining vertical edge to the back panel. Leave the top open. Use mattress stitch or whip stitch.
Top Garter Edge
With the RS facing and using the larger circular needle, pick up and knit 20 sts evenly along each square edge around the bag opening. [160 sts]
Place a beginning-of-round marker and join for working in the round.
Round 1: Knit.
Round 2: Purl.
Repeat Rounds 1–2 until the band measures approximately 1 in / 2.5 cm from the pickup edge, ending after a purl round.
Bind off knitwise.
Handles (make 2)
Using the smaller needles and holding two strands of yarn together throughout, cast on 66 sts using the long-tail cast-on method.
Knit every row for 9 rows.
Bind off knitwise.
Finishing
Sew one handle to the inside of the front top band and the other to the inside of the back top band. Center each handle on its panel, keeping the attachment positions symmetrical and matching the placement on the opposite panel. Secure both ends of each handle firmly to the garter-stitch band.
If adding a lining, assemble it to match the bag shape, turn under the top edge, and sew it inside the bag below the bound-off edge.
Weave in all remaining ends.
ABBREVIATIONS
CO – cast on
k – knit
k2tog -knit 2 stitches together
P – purl
pm – place marker
PU – pick up and knit
RS – right side
sm – slip marker
ssk – slip next st knitwise, slip next st knitwise, place stitches back onto left needle, knit both slipped sts together
st – stitch
sts – stitches
WS – wrong side
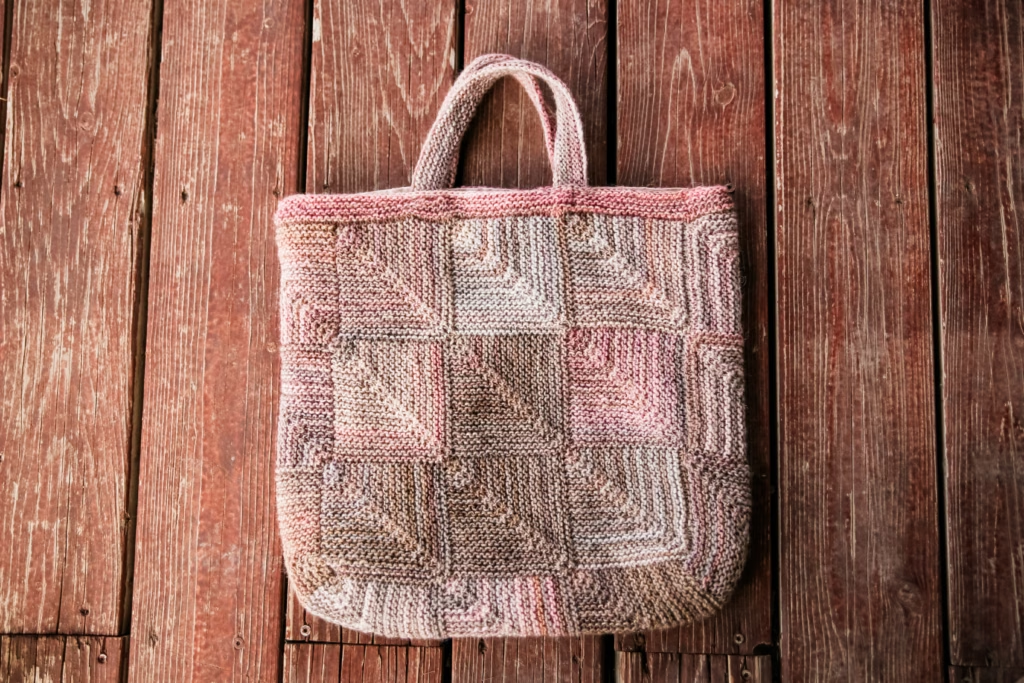
What colors would you choose for your Lodge Tote? Would yours become a project bag or an everyday tote? Let me know in the comments!
This post may contain affiliate links. If you make a purchase through one of my links, I may earn a small commission at no extra cost to you. Thank you for supporting my blog and helping me continue sharing free knitting patterns!