
Free Mary Pixie Bonnet knitting pattern for a baby bonnet worked flat in DK yarn with butterfly lace for newborns to toddlers.

The Mary Pixie Bonnet is a free knitting pattern for newborns, babies, and toddlers. This baby bonnet is knit in DK weight yarn and features a delicate lace pattern that resembles tiny butterflies across the fabric. The bonnet is worked flat and then sewn together at the back, making it a simple and approachable project for knitters who prefer straight rows. It creates a soft, lightweight layer that works well for everyday wear or as a sweet photography prop. The shaping provides a comfortable fit around the face while keeping the construction straightforward and easy to follow.
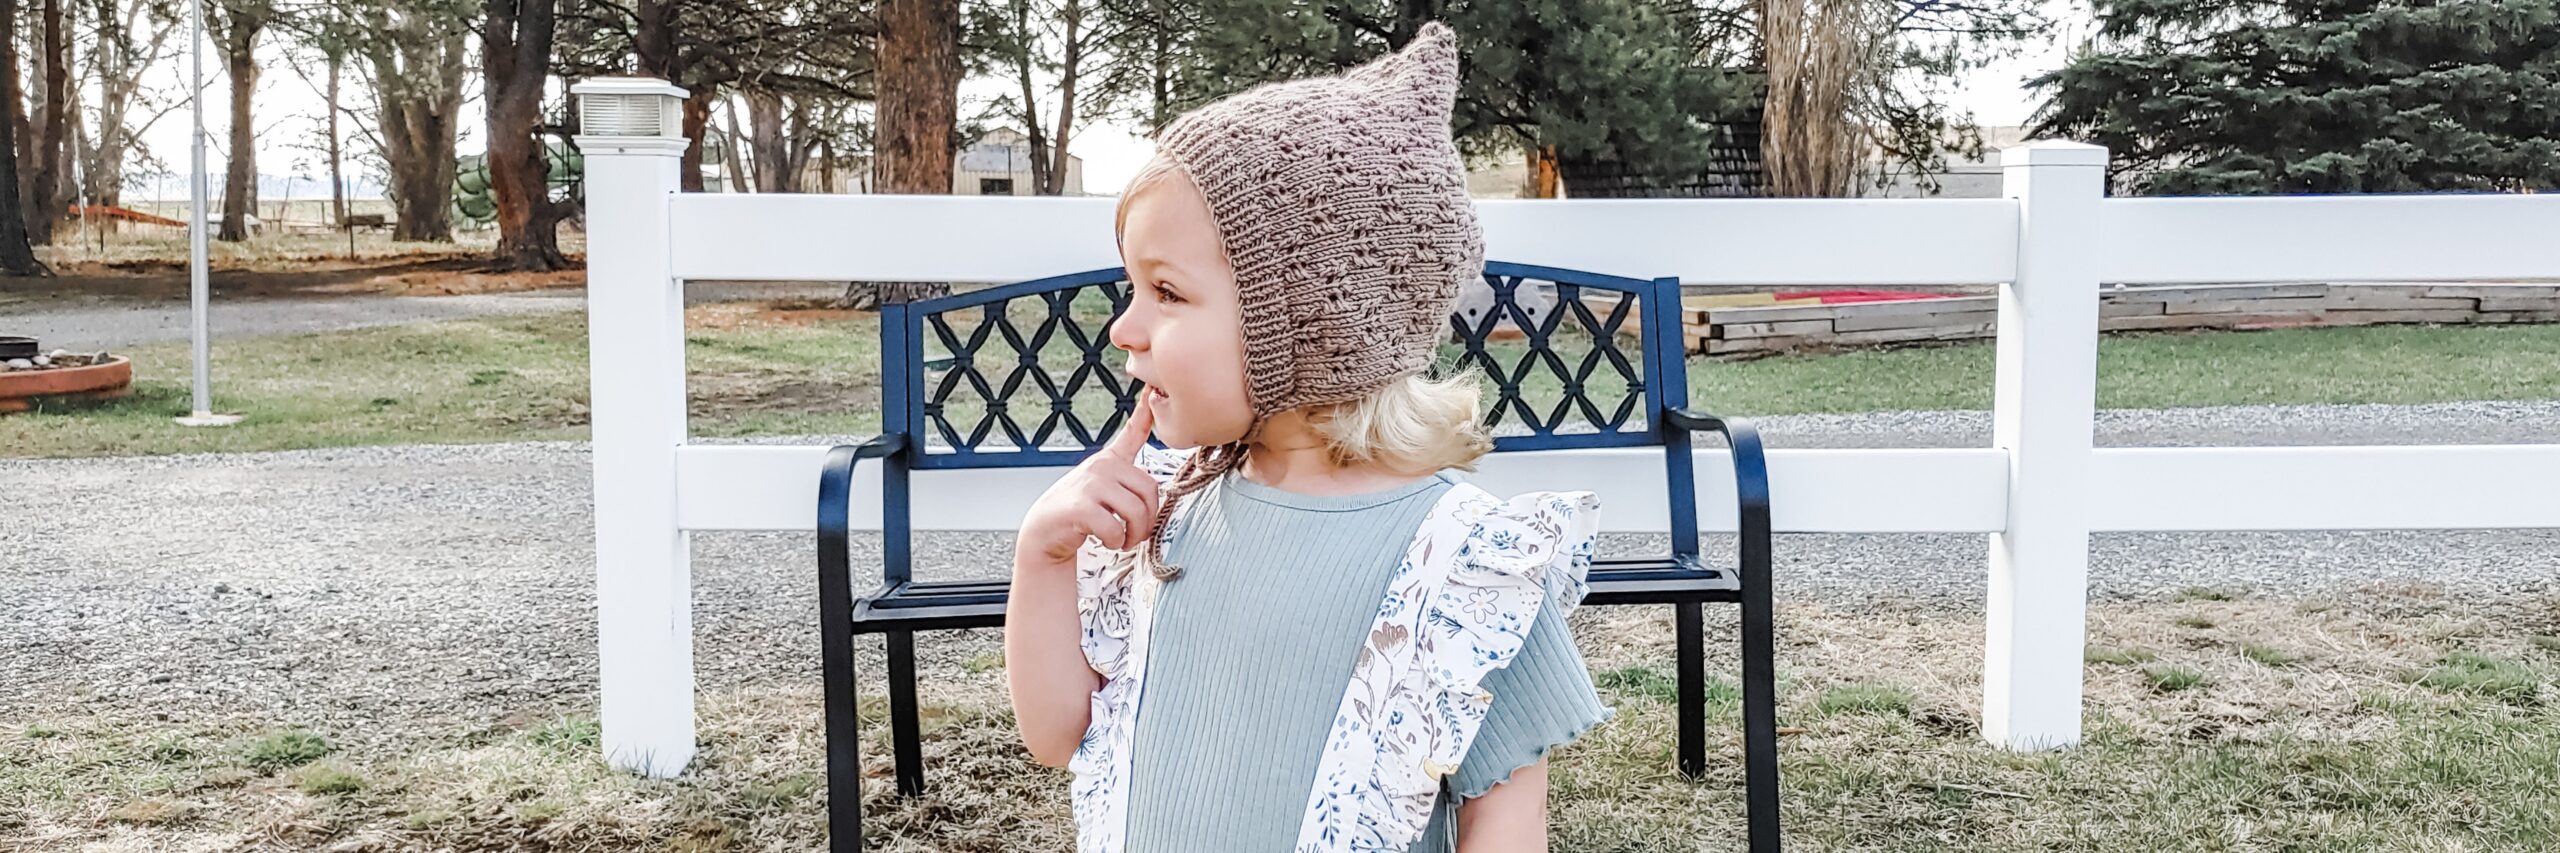
When I set out to design the free pixie bonnet pattern, I knew I wanted something whimsical yet classic—a design that could complement the Mary Bonnet and Mary Cardigan patterns perfectly. The result is a charming pixie-style bonnet that features a simple lace pattern and is available in sizes ranging from newborn to child. I used Berroco Vintage DK (affiliate link) yarn and size 4 needles, specifically my trusty KnitPicks Reflections needles (affiliate link), to bring this pattern to life. I can’t wait to share why this project has quickly become one of my favorites!

Why I Love the Mary Pixie Bonnet
There’s something timeless about a pixie bonnet. Its pointed silhouette gives off a fairytale vibe, but the delicate lace keeps it understated and elegant. The free pixie bonnet pattern is the kind of project that’s as enjoyable to knit as it is practical to use. Whether you’re crafting it for a newborn photoshoot or a child’s everyday wear, it’s versatile and adorable.
What I love most about this bonnet is how it coordinates seamlessly with the Mary Bonnet and Mary Cardigan patterns. Together, they make the sweetest set, perfect for gifting or keeping as heirlooms. The bonnet’s simple lace pattern is easy to memorize, making it an ideal project for knitters who enjoy a bit of rhythm in their stitching without overcomplicating things.

My Go-To Materials for the Free Pixie Bonnet Pattern
For this project, I chose Berroco Vintage DK (affiliate link). This yarn is a dream to work with—soft, durable, and available in a gorgeous range of colors. It’s also a great option for kids’ knits since it’s easy to care for.
As for needles, I couldn’t resist using my KnitPicks Reflections needles (affiliate link). If you’ve never tried these, you’re missing out. The smooth glide and lightweight feel make knitting lace patterns like this one a breeze. I always recommend them to friends who ask about upgrading their tools.
If you’d like to see the exact needles, tools, and everyday supplies I use for my projects, you can find them all on my Shop My Knitting Bag page, where I keep a running list of the basics I reach for again and again.

What Makes This Pattern Special?
The free pixie bonnet pattern stands out because it’s designed with knitters and little wearers in mind. The lace is simple enough for beginners to tackle but interesting enough to keep seasoned knitters engaged. The pattern also includes detailed instructions for multiple sizes, so you can make a bonnet that grows with your little one or create matching sets for siblings.
I’ve always believed that handmade items carry a bit of the maker’s love and care. That’s why I put so much thought into every detail of this pattern. The delicate lace panels give the bonnet an airy, light texture, perfect for spring or fall. And because it’s knit flat and then seamed, it’s approachable for knitters who aren’t comfortable working in the round yet.
If you enjoy this style, you might also like the Jewel Pixie Bonnet and the Bethany Pixie Bonnet, which follow a similar pixie silhouette with their own unique stitch details.

Styling the Mary Pixie Bonnet
This bonnet is as versatile as it is cute. For newborns, it pairs beautifully with delicate outfits for photoshoots. For older kids, it’s the perfect accessory for outdoor play on crisp days. I love how it frames little faces, adding an extra touch of sweetness to any outfit.
Pair the free pixie bonnet pattern with the Mary Cardigan and you have a picture-perfect ensemble that’s ideal for special occasions. The coordinated look is one of my favorite parts about designing patterns like this.

Tips for Knitting the Free Pixie Bonnet Pattern
Here are a few things I learned while working on this project that might help you, too:
- Block your lace – Lace really comes to life after blocking. I used my favorite blocking mats and pins to gently stretch the bonnet into shape. This step is essential to show off the pattern’s details. For more information on blocking check out this blog post.
- Choose your colors wisely – While I went with a soft neutral for my sample, brighter or pastel shades would make this bonnet just as charming.
- Try KnitPicks Reflections needles (affiliate link) – Their smooth finish made knitting the lace sections so much more enjoyable!
If you’d like extra support with any of these techniques, you can find step-by-step help on my Knitting Tutorial page, where I’ve gathered the basic stitches and skills used in this pattern.

Why I Share Free Knitting Patterns
Creating and sharing patterns like the free pixie bonnet pattern is one of my favorite things about being part of the knitting community. I love hearing from other knitters who’ve tried my designs and made them their own. Whether you’re using my patterns to gift to friends, donate to charity, or create something special for your family, it fills me with joy to know my designs are part of your projects.
This post contains affiliate links. If you purchase through these links, I may earn a small commission at no extra cost to you. Thank you for supporting my work!

Materials and Info
Materials – appx 65-150yds sport weight (size 3) yarn I used Berroco Vintage dk (affiliate link), size 4 (3.5mm) straight AND dpn I use KnitPicks Reflections (affiliate link), 2 stitch markers, yarn needle
Gauge -6sts/in
Sizes – newborn, infant, sitter/crawler, toddler, child
Appx Finished Measurements – Newborn 5x5ins, infant 6x6ins, sitter/crawler 6.5×6.5ins, toddler 7x7ins, child 7.5×7.5ins (measurements are for bonnet when laid flat)
Abbreviation
k – knit
P – purl
k2tog -knit 2 stitches together
ssk – slip next st knitwise, slip next st knitwise, place stitches back onto left needle, knit both slipped sts together
yo – yarn over

Mary Pixie Pattern
Cast on 62 (70, 78, 86) 94sts. I used long tail cast on.
Work a k1p1 ribbing for 5 (5, 7, 7) 7 rows
Row 1 – Knit across
Row 2 – Purl across
Row 3 – k3, [k2tog, yo, k1, yo, ssk, k3] repeat [to] across to last 3sts, k3
Row 4 – purl across
Row 5 – repeat row 3
Row 6 – purl across
Row 7 – knit across
Row 8 – purl across
Row 9 – k4, [k3, k2tog, yo, k1, yo, ssk] repeat [to] to last 2sts, k2
Row 10 – purl across
Row 11 – repeat row 9
Row 12 – purl across
Row 13 – knit across
Row 14 – purl across
Repeat rows 3-14 until your work measures 3.75 (4.5, 5, 5.5) 6ins from cast on edge. End after completing a purl row. Place a marker on either end of this last row. This will be where your seam ends to form the crown.
DECREASES
Bind off 2sts at the beginning of each row until your work measures 5 (6, 6.5, 7) 7.5ins from cast on edge ending after completing a row 2. Keep in lace pattern throughout decreases. Your ending stitch count is not important.
Bind off. Fold the bonnet in half and sew the crown together to your stitch markers. (I like to use grafting since it is nearly invisible but a simple whip stitch works great too).
I-cord Ties:
Cast on 3sts on double pointed needles and work appx 9-10ins for personal use and 12-14ins for photography use of i-cord (tutorial at the end of the pattern).
Begin i-cord edging by using the length of i-cord you have already worked. Do so by knitting 2 icord sts, slip the last st, dip the needle into the edge of the back loop of the bonnet, and bringing the yarn around to knit, pick up a stitch in your salvage edge. Knit the last stitch of Icord together with the picked stitch of the bonnet. Once you have picked up and knit across salvage edge stitches, work an additional length of i-cord that matches the other tie. Weave in ends. You can find a tutorial I made for left handed knitters here. Even if you are a right handed knitter it should be helpful to explain the process.
Download Mary Pixie Bonnet

I hope you enjoy knitting the free pixie bonnet pattern as much as I did. If you make one, I’d love to see how it turns out! Leave a comment below to let me know which size and color you chose. Have questions about the pattern? Don’t hesitate to ask below—I’m here to help.
What other types of patterns would you like to see on the blog? Your feedback is invaluable, and it helps me create designs that resonate with you.
Errata: On row 11 it previous said to repeat row 10. That has been corrected to say row 9.