
Learn how to use stitch markers to keep your knitting on track! Find clear tips plus free patterns on my free knitting pattern page.

Stitch markers (affiliate link) are one of the most versatile and useful tools in a knitter’s toolkit. Over the years, I’ve found that they are indispensable when it comes to keeping track of pattern repeats, increases, decreases, and more. In this blog post, I’ll share how I use stitch markers (affiliate link) to make my knitting projects smoother and more enjoyable. Whether you’re new to knitting or an experienced crafter, learning how to use stitch markers (affiliate link) effectively can enhance your knitting experience.

What Are Stitch Markers (affiliate link)?
Before diving into the specifics, let’s briefly cover what stitch markers are. stitch markers (affiliate link) are small, often colorful rings or clips that you place on your knitting needles to mark specific stitches or sections of your pattern. They come in various shapes and sizes, including locking markers, split-ring markers, and simple ring markers. I personally love the bulb pin markers and you will see why as I explain all the different ways I use stitch markers (affiliate link). You can purchase the stitch markers (affiliate link) I use on amazon for less than $10 US here (affiliate link).
How I Use stitch markers (affiliate link) for Pattern Repeats
When working on a project that involves pattern repeats, I always use stitch markers (affiliate link) to help me keep track. Here’s how I do it:
- Read the Pattern Ahead: Before I start knitting, I carefully read through the entire pattern. I note how many repeats of a certain stitch pattern I need to complete.
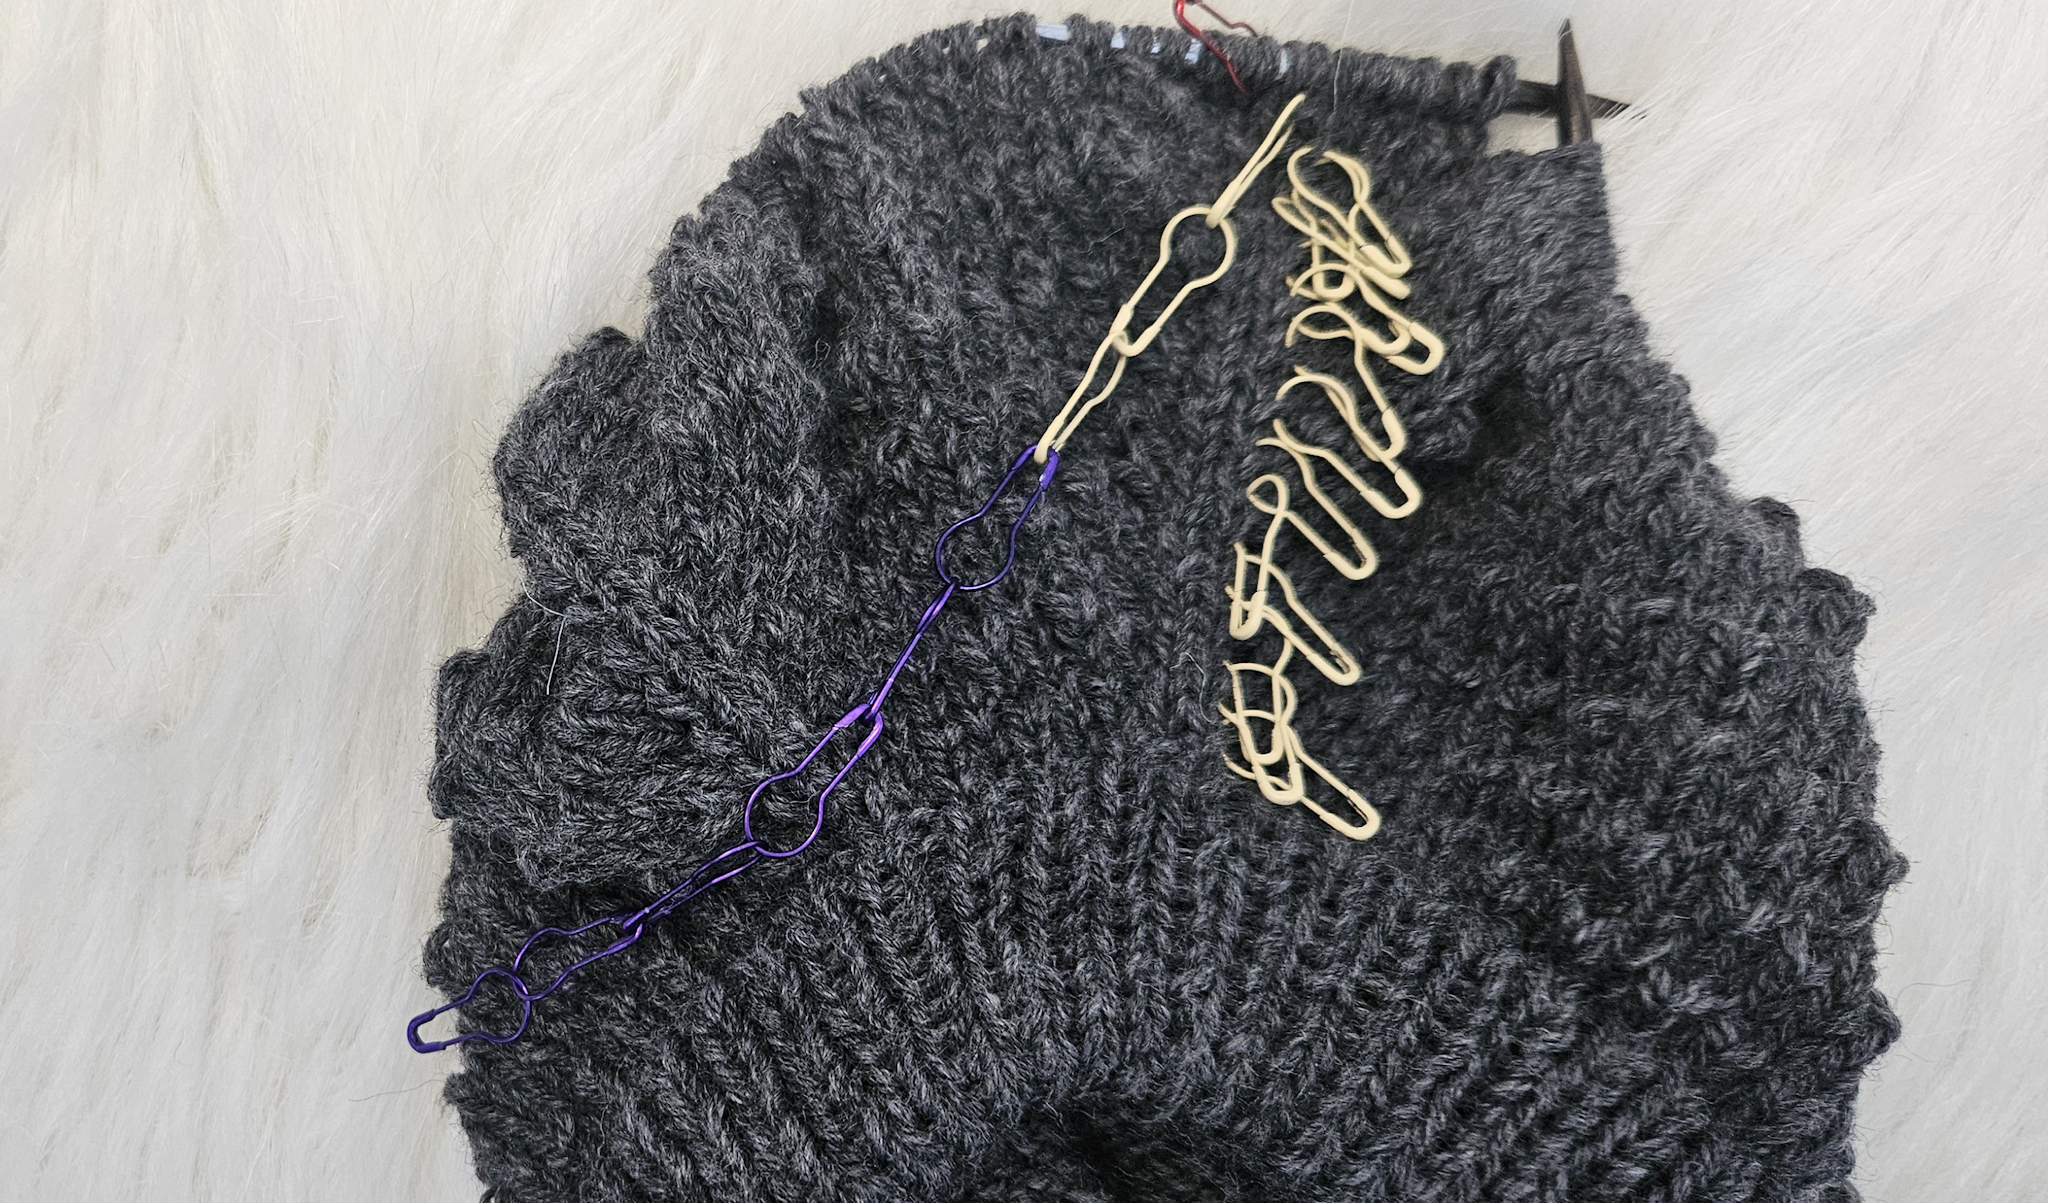
- Select Marker Colors: I choose different colors of stitch markers (affiliate link) for each type of repeat or section. For example, if my pattern requires three repeats of a lace pattern, I might use three different colors of markers to represent each repeat.
- Place the Markers: As I knit, I place the stitch markers (affiliate link) according to the pattern’s instructions. This way, I don’t have to constantly check the pattern to see where I am. Each color-coded marker tells me which section I’m in and how many repeats I’ve completed.
By using stitch markers (affiliate link) this way, I avoid confusion and reduce the risk of making mistakes. I can clearly see how many pattern repeats are left, which helps me stay on track without having to refer to my pattern constantly.

Using Stitch markers (affiliate link) for Increases and Decreases
When working on projects that involve increases or decreases, such as raglan sleeves or shaping, stitch markers (affiliate link) become even more crucial. Here’s my method:
- Determine the Increase/Decrease Schedule: I start by reading the pattern to find out the schedule for increases or decreases. For example, I might need to increase every row, every other row, and every fourth row.
- Choose Marker Colors: I assign a specific color to each type of increase or decrease. For instance, every-row increases might be marked with red, every-other-row increases with blue, and every-fourth-row increases with green.
- Align the Markers: I line up the markers on my needle in the order they will be used. This visual aid helps me quickly identify what needs to be done next without needing to check the pattern repeatedly.
- Knit with Confidence: As I knit, I simply follow the color-coded markers to complete the necessary increases or decreases. This method ensures that I don’t miss any steps and makes it easy to see how many increases or decreases I’ve completed.
By using stitch markers (affiliate link) in this way, I can knit more efficiently and with greater accuracy, saving me time and reducing the likelihood of errors.
The Benefits of Using Stitch markers (affiliate link) for Cable Patterns
Cable patterns can be intricate and challenging to keep track of. Here’s how I use stitch markers (affiliate link) to make cable knitting easier:
- Understand the Cable Pattern: I carefully study the cable pattern to understand how often I need to cross cables and if there are any specific sections that require attention.
- Mark the Sections: I use stitch markers (affiliate link) to delineate different sections of the cable pattern. For example, if a cable pattern has multiple sections that need to be crossed at different intervals, I use markers to separate these sections clearly.
- Follow the Markers: As I knit, I use the markers to remind me where I need to cross cables. This helps me maintain the correct cable pattern and ensures that I don’t miss any crossings.
Using stitch markers (affiliate link) in this way simplifies the process of knitting complex cable patterns and helps me keep track of where I am in the pattern.

How Stitch markers (affiliate link) Help When Not Knitting Daily
If you’re like me and often put your knitting project down for a few days or weeks, stitch markers (affiliate link) can be a lifesaver:
- Mark Your Progress: When I put my project aside, I place stitch markers (affiliate link) at key points in my pattern. This way, when I pick it up again, I can easily see where I left off.
- Avoid Rechecking the Pattern: With stitch markers (affiliate link) in place, I don’t need to refer to my pattern repeatedly to remember what I was doing. The markers tell me exactly where I am and what needs to be done next.
- Stay Organized: This method helps me stay organized and reduces the chance of losing my place in the pattern. It’s especially helpful if I’m working on a large project or if I take long breaks between knitting sessions.
Practice Your Skills with These 5 Knitting Patterns
Now that you’ve learned how to use stitch markers (affiliate link) to streamline your knitting, it’s time to put that knowledge into practice! Here are five knitting patterns where stitch markers can make a big difference:
👉 Baby June Dress Free Pattern
This pattern is perfect for practicing your stitch markers (affiliate link) skills, especially with its raglan increases and skirt increases. Use stitch markers to easily track where each increase should happen, ensuring a smooth and consistent finish.
👉 Youth Peter Sweater Free Pattern
The cables in this sweater can be challenging, but using stitch markers (affiliate link) to mark each cable repeat will help you stay on track. You’ll know exactly when to make those cable crosses, resulting in a beautifully textured sweater.
👉 Youth Granite Sweater Free Pattern
With both raglan increases and sleeve decreases, this pattern benefits greatly from stitch markers (affiliate link). Use them to mark your increases and decreases, so you never miss a step.
Similar to the Youth Granite Sweater, this pattern also features raglan increases and sleeve decreases. stitch markers (affiliate link) will be your best friend in keeping track of these important transitions.
👉 Youth September Cardigan Free Pattern
This cardigan involves both raglan increases and sleeve decreases, making it another ideal project for using them. They’ll help you maintain the correct stitch count and ensure a professional-looking finish.
By practicing with these patterns, you’ll become even more confident in using stitch markers (affiliate link), making your knitting projects smoother and more enjoyable!
Conclusion
Stitch markers (affiliate link) are an invaluable tool for knitters of all levels. By using them effectively, I can keep track of pattern repeats, increases, decreases, and cable patterns with ease. They help me knit more efficiently and accurately, saving time and reducing the likelihood of errors. Whether you’re working on a complex project or a simple pattern, incorporating stitch markers into your knitting routine can make a significant difference.
For a visual demonstration of how I use stitch markers, check out my YouTube video below. In the video, I walk you through my process and share additional tips to help you get the most out of your stitch markers.
Happy knitting!
Disclaimer: This page contains affiliate links. If you choose to make a purchase after clicking a link, I may receive a commission at no additional cost to you. Thank you for your support!