
Discover the brushed alpaca prop bonnet pattern below—plus find more cozy newborn photo props at the Photo Prop Pattern Page!

I can’t wait to tell you about the brushed alpaca prop bonnet pattern that came to life after one of the most peaceful, inspiring vacations I’ve ever taken. This one’s got waves, wool, and warmth—and it holds a little piece of my heart.
If you’re here for the pattern, it’s at the bottom of the post. But if you’re on the hunt for even more cozy newborn accessories, don’t miss the full list of options on my Free Photo Prop Pattern Page!
A Vacation to Remember
It all started in Maine. Think rugged coastlines, charming lighthouses, and tiny towns filled with way more knit-worthy inspiration than I expected. My family and I were enjoying some much-needed downtime when I wandered into a cozy little yarn shop tucked between a café and an antique bookstore. That shop practically whispered, “you need yarn.” (And who am I to argue?)
There on the shelf sat a skein so soft and dreamy it was practically begging to be made into a brushed alpaca prop bonnet pattern. It turned out to be Lamana Cusi, which sadly is now discontinued. But don’t worry—Rowan Alpaca Cotton (affiliate link) makes an excellent substitute. It has that same brushed, airy feel, and the colors? Oh, swoon-worthy. Plus, it’s easy to knit with and perfect for delicate baby items.
Why a Brushed Alpaca Prop Bonnet Pattern?
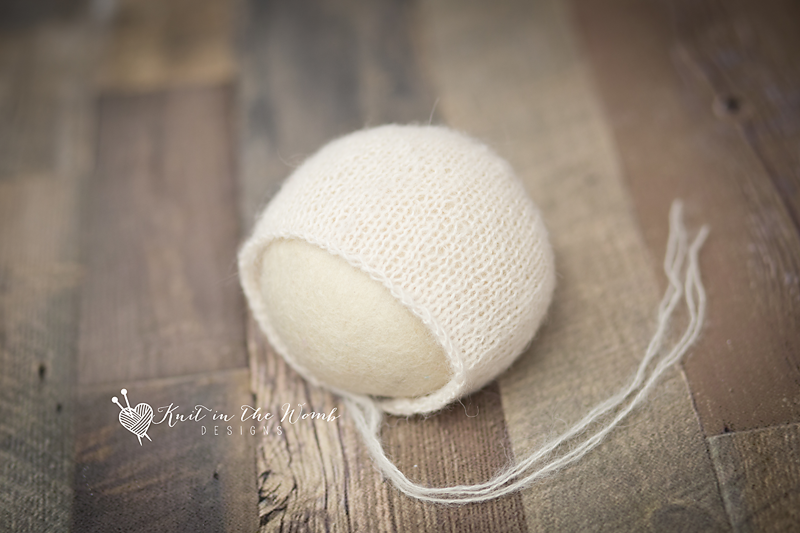
I’ve designed quite a few bonnets, but I wanted this one to have a simpler, classic vibe—something that would photograph beautifully but still feel timeless. Stockinette stitch gave me exactly that. It lets the yarn do the talking (or in this case, whispering sweet alpaca nothings).
Knitting this brushed alpaca prop bonnet pattern felt like stitching peace into every row. I cozied up by the fireplace in our vacation rental with a cup of tea, listening to the waves roll in. I didn’t even mind when I had to frog a few rows because honestly, the whole experience felt like a soothing little escape. That’s how you know a project is good—when the process is just as joyful as the finished product.
Yarn Talk: What to Use Instead
Since Lamana Cusi is off the market, I took a deep dive into yarn-testing mode (my kind of research!). After trying a few fluffy contenders, I landed on Rowan Alpaca Cotton (affiliate link). It’s dreamy. It’s soft. It’s perfect for your brushed alpaca prop bonnet pattern adventures.
This yarn has just enough structure to keep the shape of the bonnet while still being light enough for delicate newborn heads. The subtle halo gives that extra touch of luxury, without any extra fuss. It’s especially beautiful in muted neutrals for timeless photo shoots—but hey, a pop of color never hurt anyone.

Knitting the Bonnet: One Stitch at a Time
Once I’d charted out the design, it came together surprisingly quickly. That’s the beauty of a brushed alpaca prop bonnet pattern—it’s simple and satisfying. A little ribbing here, some short rows there, and a smooth stockinette finish that practically glides off your needles.
I tested the pattern using Rowan Alpaca Cotton (affiliate link) after the vacation and was just as in love with the texture as I was in Maine. It held the stitches beautifully and added that ultra-soft baby fluffiness we all adore. I mean, is there anything better than knitting baby-sized things that feel like clouds?
A Note on Safety (Because That Sweet Baby Is Precious)
Before I get too carried away talking about alpaca and aesthetics—please remember: never leave baby unattended while wearing this bonnet. As much as we love using these for photos, they’re not meant for unsupervised wear.
From Knitting Needles to Photo Studio
Back home, I had to see it in action. I teamed up with a local newborn photographer to do a little test run with the finished brushed alpaca prop bonnet pattern. The results? Pure sweetness. The bonnet framed the baby’s face perfectly, and the brushed texture from the Rowan Alpaca Cotton (affiliate link) added a soft-focus kind of magic that made every photo extra dreamy.
It confirmed everything I’d hoped—the design was working, the yarn looked great, and the fit was snug and comfy for tiny heads. That’s the kind of moment that makes all the behind-the-scenes pattern math worth it!
Sharing the Brushed Alpaca Prop Bonnet Pattern
I designed this brushed alpaca prop bonnet pattern with love and a big dose of vacation nostalgia. And now I’m so excited to share it with you. Whether you’re looking for a last-minute baby shower gift or just want a sweet little photo prop to add to your portfolio, this pattern is it.
And while this specific brushed alpaca prop bonnet pattern is at the bottom of this post, don’t forget—I’ve got tons of other adorable free photo prop options on my Photo Prop Pattern Page. Everything from bunny ears to leaf bonnets lives there, ready to cast on.
One Final Row of Reflection
Knitting this brushed alpaca prop bonnet pattern felt like bottling up the calm of Maine and pouring it into a soft little project. Every time I look at it, I can almost hear the waves again.
I hope it brings that same peaceful joy to your needles. Whether you’re knitting beachside, fireside, or during nap time, may this sweet little bonnet be a reminder of the quiet beauty that can come from a moment of rest and a skein of really good yarn.
And seriously—Rowan Alpaca Cotton (affiliate link). Try it. You’ll be hooked.
Get the Pattern
Ready to knit your own? Scroll down just a bit more for the brushed alpaca prop bonnet pattern. Happy knitting, and don’t forget to tag me in your photos—I’d love to see your sweet makes!

Materials and Info
Materials: appx 60-120yds fingering weight brushed alpaca (I used Lamana Cuzi which is discontinued but Rowan Alpaca Cotton is a great replacement), Size 6 (4mm) straight needles, yarn needle, stitch markers
Gauge: appx 5sts/in Gauge: ~GAUGE IS VERY IMPORTANT~
Abbreviation Key:
K – knit
P – purl
k2tog – knit 2 together
Sizes (Head circumference) [finished size laid flat]: nb (13ins)[5x5ins]. 0-3mths (14ins)[5.5×5.5ins], 3-6mth (15ins)[6x6ins], 6-12mths (16ins)[6.5×6.5ins], toddler (17ins)[7x7ins]

Maine Bonnet Pattern
NEWBORN
Cast on 51sts.
Work in stockinette st until your work measures 3.5ins from the cast on edge ending after completing a wrong side row. Place a stitch marker on either end of this last row to mark your back seam.
DECREASES
Row 1 – k1 [k2tog, k5] repeat [to] across to last sts, k1(44sts)
Row 2 – purl across
Row 3 – k1 [k2tog, k4] repeat [to] across to last sts, k1 (37sts)
Row 4 – purl across
Row 5 – k1 [k2tog, k3] repeat [to] across to last sts, k1 (30sts)
Row 6 – purl across
Row 7 – k1 [k2tog, k2] repeat [to] across to last sts, k1 (23sts)
Row 8 – purl across
Row 9 – k1 [k2tog, k1] repeat [to] across to last sts, k1 (16sts)
Row 10 – purl across
Row 11 – k1 [k2tog] repeat [to] across to last st, k1 (9sts)
Do not bind off.
Cut yarn leaving appx 12ins and pull through remaining stitches. Using this end sew the crown together to your stitch markers. (I like to use the mattress stitch since it is nearly invisible). Weave in ends and block.
Cut 2 pieces of yarn approximately 30ins long. Fold 1 in half and pull a loop through the front corner of the bonnet. Pull the ends through this loop. Repeat on the other front corner.
0-3 MONTHS
Cast on 57sts.
Work in stockinette st until your work measures 4ins from the cast on edge ending after completing a right side row. Place a stitch marker on either end of this last row to mark your back seam.
DECREASES
Set up row – p2 [p9,p2tog] repeat [to] across to last sts, k1 p1 (51sts)
Row 1 – k1 [k2tog, k5] repeat [to] across to last sts, k1(44sts)
Row 2 – purl across
Row 3 – k1 [k2tog, k4] repeat [to] across to last sts, k1 (37sts)
Row 4 – purl across
Row 5 – k1 [k2tog, k3] repeat [to] across to last sts, k1 (30sts)
Row 6 – purl across
Row 7 – k1 [k2tog, k2] repeat [to] across to last sts, k1 (23sts)
Row 8 – purl across
Row 9 – k1 [k2tog, k1] repeat [to] across to last sts, k1 (16sts)
Row 10 – purl across
Row 11 – k1 [k2tog] repeat [to] across to last st, k1 (9sts)
Do not bind off.
Cut yarn leaving appx 12ins and pull through remaining stitches. Using this end sew the crown together to your stitch markers. (I like to use the mattress stitch since it is nearly invisible). Weave in ends and block.
Cut 2 pieces of yarn approximately 30ins long. Fold 1 in half and pull a loop through the front corner of the bonnet. Pull the ends through this loop. Repeat on the other front corner.
3-6 MONTHS
Cast on 63sts.
Work in stockinette st until your work measures 4.5ins from the cast on edge ending after completing a right side row. Place a stitch marker on either end of this last row to mark your back seam.
DECREASES
Set up row – p2, [p10, p2tog] repeat [to] across to last st, p1 (58sts)
Row 1 – k1 [k2tog, k5] repeat [to] across to last sts, k1(50sts)
Row 2 – purl across
Row 3 – k1 [k2tog, k4] repeat [to] across to last sts, k1 (42sts)
Row 4 – purl across
Row 5 – k1 [k2tog, k3] repeat [to] across to last sts, k1 (34sts)
Row 6 – purl across
Row 7 – k1 [k2tog, k2] repeat [to] across to last sts, k1 (26sts)
Row 8 – purl across
Row 9 – k1 [k2tog, k1] repeat [to] across to last sts, k1 (18sts)
Row 10 – purl across
Row 11 – k1 [k2tog] repeat [to] across to last st, k1 (10sts)
Do not bind off.
Cut yarn leaving appx 12ins and pull through remaining stitches. Using this end sew the crown together to your stitch markers. (I like to use the mattress stitch since it is nearly invisible). Weave in ends and block.
Cut 2 pieces of yarn approximately 30ins long. Fold 1 in half and pull a loop through the front corner of the bonnet. Pull the ends through this loop. Repeat on the other front corner.
6-12 MONTHS
Cast on 67sts.
Work in stockinette st until your work measures 5ins from the cast on edge ending after completing a right side row. Place a stitch marker on either end of
this last row to mark your back seam.
DECREASES
Set up row – p1, p2tog, p61, p2tog, p1 (65sts)
Row 1 – k1 [k2tog, k5] repeat [to] across to last sts, k1(56sts)
Row 2 – purl across
Row 3 – k1 [k2tog, k4] repeat [to] across to last sts, k1 (47sts)
Row 4 – purl across
Row 5 – k1 [k2tog, k3] repeat [to] across to last sts, k1 (38sts)
Row 6 – purl across
Row 7 – k1 [k2tog, k2] repeat [to] across to last sts, k1 (29sts)
Row 8 – purl across
Row 9 – k1 [k2tog, k1] repeat [to] across to last sts, k1 (20sts)
Row 10 – purl across
Row 11 – k1 [k2tog] repeat [to] across to last st, k1 (11sts)
Do not bind off.
Cut yarn leaving appx 12ins and pull through remaining stitches. Using this end sew the crown together to your stitch markers. (I like to use the mattress stitch since it is nearly invisible). Weave in ends and block.
Cut 2 pieces of yarn approximately 30ins long. Fold 1 in half and pull a loop through the front corner of the bonnet. Pull the ends through this loop. Repeat on the other front corner.
TODDLER
Cast on 72sts.
Work in stockinette st until your work measures 5.5ins from the cast on edge ending after completing a wrong side row. Place a stitch marker on either end of this last row to mark your back seam.
DECREASES
Row 1 – k1 [k2tog, k5] repeat [to] across to last sts, k1(62sts)
Row 2 – purl across
Row 3 – k1 [k2tog, k4] repeat [to] across to last sts, k1 (52sts)
Row 4 – purl across
Row 5 – k1 [k2tog, k3] repeat [to] across to last sts, k1 (42sts)
Row 6 – purl across
Row 7 – k1 [k2tog, k2] repeat [to] across to last sts, k1 (32sts)
Row 8 – purl across
Row 9 – k1 [k2tog, k1] repeat [to] across to last sts, k1 (22sts)
Row 10 – purl across
Row 11 – k1 [k2tog] repeat [to] across to last st, k1 (12sts)
Do not bind off.
Cut yarn leaving appx 12ins and pull through remaining stitches. Using this end sew the crown together to your stitch markers. (I like to use the mattress stitch since it is nearly invisible). Weave in ends and block.
Cut 2 pieces of yarn approximately 30ins long. Fold 1 in half and pull a loop through the front corner of the bonnet. Pull the ends through this loop. Repeat on the other front corner.

Maine Bonnet PDF

Disclaimer: This page contains affiliate links. If you choose to make a purchase after clicking a link, I may receive a commission at no additional cost to you. Thank you for your support!