
Discover a free knit bonnet pattern perfect for newborn photos! Find more photo prop patterns here: Photo Prop Patterns.

I’ll be honest—I’m a bit of a sucker for tiny baby bonnets. There’s something about that soft frame around a baby’s face that gets me every time. So when I got my hands (and needles) on this free knit bonnet pattern, I knew it was going to be a favorite. Spoiler alert: it totally is.
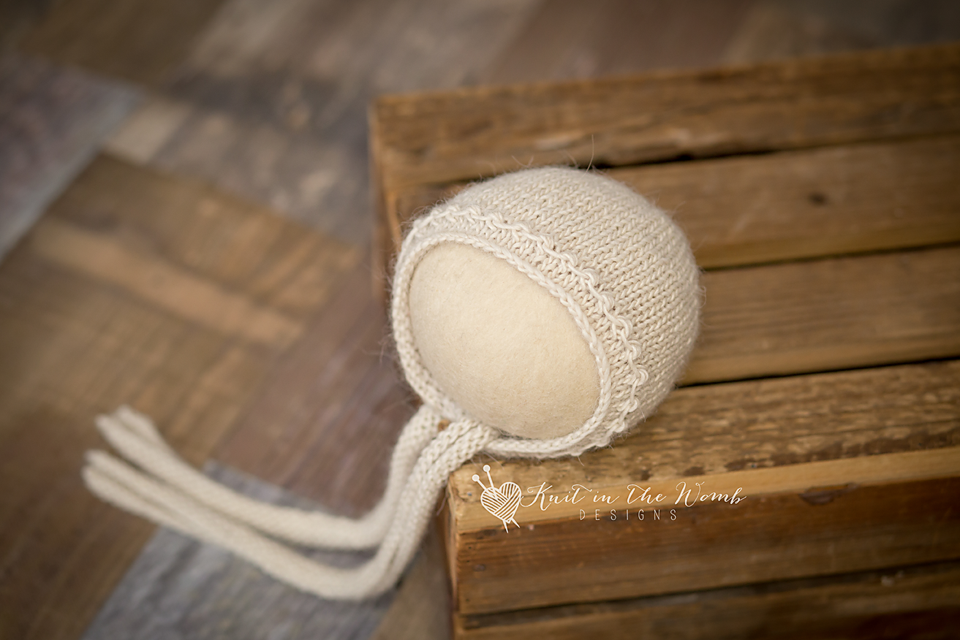
The pattern I’m talking about is the Nehemiah Bonnet, and it’s not just any bonnet. It’s a newborn photo prop dream, with sweet wide knit ties and a stunning slip stitch purl border that gives it just the right amount of texture and polish. I’ve knit it more times than I can count, and every time, it turns out just as lovely as the last.
And don’t worry—the free knit bonnet pattern is down at the bottom of this post! But if you want more photo prop patterns, check out my full collection here: Free Photo Prop Patterns.
Why I Fell for This Free Knit Bonnet Pattern
I first spotted the Nehemiah Bonnet in a knitting group I’m part of, and honestly, I couldn’t click fast enough. The name caught my eye (biblical names always pull at my heartstrings), but it was the photos that sealed the deal. That slip stitch border? Gorgeous. Those knit ties? Vintage perfection.
As someone who knits props for newborn photography, I’m always on the lookout for pieces that add a timeless charm to my shoots—and this free knit bonnet pattern checked every box.

The Yarn I Used (and What You Can Use Instead)
Now, let’s talk yarn. I originally knit the Nehemiah Bonnet in a gorgeous hand-dyed DK single ply yarn. It had this soft, lavender hue that looked stunning on camera and gave the whole bonnet this delicate, heirloom feel. Unfortunately, that yarn has been discontinued (cue the tiny violins).
But don’t worry! A fantastic substitute is Hobbii Winter Glow Solid (affiliate link). It’s got that same dreamy texture and subtle color depth that makes these bonnets shine in photos. If you haven’t tried it yet, I highly recommend giving it a spin. It’s one of those yarns that just feels special.
Every time I mention the original yarn I used, know that Hobbii Winter Glow Solid (affiliate link) is my top recommendation now. It’s soft, it works beautifully with this pattern, and it knits up like a dream.
Let’s Talk About the Pattern
The free knit bonnet pattern starts with a gorgeous slip stitch purl border that really frames the baby’s face beautifully. It’s such a simple little detail, but it adds a whole lot of polish. Then you move into the main bonnet body, which is smooth and simple—perfect for showing off that beautiful yarn (affiliate link).
And then… the ties. Oh, those wide knit ties! They’re thick enough to stay put, long enough to be styled into a sweet bow, and just old-fashioned enough to give that vintage touch. Every time I knit them, I’m reminded of classic baby bonnets in old photo albums—and it makes my heart melt a little.
This free knit bonnet pattern is clear and straightforward, and I’d recommend it for confident beginners and beyond. If you’ve knit a hat before, you can totally handle this.
A Bonnet That Photographs Like a Dream
The first time I used this bonnet in a photo session, I knew I had a winner. The slip stitch border draws the eye right to baby’s sweet little cheeks, and the ties add just enough whimsy to make every shot feel special.
I paired my first Nehemiah Bonnet with a soft wrap in a matching color, and the photos were some of my all-time favorites. The muted lavender yarn I used had subtle tonal shifts that gave the bonnet extra depth, which looked amazing under natural light. It’s no wonder parents started asking if they could take the bonnet home.
Quick note: never leave a baby unattended in this bonnet. It’s perfect for photos but should always be used with supervision.

When Yarn Meets Keepsake
I love when something I knit becomes a keepsake. More than once, parents have asked to keep the Nehemiah Bonnet I used in their baby’s photo session, and that just makes my day. It’s one thing to create a beautiful prop, but knowing it’ll be tucked away in a memory box or handed down to a cousin? That’s next-level joy.
Hand-dyed DK single ply yarns like the one I originally used—and Hobbii Winter Glow Solid (affiliate link), my go-to replacement—really shine in this free knit bonnet pattern. The simple design lets the yarn speak for itself, and I think that’s part of why it turns into a treasured item.
Final Thoughts on This Free Knit Bonnet Pattern
If you’re anything like me and love a good baby photo prop, this free knit bonnet pattern is going to steal your heart. Between the sweet ties, the delicate edge, and the soft yarn (affiliate link), it’s one of those projects that looks fancy without being fussy. And that’s my favorite kind of knitting.
I’ve knit this bonnet in a few different colors using DK single ply yarn (affiliate link), and each one has brought out a different mood—warm creams for a classic look, soft blues for a peaceful feel, and that lavender yarn (affiliate link) I mentioned earlier? Still one of my all-time faves.
Whether you’re a knitter, a photographer, or just someone who loves gifting handmade baby items, you’ll love having this pattern in your library.
Ready to Knit It?
The free knit bonnet pattern is right below—just scroll down and grab it! But if you want more adorable newborn photo props to knit, be sure to check out all my other free knit bonnet patterns and accessories right here: Photo Prop Patterns.
Happy knitting—and don’t forget to tag me if you share your bonnets online! I LOVE seeing your creations.

Materials and Info
MATERIALS: appx 80-160yds of dk (3) yarn (I like Hobbii Winter glow (affiliate link)), Size 6 (4mm) needles, stitch markers, yarn needle
Gauge: appx 5sts/inch Gauge is very important!
Sizes (appx finished head circumference)[appx finished measurements not including ties] : newborn (13ins) [5X5ins], 0-3mths (14 ins) [5.5×5.5ins], 3-6mths (15ins) [6x6ins], 6-12mths (16ins) [6.5×6.5ins], 1-3yrs (17ins) [7x7ins]
Stitch Key
K – knit
p – purl
K2tog – knit 2 stitches together
k3togtbl – knit 3 together through back loop
Wyib – with yarn in back
sl – slip stitch
Yo – yarn over
sm – slip marker
Pm – place marker remove marker

Nehemiah Bonnet Pattern
NEWBORN
Cast on 175
Note: This seems like a lot but your ties are in this cast on. You will bind off to finish your ties on row 8.
Row 1 – p60, pm, p55, pm, p60
Row 2 – knit across
Row 3 – purl across
Row 4 – k60, sm, k3, [(k1, yo, k1) in next st, k1] repeat [to] to last 4 sts before marker (k1, yo, k1) in next sts, k3, sm, k60 (225sts)
Row 5 – p60, sm, p3, [k3togtbl, sl wyib] repeat [to] until last 6sts, k3togtbl, p3, sm, p60 (175sts)
Row 6 – knit across
Row 7 – purl across
Row 8 – bind off 60, rm, k55, rm, bind off 60 (55sts) cut yarn
Join yarn with wrong side (purl row) facing.
Row 9 – k3, p49, k3
Row 10 – k55
Repeat rows 9 and 10 until your work measures appx 4ins from cast on edge. End after completing a wrong side (purl row). Place stitch markers on either end of this last row. These will mark were to sew the crown seam to.
DECREASES
Row 1 – k1 [k2tog, k4] repeat [to] across (46sts)
Row 2 – purl across
Row 3 – k1 [k2tog, k3] repeat [to] across (37sts)
Row 4 – purl across
Row 5 – k1 [k2tog, k2] repeat [to] across (28sts)
Row 6 – purl across
Row 7 – k1 [k2tog, k1] repeat [to] across (19sts)
Row 8 – purl across
Row 9 – k1 [k2tog] repeat [to] across (10sts)
Do not bind off. Cut yarn leaving appx 12ins and pull through remaining stitches. Using this end sew the crown together to your stitch markers. (I like to use the mattress stitch since it is nearly invisible). Weave in ends and block as necessary.
0-3 MONTHS
Cast on 181
Note: This seems like a lot but your ties are in this cast on. You will bind off to finish your ties on row 8.
Row 1 – p60, pm, p61, pm, p60
Row 2 – knit across
Row 3 – purl across
Row 4 – k60, sm, k3, [(k1, yo, k1) in next st, k1] repeat [to] to last 4 sts before marker (k1, yo, k1) in next sts, k3, sm, k60 (237sts)
Row 5 – p60, sm, p3, [k3togtbl, sl wyib] repeat [to] until last 6sts, k3togtbl, p3, sm, p60 (181sts)
Row 6 – knit across
Row 7 – purl across
Row 8 – bind off 60, rm, k61, rm, bind off 60 (61sts) cut yarn
Join yarn with wrong side (purl row) facing.
Row 9 – k3, p55, k3
Row 10 – k61
Repeat rows 9 and 10 until your work measures appx 4.5ins from cast on edge. End after completing a wrong side (purl row). Place stitch markers on either end of this last row. These will mark were to sew the crown seam to.
DECREASES
Row 1 – k1 [k2tog, k4] repeat [to] across (51sts)
Row 2 – purl across
Row 3 – k1 [k2tog, k3] repeat [to] across (41sts)
Row 4 – purl across
Row 5 – k1 [k2tog, k2] repeat [to] across (31sts)
Row 6 – purl across
Row 7 – k1 [k2tog, k1] repeat [to] across (21sts)
Row 8 – purl across
Row 9 – k1 [k2tog] repeat [to] across (11sts)
Do not bind off. Cut yarn leaving appx 12ins and pull through remaining stitches. Using this end sew the crown together to your stitch markers. (I like to use the mattress stitch since it is nearly invisible). Weave in ends and block as necessary.
3-6 MONTHS
Cast on 187
Note: This seems like a lot but your ties are in this cast on. You will bind off to finish your ties on row 8.
Row 1 – p60, pm, p67, pm, p60
Row 2 – knit across
Row 3 – purl across
Row 4 – k60, sm, k3, [(k1, yo, k1) in next st, k1] repeat [to] to last 4 sts before marker (k1, yo, k1) in next sts, k3, sm, k60 (249sts)
Row 5 – p60, sm, p3, [k3togtbl, sl wyib] repeat [to] until last 6sts, k3togtbl, p3, sm, p60 (187sts)
Row 6 – knit across
Row 7 – purl across
Row 8 – bind off 60, rm, k67, rm, bind off 60 (61sts) cut yarn
Join yarn with wrong side (purl row) facing.
Row 9 – k3, p61, k3
Row 10 – k67
Repeat rows 9 and 10 until your work measures appx 5ins from cast on edge. End after completing a wrong side (purl row). Place stitch markers on either end of this last row. These will mark were to sew the crown seam to.
DECREASES
Row 1 – k1 [k2tog, k4] repeat [to] across (56st)
Row 2 – purl across
Row 3 – k1 [k2tog, k3] repeat [to] across (45st)
Row 4 – purl across
Row 5 – k1 [k2tog, k2] repeat [to] across (34st)
Row 6 – purl across
Row 7 – k1 [k2tog, k1] repeat [to] across (23st)
Row 8 – purl across
Row 9 – k1 [k2tog] repeat [to] across (12st)
Do not bind off. Cut yarn leaving appx 12ins and pull through remaining stitches. Using this end sew the crown together to your stitch markers. (I like to use the mattress stitch since it is nearly invisible). Weave in ends and block as necessary.
6-12 MONTHS
Cast on 193
Note: This seems like a lot but your ties are in this cast on. You will bind off to finish your ties on row 8.
Row 1 – p60, pm, p73, pm, p60
Row 2 – knit across
Row 3 – purl across
Row 4 – k60, sm, k3, [(k1, yo, k1) in next st, k1] repeat [to] to last 4 sts before marker (k1, yo, k1) in next sts, k3, sm, k60 (261sts)
Row 5 – p60, sm, p3, [k3togtbl, sl wyib] repeat [to] until last 6sts, k3togtbl, p3, sm, p60 (193sts)
Row 6 – knit across
Row 7 – purl across
Row 8 – bind off 60, rm, k73, rm, bind off 60 (61sts) cut yarn
Join yarn with wrong side (purl row) facing.
Row 9 – k3, p67, k3
Row 10 – k73
Repeat rows 9 and 10 until your work measures appx 5.5ins from cast on edge. End after completing a right side (knit) row. Place a marker on either side of your work here. These will mark were to sew the crown seam to.
DECREASES
Row 1 – p70sts, p2tog, p1 (72sts)
Row 2 – k1 [k2tog, k5] repeat [to] across to last st, k1 (62st)
Row 3 – purl across
Row 4 – k1 [k2tog, k4] repeat [to] across to last st, k1 (52st)
Row 5 – purl across
Row 6 – k1 [k2tog, k3] repeat [to] across to last st, k1 (42st)
Row 7 – purl across
Row 8 – k1 [k2tog, k2] repeat [to] across to last st, k1 (32st)
Row 9 – purl across
Row 10 – k1 [k2tog, k1] repeat [to] across to last st, k1 (22st)
Row 11 – purl across
Row 12 – k1 [k2tog] repeat [to] across to last st, k1 (12st)
Do not bind off. Cut yarn leaving appx 12ins and pull through remaining stitches. Using this end sew the crown together to your stitch markers. (I like to use the mattress stitch since it is nearly invisible). Weave in ends and block as necessary.
TODDLER (1-3YRS)
Cast on 199
Note: This seems like a lot but your ties are in this cast on. You will bind off to finish your ties on row 8.
Row 1 – p60, pm, p79, pm, p60
Row 2 – knit across
Row 3 – purl across
Row 4 – k60, sm, k3, [(k1, yo, k1) in next st, k1] repeat [to] to last 4 sts before marker (k1, yo, k1) in next sts, k3, sm, k60 (273sts)
Row 5 – p60, sm, p3, [k3togtbl, sl wyib] repeat [to] until last 6sts, k3togtbl, p3, sm, p60 (199sts)
Row 6 – knit across
Row 7 – purl across
Row 8 – bind off 60, rm, k79, rm, bind off 60 (61sts) cut yarn
Join yarn with wrong side (purl row) facing.
Row 9 – k3, p73, k3
Row 10 – k79
Repeat rows 9 and 10 until your work measures appx 6ins from cast on edge. End after completing a wrong side (purl row). Place stitch markers on either end of this last row. These will mark were to sew the crown seam to.
DECREASES
Row 1 – k1 [k2tog, k5] repeat [to] across to last st, k1 (68st)
Row 2 – purl across
Row 3 – k1 [k2tog, k4] repeat [to] across to last st, k1 (57st)
Row 4 – purl across
Row 5 – k1 [k2tog, k3] repeat [to] across to last st, k1 (46st)
Row 6 – purl across
Row 7 – k1 [k2tog, k2] repeat [to] across to last st, k1 (35st)
Row 8 – purl across
Row 9 – k1 [k2tog, k1] repeat [to] across to last st, k1 (24st)
Row 10 – purl across
Row 11 – k1 [k2tog] repeat [to] across to last st, k1 (13st)
Do not bind off. Cut yarn leaving appx 12ins and pull through remaining stitches. Using this end sew the crown together to your stitch markers. (I like to use the mattress stitch since it is nearly invisible). Weave in ends and block as necessary.

Nehemiah Bonnet PDF

Disclaimer: This page contains affiliate links. If you choose to make a purchase after clicking a link, I may receive a commission at no additional cost to you. Thank you for your support!