
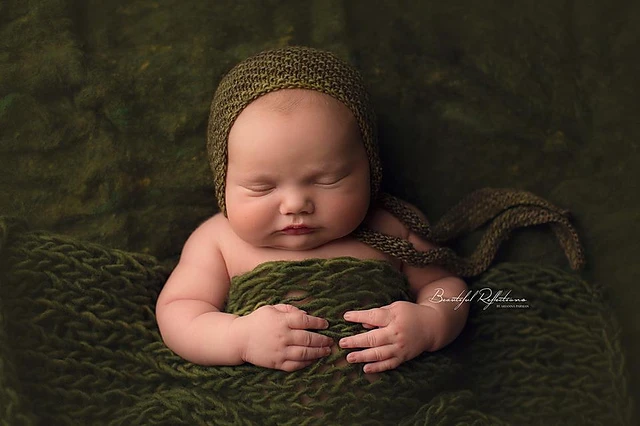
Fall in love with this photo prop knit ties bonnet pattern! Click for more photo prop patterns — this one’s at the bottom of the post!

When it comes to knitting for newborns, few things bring me as much joy as creating sweet little bonnets for their very first photos. There’s just something timeless and special about a baby in a handknit hat, especially when it’s one with delicate ties and textured charm. The photo prop knit ties bonnet pattern I keep coming back to is the Aaron Bonnet. I’ve made it more times than I can count, and each time I fall in love with it all over again.
If you’re looking for a photo prop knit ties bonnet pattern that’s simple, elegant, and perfect for newborn photography, this one’s for you. And yes — the pattern is free and tucked right at the bottom of this post. But I’ve also got a whole collection of other adorable photo props over on this page if you want to stock up!
Why I Love This Photo Prop Knit Ties Bonnet Pattern
The Aaron Bonnet is a classic. It has a vintage vibe with its soft shaping and gentle texture, and the knit ties add just the right amount of sweetness while also helping the bonnet stay put during those sleepy baby photo sessions. The structure makes it ideal for showcasing the delicate features of a newborn, especially those tiny cheeks we all swoon over.
Every time I cast on for this photo prop knit ties bonnet pattern, I know I’m about to knit something beautiful that will be treasured. And let’s be honest — we all need a few go-to baby patterns that are easy, reliable, and just plain adorable.

Yarn Talk: Malabrigo Silky Merino (affiliate link)
Now let’s talk yarn. The original yarn for this photo prop knit ties bonnet pattern was sadly discontinued, but don’t worry — I found the perfect alternative. Enter Malabrigo Silky Merino (affiliate link). This yarn is dreamy. It’s a blend of silk and merino wool, which means it’s not only soft and snuggly but also has this gorgeous drape and a light sheen that really makes the texture in this pattern pop.
I was a little skeptical at first (you know how picky I am about yarn for newborns!), but the moment I started knitting, I was sold. Malabrigo Silky Merino (affiliate link) feels absolutely luxurious and glides like butter over the needles.

The Texture Shines with Malabrigo Silky Merino (affiliate link)
One of my favorite things about working up the Aaron Bonnet is watching the texture develop. And let me tell you — that texture is chef’s kiss when knit with Malabrigo Silky Merino (affiliate link). The blend gives the bonnet a professional finish while still keeping it soft and cozy for baby.
The subtle sheen of Malabrigo Silky Merino (affiliate link) highlights every stitch, and it blocks out beautifully. I always recommend a gentle soak and reshape to really bring this photo prop knit ties bonnet pattern to life.
Tips for Knitting This Photo Prop Knit Ties Bonnet Pattern
I’ve picked up a few tips while knitting this photo prop knit ties bonnet pattern over the years — especially with Malabrigo Silky Merino (affiliate link) as my go-to yarn. Here’s what I’ve learned:
- Check your gauge: As with any yarn substitution, it’s key to knit a swatch first. Malabrigo Silky Merino (affiliate link) is a bit unique, so matching gauge will help the bonnet fit just right.
- Handle with care: This yarn is delicate (it is silky merino after all), so keep your tension relaxed and avoid tugging too tightly.
- Block with love: Don’t skip the blocking step! It helps open up the texture and gives that polished look that makes your bonnet camera-ready.
- Color matters: Malabrigo Silky Merino (affiliate link) comes in some of the most beautiful colors I’ve ever seen. I gravitate toward pastels for photo props, but the rich tones are stunning too. Think about your photoshoot theme and choose accordingly.

A Note About Safety
As much as I adore this photo prop knit ties bonnet pattern, I always want to remind fellow makers and photographers: babies should never be left unattended in this bonnet. It’s designed as a photography prop, not as everyday wear. Safety always comes first.
The Joy of Handmade Memories
There’s something truly rewarding about knowing your stitches are becoming part of a family’s precious memories. That’s what keeps me coming back to this photo prop knit ties bonnet pattern. Each one I knit gets tucked into a newborn session or gifted to a new mom, and that makes it so much more than just yarn and needles.
And knitting it with Malabrigo Silky Merino (affiliate link) makes it even better. This yarn elevates the project without making it complicated — and that’s my sweet spot.

Let’s Talk About Substitutions
If you can’t get your hands on Malabrigo Silky Merino (affiliate link), don’t panic! Look for yarns that are a blend of silk and wool, or even bamboo and wool blends. You’ll want something soft enough for baby skin with a little drape and texture to show off the stitchwork.
But if you can get your hands on Malabrigo Silky Merino (affiliate link), I highly recommend it for this photo prop knit ties bonnet pattern. It’s a game changer.
Get the Photo Prop Knit Ties Bonnet Pattern Below!
Ready to knit your own Aaron Bonnet? The free photo prop knit ties bonnet pattern is waiting for you at the bottom of this post. Whether you’re making it for your own baby, a client’s photoshoot, or a sweet gift, I hope it brings you the same joy it’s brought me.
And if you’re looking for even more baby props to add to your collection, don’t miss the rest of my free photo prop patterns. There’s a whole lineup waiting for you to explore.
Final Thoughts
Knitting this photo prop knit ties bonnet pattern with Malabrigo Silky Merino (affiliate link) has reminded me once again why I love designing and sharing baby knits. It’s about creativity, connection, and those little moments that mean the most. Whether you’re new to photo prop knitting or an old pro, this pattern is a must-have in your baby knit toolbox.
Now grab your yarn, make a cup of tea, and scroll on down to cast on your new favorite photo prop!

Materials and Info
MATERIALS: appx 80-160yds of dk (3) yarn (I used malabrigo silky merino), Size 6 (4mm) needles, stitch markers, yarn needle
Gauge: appx 5sts/inch Gauge is very important!
Sizes (appx finished head circumference) : newborn (13ins), 0-3mths (14 ins), 3-6mths (15ins), 6-12mths (16ins), 1-3yrs (17ins)
Stitch Key
K – knit
p – purl
K2tog – knit 2 stitches together

Aaron Bonnet Pattern
NEWBORN
Cast on 176sts.
Row 1 (wrong side) – [k1, p1] for 60sts, place marker, [k1, p1] for 56sts, place marker, [k1, p1] for the remaining 60sts.
Row 2 (right side) – knit across
Row 3 – [p1, k1] across
Row 4 – knit across
Row 5 – [k1, p1] across
Continue working rows 2-5 until your work measures appx 1in from cast on edge ending after completing a wrong side row (a row 3 or 5).
Bind off row – Bind off LOOSELY to the first marker, knit to next marker (leaving these stitches on your needle to be picked up again in the next row), bind off LOOSELY remaining stitches. In the bind off process you will remove all markers. Cut yarn.
Join yarn and continue working rows 2-5 starting with a wrong side row (row 3 or 5) until your work measures appx 4ins from cast on edge ending after completing a wrong side row (a row 3 or 5).
DECREASES
Row 1 – k1 [k2tog, k4] repeat [to] across to last st, k1 (47sts) Place markers on both ends of this row and leave them on this row.
Row 2 – purl across
Row 3 – k1 [k2tog, k3] repeat [to] across to last st, k1 (38sts)
Row 4 – purl across
Row 5 – k1 [k2tog, k2] repeat [to] across to last st, k1 (29sts)
Row 6 – purl across
Row 7 – k1 [k2tog, k1] repeat [to] across to last st, k1 (20sts)
Row 8 – purl across
Row 9 – k1 [k2tog] repeat [to] across to last st, k1 (11sts)
Do not bind off. Cut yarn leaving appx -10ins. Pull yarn through remaining stitches and cinch the back tight. Using this end sew the crown together to your stitch markers. (I like to use the mattress stitch since it is nearly invisible).
0-3 MONTHS
Cast on 182sts.
Row 1 (wrong side) – [k1, p1] for 60sts, place marker, [k1, p1] for 62sts, place marker, [k1, p1] for the remaining 60sts.
Row 2 (right side) – knit across
Row 3 – [p1, k1] across
Row 4 – knit across
Row 5 – [k1, p1] across
Continue working rows 2-5 until your work measures appx 1in from cast on edge ending after completing a wrong side row (a row 3 or 5).
Bind off row – Bind off LOOSELY to the first marker, knit to next marker (leaving these stitches on your needle to be picked up again in the next row), bind off LOOSELY remaining stitches. In the bind off process you will remove all markers. Cut yarn.
Join yarn and continue working rows 2-5 starting with a wrong side row (row 3 or 5) until your work measures appx 4.5ins from cast on edge ending after completing a wrong side row (a row 3 or 5).
DECREASES
Row 1 – k1 [k2tog, k4] repeat [to] across to last st, k1 (52sts) Place markers on both ends of this row and leave them on this row.
Row 2 – purl across
Row 3 – k1 [k2tog, k3] repeat [to] across to last st, k1 (42sts)
Row 4 – purl across
Row 5 – k1 [k2tog, k2] repeat [to] across to last st, k1 (32sts)
Row 6 – purl across
Row 7 – k1 [k2tog, k1] repeat [to] across to last st, k1 (22sts)
Row 8 – purl across
Row 9 – k1 [k2tog] repeat [to] across to last st, k1 (12sts)
Do not bind off. Cut yarn leaving appx -10ins. Pull yarn through remaining stitches and cinch the back tight. Using this end sew the crown together to your stitch markers. (I like to use the mattress stitch since it is nearly invisible).
3-6 MONTHS
Cast on 188sts.
Row 1 (wrong side) – [k1, p1] for 60sts, place marker, [k1, p1] for 68sts, place marker, [k1, p1] for the remaining 60sts.
Row 2 (right side) – knit across
Row 3 – [p1, k1] across
Row 4 – knit across
Row 5 – [k1, p1] across
Continue working rows 2-5 until your work measures appx 1in from cast on edge ending after completing a wrong side row (a row 3 or 5).
Bind off row – Bind off LOOSELY to the first marker, knit to next marker (leaving these stitches on your needle to be picked up again in the next row), bind off LOOSELY remaining stitches. In the bind off process you will remove all markers. Cut yarn.
Join yarn and continue working rows 2-5 starting with a wrong side row (row 3 or 5) until your work measures appx 5ins from cast on edge ending after completing a wrong side row (a row 3 or 5).
DECREASES
Row 1 – k1 [k2tog, k4] repeat [to] across to last st, k1 (57sts) Place markers on both ends of this row and leave them on this row.
Row 2 – purl across
Row 3 – k1 [k2tog, k3] repeat [to] across to last st, k1 (46sts)
Row 4 – purl across
Row 5 – k1 [k2tog, k2] repeat [to] across to last st, k1 (35sts)
Row 6 – purl across
Row 7 – k1 [k2tog, k1] repeat [to] across to last st, k1 (24sts)
Row 8 – purl across
Row 9 – k1 [k2tog] repeat [to] across to last st, k1 (13sts)
Do not bind off. Cut yarn leaving appx -10ins. Pull yarn through remaining stitches and cinch the back tight. Using this end sew the crown together to your stitch markers. (I like to use the mattress stitch since it is nearly invisible).
6-12 MONTHS
Cast on 192sts.
Row 1 (wrong side) – [k1, p1] for 60sts, place marker, [k1, p1] for 72sts, place marker, [k1, p1] for the remaining 60sts.
Row 2 (right side) – knit across
Row 3 – [p1, k1] across
Row 4 – knit across
Row 5 – [k1, p1] across
Continue working rows 2-5 until your work measures appx 1in from cast on edge ending after completing a wrong side row (a row 3 or 5).
Bind off row – Bind off LOOSELY to the first marker, knit to next marker (leaving these stitches on your needle to be picked up again in the next row), bind off LOOSELY remaining stitches. In the bind off process you will remove all markers. Cut yarn.
Join yarn and continue working rows 2-5 starting with a wrong side row (row 3 or 5) until your work measures appx 5.5ins from cast on edge ending after completing a wrong side row (a row 3 or 5).
DECREASES
Row 1 – k1 [k2tog, k5] repeat [to] across to last st, k1 (62sts) Place markers on both ends of this row and leave them on this row.
Row 2 – purl across
Row 3 – k1 [k2tog, k4] repeat [to] across to last st, k1 (52sts)
Row 4 – purl across
Row 5 – k1 [k2tog, k3] repeat [to] across to last st, k1 (42sts)
Row 6 – purl across
Row 7 – k1 [k2tog, k2] repeat [to] across to last st, k1 (32sts)
Row 8 – purl across
Row 9 – k1 [k2tog, k1] repeat [to] across to last st, k1 (22sts)
Row 10 – purl across
Row 11 – k1 [k2tog] repeat [to] across to last st, k1 (12sts)
Do not bind off. Cut yarn leaving appx -10ins. Pull yarn through remaining stitches and cinch the back tight. Using this end sew the crown together to your stitch markers. (I like to use the mattress stitch since it is nearly invisible).
TODDLER
Cast on 198sts.
Row 1 (wrong side) – [k1, p1] for 60sts, place marker, [k1, p1] for 78sts, place marker, [k1, p1] for the remaining 60sts.
Row 2 (right side) – knit across
Row 3 – [p1, k1] across
Row 4 – knit across
Row 5 – [k1, p1] across
Continue working rows 2-5 until your work measures appx 1in from cast on edge ending after completing a wrong side row (a row 3 or 5).
Bind off row – Bind off LOOSELY to the first marker, knit to next marker (leaving these stitches on your needle to be picked up again in the next row), bind off LOOSELY remaining stitches. In the bind off process you will remove all markers. Cut yarn.
Join yarn and continue working rows 2-5 starting with a wrong side row (row 3 or 5) until your work measures appx 6ins from cast on edge ending after completing a wrong side row (a row 3 or 5).
DECREASES
Row 1 – [k2tog, k11] repeat [to] across to last st, k1 (72sts) Place markers on both ends of this row and leave them on this row.
Row 2 – purl across
Row 3 – k1 [k2tog, k5] repeat [to] across to last st, k1 (62sts)
Row 4 – purl across
Row 5 – k1 [k2tog, k4] repeat [to] across to last st, k1 (52sts)
Row 6 – purl across
Row 7 – k1 [k2tog, k3] repeat [to] across to last st, k1 (42sts)
Row 8 – purl across
Row 9 – k1 [k2tog, k2] repeat [to] across to last st, k1 (32sts)
Row 10 – purl across
Row 11 – k1 [k2tog, k1] repeat [to] across to last st, k1 (22sts)
Row 12 – purl across
Row 13 – k1 [k2tog] repeat [to] across to last st, k1 (12sts)
Do not bind off. Cut yarn leaving appx -10ins. Pull yarn through remaining stitches and cinch the back tight. Using this end sew the crown together to your stitch markers. (I like to use the mattress stitch since it is nearly invisible).

Aaron Bonnet PDF

Disclaimer: This page contains affiliate links. If you choose to make a purchase after clicking a link, I may receive a commission at no additional cost to you. Thank you for your support!