
This mohair lace photo prop pattern is perfect for newborn shoots! Find more photo props on my photo prop pattern page.

There’s something so satisfying about combining softness, lace, and tiny baby knits. As a mom of eight and a long-time photographer of squishy newborns, I’ve worked up more than my fair share of tiny outfits for photo shoots. But this latest mohair lace photo prop pattern might just be one of my all-time favorites.
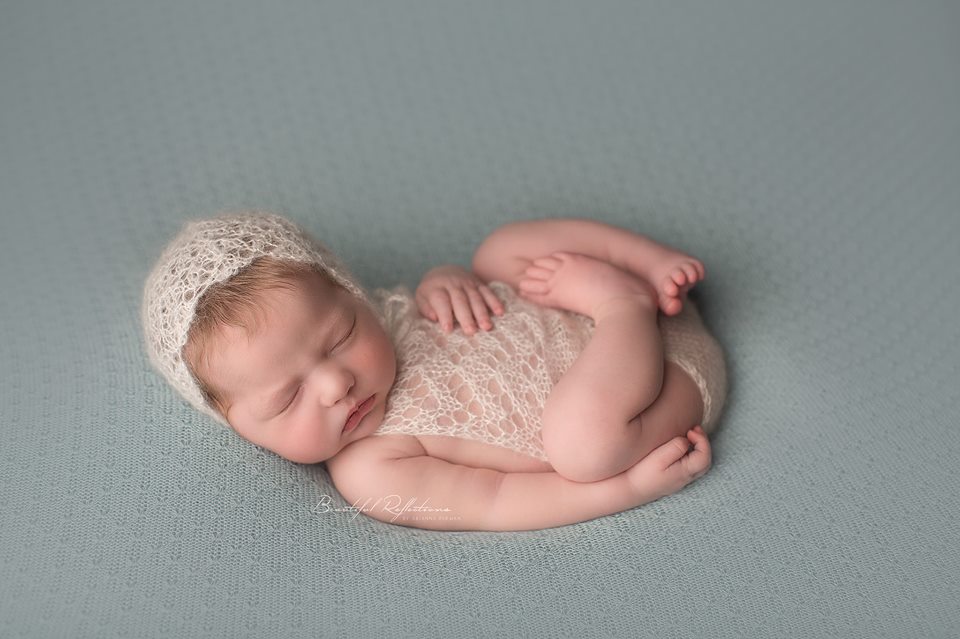
Meet the Coral Bonnet and Romper set—a sweet little duo that’s airy, elegant, and picture-perfect. I designed it specifically with newborn photography in mind, and I can’t wait to walk you through all the fun details of this mohair lace photo prop pattern.
This pattern is at the bottom of this post, but if you’re looking for more baby photo prop patterns, be sure to browse through the rest of them on this page!
The Spark Behind This Mohair Lace Photo Prop Pattern
The idea for this mohair lace photo prop pattern started as a sketch in one of my old design notebooks. I wanted something timeless—something that whispers vintage charm while still feeling modern and fresh. Lace felt like the natural choice, especially in a dainty weight.
I envisioned a set that could be dressed up or down depending on the colors used, and something that would look dreamy from every angle during a shoot. So the Coral Bonnet and Romper were born, both featuring the same graceful lacework across the face and chest.
Yarn Choice: All the Praise for Aloft
KnitPicks Aloft yarn (affiliate link) was the instant front-runner for this design. If you’ve never knit with mohair and silk before, just imagine the softest whisper of yarn that floats through your fingers. This lace-weight beauty adds that dreamy halo effect and a subtle sheen that really lets the lace do its thing.
Because this mohair lace photo prop pattern relies on texture and drape to shine, I needed a yarn that could hold up its end of the bargain. Aloft (affiliate link) absolutely delivered. It made the finished pieces feel feather-light and delicate without losing shape or structure—aka newborn photo prop gold.
Knitting the Coral Bonnet
I always like to start my sets with the bonnet, since it’s usually the photo’s focal point. A bonnet frames the baby’s face and draws attention to those fresh, soft features. For this mohair lace photo prop pattern, I worked a delicate coral-branch lace across the entire bonnet.
I cast on using a provisional method to give the back a seamless finish. And let me tell you—seeing that lace take shape row by row was so satisfying. Aloft yarn (affiliate link) worked like a dream with sharp-tipped needles, and even though it’s a fuzzy lace-weight yarn, I found it really easy to manage.
The ties are simple and soft, so you won’t have to worry about anything being scratchy or bulky under the baby’s chin.

The Matching Romper
Next came the romper, and I wanted this piece to complement the bonnet without being too matchy-matchy. The lace panel on the bib ties the two together beautifully, while the body is kept simple in stockinette so the texture doesn’t feel too overwhelming.
Like all good newborn knits, this romper is both adorable and practical. The straps are adjustable, and the ribbed leg openings gently hold the fit without digging in.
And once again, Aloft yarn (affiliate link) made the whole thing feel like luxury. The drape was just what I was after—light enough to gather softly around the legs, but structured enough to keep its shape during a photo session.
Tips for Working with Mohair Lace Yarn
If you’re new to knitting lace-weight mohair like Aloft yarn (affiliate link), here are a few things I’ve learned from hours (and hours) of baby knit time:
1. Use sharp needles.
Lace patterns involve a lot of yarn overs and decreases, and a good sharp needle helps you hit every stitch cleanly.
2. Stay relaxed with your tension.
Mohair can be a little sticky, so resist the urge to pull tight. Gentle and even wins the race here.
3. Swatch and block!
Swatching helps you get to know the yarn and the lace pattern. And blocking? Non-negotiable. It opens up all that lace and gives your mohair lace photo prop pattern its final dreamy shape.
4. Be patient.
This yarn has personality. You’ll want to take your time to avoid tangles or breakage. It’s delicate, but oh so worth it.
Why I Love This Mohair Lace Photo Prop Pattern
There’s something extra special about designing photo prop pieces. These are the kinds of things that live forever in baby books and framed nursery walls. And with the Coral Bonnet and Romper set, I knew I was creating something that would make memories—not just something pretty to post.
Every stitch in this mohair lace photo prop pattern is done with love, and there’s nothing like seeing a fresh little one swaddled up in something handmade. It’s what makes this work feel less like a job and more like a calling.
A Little Behind-the-Scenes Joy
Let’s just say my youngest model didn’t mind wearing this mohair lace photo prop pattern at all. The soft, airy texture kept her totally content during the shoot, and the delicate details really popped on camera. No fussy adjustments, no overheating—just sweet, snuggly perfection.
And I have to admit—I kept sneaking in extra photos just because I loved how the light hit that lace.
Final Thoughts on the Coral Bonnet and Romper Set
If you’ve been looking for a mohair lace photo prop pattern that feels elegant, intentional, and a joy to knit, this one’s for you. The Coral Bonnet and Romper are perfect for gifting, photography clients, or your own baby stash.
I hope this post inspires you to give lace-weight mohair a try—especially with a pattern that really makes it shine. Don’t forget, this mohair lace photo prop pattern is at the bottom of the post, and you can find tons more newborn photo prop ideas over on my pattern collection page.
Happy knitting, and happy memory-making!
Let me know in the comments if you’ve ever tried knitting with mohair—or if this is your first time diving into a mohair lace photo prop pattern! I’d love to hear how it went.

Materials and Info
Coral Bonnet
Materials: 60-150 yds of lace weight (size 0) mohair yarn (I used knitpicks aloft), size 7 (4.5mm) straight needles, yarn needle, 2 stitch markers
Gauge: 4.5sts/in ~GAUGE IS VERY IMPORTANT~
Head circumference: nb (13ins). 0-3mths (14ins), 3-6mth (15ins), 6- 12mths (16ins)
Coral Romper
Materials: 100-300yds of lace weight (size 0) yarn, size 7 (4.5mm) straight needles, 4 stitch markers, yarn needle, crochet hook (I use a 3.5mm) for ties (or if you don’t know how to crochet chain st you can always just braid the ties)
Sizes: newborn (6.5x9ins), 3-6mth (7.5×10.5ins), 6-12mths (8.5x12ins)
Gauge – 4.5sts/ins in stockinette
Gauge is very important!!!!
Stitch Key:
K – knit
P – purl
yo – yarn over
k2tog – knit 2 together
ssk – slip slip knit (slip sts purlwise)
sl – slip st knitwise
psso – pass slipped stitch over
p2tog – purl 2 together
m1 – make1
Coral Bonnet Pattern
NEWBORN
Cast on 51sts.
Row 1 – k4, [yo, ssk, k4] repeat [to] ending last repeat with k3
Row 2 – purl across
Row 3 – k1 [k1, k2tog, yo, k1, yo, ssk] repeat [to] ending with k2
Row 4 – purl across
Row 5 – k1, k2tog [yo, k3, yo, sl1, k2tog, psso] repeat [to] ending last repeat with yo, k3, yo, ssk, k1.
Row 6 – purl across
Continue working rows 1-6 until your work measures 4ins from the cast on edge ending after completing a right side row.
DECREASES
Row 1 – purl to last 3 sts, p2tog, p1 (50sts)
Place one stitch marker on either end of the row just completed.
Row 2 – k1 [k2tog, k4] repeat [to] across to last sts, k1(42sts)
Row 3 – purl across
Row 4 – k1 [k2tog, k3] repeat [to] across row (34sts)
Row 5 – purl across
Row 6 – k1 [k2tog, k2] repeat [to] across row (26sts)
Row 7 – purl across
Row 8 – k1 [k2tog, k1] repeat [to] across row (18sts)
Row 9 – p1 [p2tog] repeat [to] across to last sts, p1 (10sts)
Do not bind off. Cut yarn and pull through remaining stitches. Using this end sew the crown together to your stitch markers. (I like to use the mattress stitch since it is nearly invisible). Cut 6 pieces of yarn approximately 30ins long.
Fold them in half and pull a loop through the front corner of the hood. Pull the ends through this loop.
0-3MTH
Cast on 55sts.
Row 1 – k6, [yo, ssk, k4] repeat [to] to last sts, k1
Row 2 – purl across
Row 3 – k3 [k1, k2tog, yo, k1, yo, ssk] repeat [to] to last 4sts, k4
Row 4 – purl across
Row 5 – k3, k2tog [yo, k3, yo, sl1, k2tog, psso] repeat [to] ending last repeat
with yo, k3, yo, ssk, k3.
Row 6 – purl across
Continue working rows 1-6 until your work measures 4.5ins from the cast on edge ending after completing a right side row.
DECREASES
Row 1 – p12, p2tog, [p11, p2tog] repeat [to] 2 more times, p1 (50sts)
Place one stitch marker on either end of the row just completed.
Row 2 – k1 [k2tog, k4] repeat [to] across to last sts, k1(42sts)
Row 3 – purl across
Row 4 – k1 [k2tog, k3] repeat [to] across row (34sts)
Row 5 – purl across
Row 6 – k1 [k2tog, k2] repeat [to] across row (26sts)
Row 7 – purl across
Row 8 – k1 [k2tog, k1] repeat [to] across row (18sts)
Row 9 – p1 [p2tog] repeat [to] across to last sts, p1 (10sts)
Do not bind off. Cut yarn and pull through remaining stitches. Using this end sew the crown together to your stitch markers. (I like to use the mattress stitch since it is nearly invisible). Cut 6 pieces of yarn approximately 30ins long.
Fold them in half and pull a loop through the front corner of the hood. Pull the ends through this loop.
3-6MTH
Cast on 63sts.
Row 1 – k4, [yo, ssk, k4] repeat [to] ending last repeat with k3
Row 2 – purl across
Row 3 – k1 [k1, k2tog, yo, k1, yo, ssk] repeat [to] ending with k2
Row 4 – purl across
Row 5 – k1, k2tog [yo, k3, yo, sl1, k2tog, psso] repeat [to] ending last repeat
with yo, k3, yo, ssk, k1.
Row 6 – purl across
Continue working rows 1-6 until your work measures 5ins from the cast on edge ending after completing a right side row.
DECREASES
Row 1 – purl to last 3 sts, p2tog, p1 (62sts)
Place one stitch marker on either end of the row just completed.
Row 2 – k1 [k2tog, k4] repeat [to] across to last sts, k1(52sts)
Row 3 – purl across
Row 4 – k1 [k2tog, k3] repeat [to] across row (42sts)
Row 5 – purl across
Row 6 – k1 [k2tog, k2] repeat [to] across row (32sts)
Row 7 – purl across
Row 8 – k1 [k2tog, k1] repeat [to] across row (22sts)
Row 9 – p1 [p2tog] repeat [to] across to last sts, p1 (12sts)
Do not bind off. Cut yarn and pull through remaining stitches. Using this end sew the crown together to your stitch markers. (I like to use the mattress stitch since it is nearly invisible). Cut 6 pieces of yarn approximately 30ins long.
Fold them in half and pull a loop through the front corner of the hood. Pull the ends through this loop.
6-12MTH
Cast on 69sts.
Row 1 – k4, [yo, ssk, k4] repeat [to] ending last repeat with k3
Row 2 – purl across
Row 3 – k1 [k1, k2tog, yo, k1, yo, ssk] repeat [to] ending with k2
Row 4 – purl across
Row 5 – k1, k2tog [yo, k3, yo, sl1, k2tog, psso] repeat [to] ending last repeat
with yo, k3, yo, ssk, k1.
Row 6 – purl across
Continue working rows 1-6 until your work measures 5.5ins from the cast on edge ending after completing a right side row.
DECREASES
Row 1 – purl to last 3 sts, p2tog, p1 (68sts)
Place one stitch marker on either end of the row just completed.
Row 2 – k1 [k2tog, k4] repeat [to] across to last sts, k1(57sts)
Row 3 – purl across
Row 4 – k1 [k2tog, k3] repeat [to] across row (46sts)
Row 5 – purl across
Row 6 – k1 [k2tog, k2] repeat [to] across row (35sts)
Row 7 – purl across
Row 8 – k1 [k2tog, k1] repeat [to] across row (24sts)
Row 9 – p1 [p2tog] repeat [to] across to last sts, p1 (13sts)
Do not bind off. Cut yarn and pull through remaining stitches. Using this end sew the crown together to your stitch markers. (I like to use the mattress stitch since it is nearly invisible). Cut 6 pieces of yarn approximately 30ins long.
Fold them in half and pull a loop through the front corner of the hood. Pull the ends through this loop.
Coral Romper Pattern
NEWBORN
For a picture of how your work will look when complete before seams are sewn see the end of the pattern.
Bottom
Cast on 32 sts.
Work in stockinette st for 2.5ins starting with a knit row and ending after completing a purl row.
Place 1 marker on each end of the end row.
Decrease rows
Row 1 – k1, ssk, k26, k2tog, k1 (30sts)
Row 2 (and all following wrong side rows) – purl
Row 3 – k1, ssk, k24, k2tog, k1 (28sts)
Row 5 – k1, ssk, k22, k2tog, k1 (26sts)
Row 7 – k1, ssk, k20, k2tog, k1 (24sts)
Row 9 – k1, ssk, k18, k2tog, k1 (22sts)
Row 11 – k1, ssk, k16, k2tog, k1 (20sts)
Row 13 – k1, ssk, k14, k2tog, k1 (18sts)
Work 11 rows in stockinette st starting and ending with a purl row.
Increase rows
Row 25 – k1, m1, k16, m1, k1 (20sts)
Row 26 (and all following wrong side rows) – purl
Row 27 – k1, m1, k18, m1, k1 (22sts)
Row 29 – k1, m1, k20, m1, k1 (24sts)
Row 31 – k1, m1, k22, m1, k1 (26sts)
Row 33 – k1, m1, k24, m1, k1 (28sts)
Row 35 – k1, m1, k26, m1, k1 (30sts)
Row 37 – k1, m1, k28, m1, k1 (32sts)
Place 1 marker on each end of the end row.
Work in stockinette st for 2.5ins starting with a purl row and ending after completing a purl row. Do not bind off.
Bib
Row 1 – Bind off 5sts, k3, yo, ssk, k4, yo, ssk, k4, yo, ssk, k9 (27sts)
Row 2 – Bind off 6sts, purl across (21sts)
Row 3 – k1 (k1, k2tog, yo, k1, yo, ssk) Repeat (to) across to last 2sts, k2
Row 4 (and all following wrong side rows) – purl
Row 5 – k1, k2tog (yo, k3, yo, sl1, k2tog, psso) Repeat (to) across working the final repeat as yo, k3, yo, ssk, k1
Row 7 – (k4, yo, ssk) Repeat (to) across to last 3sts, k3
Repeat rows 3-8 until your work measures 3.5ins ending after completing a purl row.
Bind off. Sew side seams. Weave in ends. Now either cut 3 strand of yarn appx 30ins long. Fold them in half and pull a loop through the front corner of the hood. Pull the ends through this loop and braid. Repeat on the other side. OR using your crochet hook, chain st for appx 9-10 ins then chain st across the top of the bib then chain st a further 9-10ins. Finish off. Lightly block your work. For blocking instructions see the end of the pattern.
3-6 MONTHS
For a picture of how your work will look when complete before seams are sewn see the end of the pattern.
Bottom
Cast on 36 sts.
Work in stockinette st for 3ins starting with a knit row and ending after completing a purl row.
Place 1 marker on each end of the end row.
Decrease rows
Row 1 – k1, ssk, k30, k2tog, k1 (34sts)
Row 2 (and all following wrong side rows) – purl
Row 3 – k1, ssk, k28, k2tog, k1 (32sts)
Row 5 – k1, ssk, k26, k2tog, k1 (30sts)
Row 7 – k1, ssk, k24, k2tog, k1 (28sts)
Row 9 – k1, ssk, k22, k2tog, k1 (26sts)
Row 11 – k1, ssk, k20, k2tog, k1 (24sts)
Row 13 – k1, ssk, k18, k2tog, k1 (22sts)
Row 15 – k1, ssk, k16, k2tog, k1 (20sts)
Work 11 rows in stockinette st starting and ending with a purl row.
Increase rows
Row 27 – k1, m1, k18, m1, k1 (22sts)
Row 26 (and all following wrong side rows) – purl
Row 29 – k1, m1, k20, m1, k1 (24sts)
Row 31 – k1, m1, k22, m1, k1 (26sts)
Row 33 – k1, m1, k24, m1, k1 (28sts)
Row 35 – k1, m1, k26, m1, k1 (30sts)
Row 37 – k1, m1, k28, m1, k1 (32sts)
Row 39 – k1, m1, k30, m1, k1 (34sts)
Row 40 – k1, m1, k32, m1, k1 (36sts)
Place 1 marker on each end of the end row.
Work in stockinette st for 3ins starting with a purl row and ending after completing a purl row. Do not bind off.
Bib
Row 1 – Bind off 5sts, k5, yo, ssk, k4, yo, ssk, k4, yo, ssk, k11 (31sts)
Row 2 – Bind off 6sts, purl across (25sts)
Row 3 – k3 (k1, k2tog, yo, k1, yo, ssk) Repeat (to) across to last 4sts, k4
Row 4 (and all following wrong side rows) – purl
Row 5 – k3, k2tog (yo, k3, yo, sl1, k2tog, psso) Repeat (to) across working the final repeat as yo, k3, yo, ssk, k3
Row 7 – k2(k4, yo, ssk) Repeat (to) across to last 5sts, k5
Repeat rows 3-8 until your work measures 4ins ending after completing a purl row.
Bind off. Sew side seams. Weave in ends. Now either cut 3 strand of yarn appx 30ins long. Fold them in half and pull a loop through the front corner of the hood. Pull the ends through this loop and braid. Repeat on the other side. OR using your crochet hook, chain st for appx 9-10 ins then chain st across the top of the bib then chain st a further 9-10ins. Finish off. Lightly block your work. For blocking instructions see the end of the pattern.
6-12 MONTHS
For a picture of how your work will look when complete before seams are sewn see
the end of the pattern.
Bottom
Cast on 40 sts.
Work in stockinette st for 3.5ins starting with a knit row and ending after completing a purl row.
Place 1 marker on each end of the end row.
Decrease rows
Row 1 – k1, ssk, k34, k2tog, k1 (38sts)
Row 2 (and all following wrong side rows) – purl
Row 3 – k1, ssk, k32, k2tog, k1 (36sts)
Row 5 – k1, ssk, k30, k2tog, k1 (34sts)
Row 7 – k1, ssk, k28, k2tog, k1 (32sts)
Row 9 – k1, ssk, k26, k2tog, k1 (30sts)
Row 11 – k1, ssk, k24, k2tog, k1 (28sts)
Row 13 – k1, ssk, k22, k2tog, k1 (26sts)
Row 15 – k1, ssk, k20, k2tog, k1 (24sts)
Row 17 – k1, ssk, k18, k2tog, k1 (22sts)
Work 13 rows in stockinette st starting and ending with a purl row.
Increase rows
Row 31 – k1, m1, k20, m1, k1 (24sts)
Row 32 (and all following wrong side rows) – purl
Row 33 – k1, m1, k22, m1, k1 (26sts)
Row 35 – k1, m1, k24, m1, k1 (28sts)
Row 37 – k1, m1, k26, m1, k1 (30sts)
Row 39 – k1, m1, k28, m1, k1 (32sts)
Row 41 – k1, m1, k30, m1, k1 (34sts)
Row 43 – k1, m1, k32, m1, k1 (36sts)
Row 45 – k1, m1, k34, m1, k1 (38sts)
Row 47 – k1, m1, k36, m1, k1 (40sts)
Place 1 marker on each end of the end row.
Work in stockinette st for 3.5ins starting with a purl row and ending after completing a purl row. Do not bind off.
Bib
Row 1 – Bind off 6sts, k3, yo, (ssk, k4, yo) repeat (to) 2 more times, k11 (34sts)
Row 2 – Bind off 7sts, purl across (27sts)
Row 3 – k1 (k1, k2tog, yo, k1, yo, ssk) Repeat (to) across to last 2sts, k2
Row 4 (and all following wrong side rows) – purl
Row 5 – k1, k2tog (yo, k3, yo, sl1, k2tog, psso) Repeat (to) across working the final repeat as yo, k3, yo, ssk, k1
Row 7 – (k4, yo, ssk) Repeat (to) across to last 3sts, k3
Repeat rows 3-8 until your work measures 4.5ins ending after completing a purl row.
Bind off. Sew side seams. Weave in ends. Now either cut 3 strand of yarn appx 30ins long. Fold them in half and pull a loop through the front corner of the hood. Pull the ends through this loop and braid. Repeat on the other side. OR using your crochet hook, chain st for appx 9-10 ins then chain st across the top of the bib then chain st a further 9-10ins. Finish off. Lightly block your work. For blocking instructions see the end of the pattern.

Coral Bonnet and Romper PDFs
Disclaimer: This page contains affiliate links. If you choose to make a purchase after clicking a link, I may receive a commission at no additional cost to you. Thank you for your support!