
Looking for the sweetest free onesie knitting pattern? if you love this pattern check out all of our free photo prop patterns here on my blog!

Why I Created This Free Onesie Knitting Pattern
As someone who’s always on the lookout for adorable knitting projects, I absolutely love creating unique pieces—especially when babies are involved! There’s just something irresistible about knitting tiny clothing, isn’t there? That’s exactly why I’m thrilled to share this free onesie knitting pattern with you!
I’m all about combining style with functionality, and let’s face it, tiny humans deserve to look adorable and feel comfy at the same time! This free onesie knitting pattern gives you exactly that: a cute, practical, and photo-ready hooded bodysuit that’s perfect for those precious newborn photo sessions.
Why You’ll Love This Free Onesie Knitting Pattern
Trust me; I’ve tried plenty of baby knitting patterns, and this one is extra special. The raglan-style sleeves give it a trendy and stylish look that’s still timeless enough for your baby albums. Plus, the hood adds just the right amount of cozy cuteness! It’s like wrapping your favorite tiny person in a warm hug made from yarn. Could anything be sweeter?
And did I mention it’s a free onesie knitting pattern? (You knew that, but I love saying it again anyway!) It’s perfect for knitters at every skill level—from seasoned pros to brand-new knitters who might still be untangling yarn. No judgment here, friend! I’ve been there, done that, and got the yarn knots to prove it.
Choosing the Perfect Yarn for Your Free Onesie Knitting Pattern
Choosing yarn for this project was honestly half the fun! For this free onesie knitting pattern, I picked my absolute favorite: KnitPicks Wonderfluff (affiliate link). If you’ve never worked with KnitPicks Wonderfluff (affiliate link) before, you’re in for a treat! It’s fluffy, soft, and dreamy—exactly what you want touching that delicate newborn skin. Plus, it knits up quickly and creates a delightfully plush fabric, which is perfect for a cozy onesie.
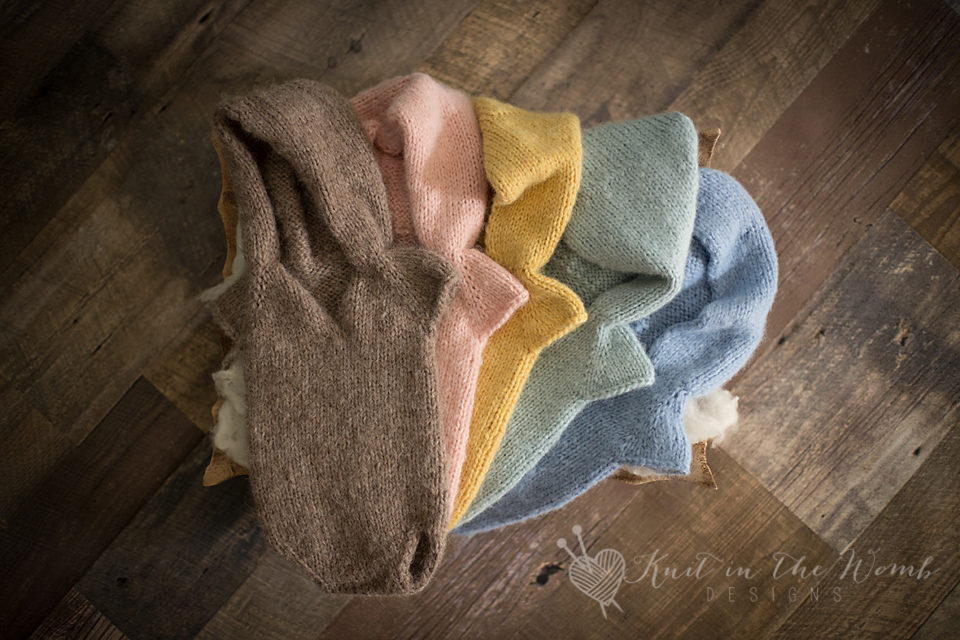
Feel free to get creative with colors too. The beauty of this free onesie knitting pattern is that it looks amazing whether you pick soft pastels, classic neutrals, or vibrant jewel tones. Imagine capturing a newborn’s sweet sleepy expressions while wrapped in your handmade masterpiece!
By the way, whenever you purchase KnitPicks Wonderfluff (affiliate link) using the links I provide, I receive a small commission. It doesn’t cost you extra, but it helps me keep offering patterns like this one totally free for you. It’s a win-win!
Easy-to-Follow Steps Make This Free Onesie Knitting Pattern Fun
One of the reasons I’m obsessed with knitting baby items is because you can finish them quickly, which gives you that oh-so-satisfying feeling of accomplishment. And trust me, you’ll get that feeling when knitting this free onesie knitting pattern. It includes clear step-by-step instructions, making it super simple even if you haven’t knitted a onesie before.
No more getting lost in complicated pattern jargon! This free onesie knitting pattern is beginner-friendly and fun enough for advanced knitters who just want a relaxing knit. Knit it up while binge-watching your favorite series—I promise, no one’s judging!
Perfect as a Photo Prop or Thoughtful Gift
I initially designed this free onesie knitting pattern because photographers kept asking me for adorable and comfortable photo props. And honestly, what’s cuter than a tiny human bundled up in a hand-knit bodysuit? Whether you run your own newborn photography business or you’re knitting for friends and family, this bodysuit will be an instant favorite.
Handmade gifts always have that extra special touch, and imagine gifting someone this delightful knitted onesie! They’ll cherish it forever—and you’ll be everyone’s favorite gift-giver. Not bad, right?
Why a Raglan Design in This Free Onesie Knitting Pattern?
I specifically chose a raglan style for this free onesie knitting pattern because it fits comfortably on babies without restricting their movement. Plus, raglan sleeves are genuinely adorable and give your knitwear a professional finish. The seamless look and gentle fit make it perfect for newborn photo sessions where comfort matters most.
Knit It in KnitPicks Wonderfluff (affiliate link)—You Won’t Regret It!
I can’t stress enough how delightful KnitPicks Wonderfluff (affiliate link) is to knit with. Not only does it work up beautifully, but it’s also lightweight and incredibly warm, making it ideal for newborn photography props. Plus, I love the slight halo effect this yarn has—it adds an extra level of softness and depth to your finished piece.
If you’re as enthusiastic about yarn as I am, you already know that the quality of the yarn can really make your project shine. Trust me, KnitPicks Wonderfluff (affiliate link) makes this free onesie knitting pattern truly stand out. (Your camera will thank you later!)
Grab Your Needles and Start Knitting Today!
Are you excited yet? Good! Grab your favorite needles, your yarn—preferably KnitPicks Wonderfluff (affiliate link)—and settle in for some joyful knitting time. I’m positive you’ll love how quickly this free onesie knitting pattern knits up and how rewarding it feels when you see your tiny masterpiece come to life.
If you enjoyed this free onesie knitting pattern, I’d love to see your finished creations! Share your photos with me on Instagram or Pinterest—I can’t wait to see how creative you get with your colors and styling.
Ready, set, knit! (And don’t forget to bookmark this page for later!)
Final Thoughts on this Free Onesie Knitting Pattern
Thanks for hanging out with me today! I love sharing my patterns and passion for knitting, and this free onesie knitting pattern is definitely one of my favorites. Remember, handmade is always made with love, and your knitted onesie will undoubtedly bring smiles (and adorable photos!) for years to come.
Happy knitting!

Materials and Info
Materials – 160-220yds of Knitpicks Wonderfluff, size 7 (4.5mm) 16ins circular needles, 4 stitch markers, yarn needle, crochet hook (for provisional cast on)
Gauge – 4sts/in GAUGE IS VERY, VERY IMPORTANT
SIZES – newborn – appx 13-14ins across, 11-12ins long, sitter – appx 16-17ins across, 13-14ins long
(hood not included in finished measurements)
Hooded Raglan Onesie is a top down raglan, the hood is added after the body is completed.

Hooded Raglan Bodysuit Pattern
NEWBORN
YOKE
Provisional cast on 28sts on your circular needle
Set up row – p4, place marker, p4, place marker, p12, place marker, p4, place marker, p4
Row 1 – [k1, m1, k to 1 st before next marker, m1, k1, slm] repeat [to] across to last marker then k1, m1, k to 1 st before end, m1, k1 (38sts)
Row 2 – purl across
Repeat rows 1 and 2 3 times more (68sts)
Row 9 – [k to 1 st before next marker, m1, k1, slm, k1, m1] repeat [to] across to last marker, knit remaining sts (76sts)
Row 10 – purl across
Repeat rows 9 and 10 3 more times (100sts)
SEPARATE SLEEVES AND JOIN IN THE ROUND
Row 1 – k16, bind off loosely 20sts, k28, bind of loosely 20sts, k12 removing all markers as you work this row (60sts)
Place the remaining 4 sts of the row on a spare needle. You will now start working in the round. Place the remaining 4 stitches on your needle from the previous row in front of the first 4 sts of the row stacking them so you can knit them together (making sure the right side is facing you. Remember we are joining in the round so make sure there is no twist in your work.) Now knit the 1 st of the remaining sts together with the first st of the row. Do this 3 more times. (a tutorial for this will be at the end if you are in need of photos) (56sts)
BODY
Knit across to 2st before the first of the bound off sleeve stitches, place a marker (this is now the beginning of your round), k1, k2tog, knit to 1 st before bound off sleeve sts, k2tog, k1 place marker (54sts)
Work in stockinette st for appx 6.5ins
SEPARATE LEGS
Starting at your beginning of round marker you will now start working flat again:
Row 1 – k1, ssk, k24, k2tog, k1 (28sts) keep the remaining front stitches on a stitch holder. Turn work.
Row 2 – purl across
Row 3 – k1, ssk, k22, k2tog, k1 (26sts)
Row 4 – purl across
Row 5 – k1, ssk, k20, k2tog, k1 (24sts)
Row 6 – purl across
Row 7 – k1, ssk, k18, k2tog, k1 (22sts)
Row 8 – purl across
Row 9 – k1, ssk, k16, k2tog, k1 (20sts)
Row 10 – purl across
Row 11 – k1, ssk, k14, k2tog, k1 (18sts)
Row 12 – purl across
Row 13 – k1, ssk, k12, k2tog, k1 (16sts)
Row 14 – purl across
Row 15 – k1, ssk, k10, k2tog, k1 (14sts)
Row 16 – purl across
Row 17 – knit across
Leave the remaining 15sts on a stitch holder. Pick up the 24 sts for the front. Start work with right side facing.
Row 1 – k1, ssk, k18, k2tog, k1 (22sts)
Row 2 – purl across
Row 3 – k1, ssk, k16, k2tog, k1 (20sts)
Row 4 – purl across
Row 5 – k1, ssk, k14, k2tog, k1 (18sts)
Row 6 – purl across
Row 7 – k1, ssk, k12, k2tog, k1 (16sts)
Row 8 – purl across
Row 9 – k1, ssk, k10, k2tog, k1 (14sts)
Row 10 – purl across
Row 11 – knit across
Now you will kitchener st the front and back leg opening pieces together (making sure wrong sides are facing each other).
HOOD
Pick up the neck sts being held by your provisional cast on.
Inc row – [k1, m1] across to last st, k1 (55sts)
If you want your hood to have a pixie like point than you will work in stockinette st for 6.5 ins from the neck then move on to closing the hood. If you would like your hood to have a more rounded back than you will work to 5ins and shape as following:
Row 1 – k25, ssk, k1, k2tog, k25 (53sts)
Row 2 – purl across
Row 3 – k24, ssk, k1, k2tog, k24 (51sts)
Row 4 – purl across
Continue decreasing in this manner until your hood measures 6.5 ins from the neck.
To close the hood: split your stitches into two equal parts (understanding that there is one extra that will be worked in at the end). Fold the halves wrong sides together and Kitchener stitch the top of the hood closed.
Weave in all your ends and block to finish your bodysuit.

SITTER
YOKE
Provisional cast on 42sts on your circular needle
Set up row – p6, place marker, p6, place marker, p18, place marker, p6, place marker, p6
Row 1 – [k1, m1, k to 1 st before next marker, m1, k1, slm] repeat [to] across to last marker then k1, m1, k to 1 st before end, m1, k1 (52sts)
Row 2 – purl across
Repeat rows 1 and 2 3 times more (82sts)
Row 9 – [k to 1 st before next marker, m1, k1, slm, k1, m1] repeat [to] across to last marker, knit remaining sts (90sts)
Row 10 – purl across
Repeat rows 9 and 10 4 more times (122sts)
SEPARATE SLEEVES AND JOIN IN THE ROUND
Row 1 – k19, bind off loosely 24sts, k36, bind of loosely 24sts, k15 removing all markers as you work this row (74sts)
Leaving the remaining 4 sts of the row on your needle. You will now start working in the round. Place the remaining 4 stitches on your needle from the previous row in front of the first 4 sts of the row stacking them so you can knit them together (making sure the right side is facing you. Remember we are joining in the round so make sure there is no twist in your work.) Now knit the 1 st of the remaining sts together with the first st of the row. Do this 3 more times. (a tutorial for this will be at the end if you are in need of photos) (70sts)
BODY
Knit across to 2sts before the first of the bound off sleeve stitches, place a marker (this is now the beginning of your round), k1, k2tog (one stitch from either side of the bound of sleeve), knit to 1 st before bound off sleeve sts, k2tog, k1 place marker.
(68sts)
Work in stockinette st for appx 8ins
SEPARATE LEGS
Starting at your beginning of round marker you will now start working flat again:
Row 1 – k1, ssk, k30, k2tog, k1 (34sts) keep the remaining front stitches on a stitch holder. Turn work.
Row 2 – purl across, turn
Row 3 – k1, ssk, k28, k2tog, k1 (32sts)
Row 4 – purl across
Row 5 – k1, ssk, k26, k2tog, k1 (30sts)
Row 6 – purl across
Row 7 – k1, ssk, k24, k2tog, k1 (28sts)
Row 8 – purl across
Row 9 – k1, ssk, k22, k2tog, k1 (26sts)
Row 10 – purl across
Row 11 – k1, ssk, k20, k2tog, k1 (24sts)
Row 12 – purl across
Row 13 – k1, ssk, k18, k2tog, k1 (22sts)
Row 14 – purl across
Row 15 – k1, ssk, k16, k2tog, k1 (20sts)
Row 16 – purl across
Row 17 – k1, ssk, k14, k2tog, k1 (18sts)
Row 18- purl across
Row 19 – knit across
Leave the remaining 18sts on a stitch holder. Pick up the 32sts for the front. Start work with right side facing.
Row 1 – k1, ssk, k26, k2tog, k1 (30sts)
Row 2 – purl across
Row 3 – k1, ssk, k24, k2tog, k1 (28sts)
Row 4 – purl across
Row 5 – k1, ssk, k22, k2tog, k1 (26sts)
Row 6 – purl across
Row 7 – k1, ssk, k20, k2tog, k1 (24sts)
Row 8 – purl across
Row 9 – k1, ssk, k18, k2tog, k1 (22sts)
Row 10 – purl across
Row 11 – k1, ssk, k16, k2tog, k1 (20sts)
Row 12 – purl across
Row 13 – k1, ssk, k14, k2tog, k1 (18sts)
Row 14- purl across
Row 15 – knit across
Now you will kitchener st the front and back leg opening pieces together (making sure wrong sides are facing each other).
HOOD
Pick up the neck sts being held by your provisional cast on.
Inc row – [k1, m1, k] across (63sts)
Purl across
Inc row – k3, m1, k6, m1,k45, m1, k6, m1, k3 (67sts)
If you want your hood to have a pixie like point than you will work in stockinette st for 8 ins from the neck then move on to closing the hood. If you would like your hood to have a more rounded back than you will work to 6.5ins and shape as following:
Row 1 – k31, ssk, k1, k2tog, k31 (65sts)
Row 2 – purl across
Row 3 – k30, ssk, k1, k2tog, k30 (63sts)
Row 4 – purl across
Continue decreasing in this manner until your hood measures 8 ins from the neck.
To close the hood: split your stitches into two equal parts (understanding that there is on extra that will be worked in at the end). Fold the halves wrong sides together and Kitchener stitch the top of the hood closed.
Weave in all your ends and block to finish your bodysuit.

Abbreviations and Tutorials
JOINING IN THE ROUND
Place the remaining 4 sts of the row on a spare needle. You will now start working in the round. Place the remaining 4 stitches on your needle from the previous row in front of the first 4 sts of the row stacking them so you can knit them together (making sure the right side is facing you. Remember we are joining in the round so make sure there is no twist in your work.) Now knit the 1 st of the remaining sts together with the first st of the row. Do this 3 more times. Now your work is joined in the round with a 4 stitch overlap.
Left Handed

Right Handed

Stitch key
K – knit
p – purl
St – stitch
slm – slip marker
K2tog – knit 2 together
m1 – make one
ssk – slip one st, slip one st, knit them both together
Download Raglan Hooded Bodysuit PDF

If you loved this pattern, check out all of our other free photography prop patterns here.
Disclaimer: This page contains affiliate links. If you choose to make a purchase after clicking a link, I may receive a commission at no additional cost to you. Thank you for your support!