
This mohair photo prop pattern will level up your newborn photography! Check out even more adorable patterns on my free photo prop pattern page.

I absolutely love newborn photography! There’s nothing sweeter than capturing those first days when a baby is tiny, sleepy, and just oh-so-perfect. I’m a huge fan of adding special touches to newborn shoots, and the right prop makes all the difference. That’s why today I’m sharing one of my absolute favorites: a mohair photo prop pattern called the Tyler Bonnet. If you’re already sold and looking for more sweet photo prop ideas, I have plenty waiting for you on my free photo prop pattern page. But stick around, because THIS mohair photo prop pattern is waiting for you right at the bottom of this post!

Why You Need a Mohair Photo Prop Pattern
Mohair is seriously dreamy—it’s soft, delicate, and perfect for babies. If you’ve never worked with mohair, let me tell you, it’s an experience. This beautiful fiber comes from the Angora goat and gives off a gentle, fuzzy glow that photographs like a dream. It’s exactly what you want for a newborn shoot because it’s both comfortable and elegant.
When choosing yarn for my bonnets, I went straight for KnitPicks Aloft (affiliate link). It’s soft, fluffy, and captures the delicate feel needed for newborn props. KnitPicks Aloft (affiliate link) is available in plenty of beautiful shades, making this mohair photo prop pattern versatile enough to suit any photography style or theme.

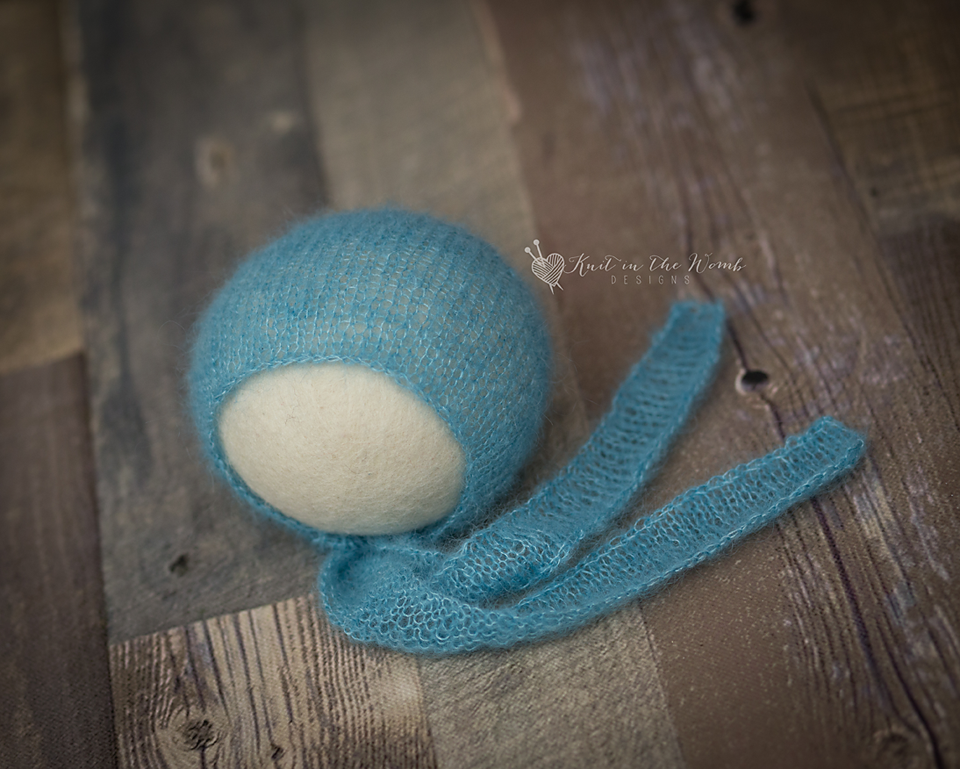
Why the Tyler Bonnet is the Perfect Mohair Photo Prop Pattern
The Tyler Bonnet isn’t just any bonnet—it’s a newborn photography game-changer. I designed this mohair photo prop pattern specifically for newborn heads, ensuring a snug, adorable fit every time. Plus, its simple construction makes the delicate texture of mohair truly shine.
Here are some reasons you’ll fall in love with this mohair photo prop pattern:
Timeless Aesthetic
This bonnet never goes out of style, making it an essential staple in your prop stash. Whether your photography style is vintage-inspired, modern minimalist, or classic elegance, the Tyler Bonnet complements it all.
Easy to Knit
New to knitting? No worries! This mohair photo prop pattern is super beginner-friendly. With basic knitting skills, you’ll whip up this adorable bonnet in no time. Trust me—you’ll feel like a knitting superstar.
Versatile Styling
The Tyler Bonnet pairs effortlessly with all sorts of baby outfits, wraps, and backgrounds. You can easily change the look from dreamy and soft to vibrant and whimsical. One mohair photo prop pattern, endless possibilities!

How to Get Stunning Photos with Your Mohair Photo Prop Pattern
Alright, so you’ve knit the bonnet—now what? Here are my favorite tips to showcase the beauty of this mohair photo prop pattern in your newborn photoshoots.
Coordinate Outfits Thoughtfully
Pair the bonnet with simple, muted, or pastel-colored outfits. You want this mohair bonnet to stand out, not compete with busy prints. Soft neutrals, blush pinks, creams, and dusty blues complement mohair beautifully.
Go for Soft, Natural Lighting
Lighting makes all the difference. To capture the delicate fuzziness of mohair, use gentle, diffused natural lighting. Harsh lights can wash out the soft textures. A soft glow highlights why mohair is such a beloved fiber for newborn props.
Pose with Care and Comfort
Always prioritize the baby’s comfort! Gentle poses that highlight the bonnet’s details are perfect. Close-ups showcasing those squishy cheeks framed by this sweet mohair photo prop pattern are a guaranteed heart-melter.
Enhance with Subtle Props
Adding a few well-chosen props can elevate your photos. Think soft blankets, woven baskets, or rustic wooden crates. Floral elements can add a sweet, natural vibe without distracting from the elegance of your mohair bonnet.

Knitting Your Own Mohair Photo Prop Pattern
Ready to get knitting? While the full pattern instructions are waiting for you at the bottom of this post, you’ll need to gather your supplies first. I recommend using KnitPicks Aloft (affiliate link) for its softness, fluffy texture, and ease of knitting. KnitPicks Aloft (affiliate link) creates just the right ethereal look that makes this bonnet a stunning addition to your photo prop collection.
Grab your yarn, needles, and favorite knitting spot, and dive in. Knitting this mohair photo prop pattern is super satisfying and relaxing—and knowing it’ll become part of a family’s cherished memories makes every stitch feel special.

Why You’ll Love KnitPicks Aloft for Your Mohair Photo Prop Pattern
I can’t stop gushing about KnitPicks Aloft (affiliate link). This yarn is a dream to work with and perfect for newborn props. It’s lightweight, breathable, and ideal for delicate skin. The subtle halo of KnitPicks Aloft (affiliate link) photographs incredibly well, bringing out every tiny stitch beautifully.
Plus, KnitPicks Aloft (affiliate link) offers a variety of lovely shades, from whisper-soft neutrals to playful pastels. Picking your favorite color might actually be the hardest part of making this bonnet!

Final Thoughts on This Sweet Mohair Photo Prop Pattern
The Tyler Bonnet isn’t just another knitting project—it’s something special you’ll adore creating. Whether you’re a photographer looking to enhance your props or a proud mama knitting your own heirlooms, this mohair photo prop pattern is a must-try.
Newborns grow up way too quickly, and capturing those precious first weeks beautifully is so important. A hand-knit bonnet adds that personal, special touch parents cherish forever. The Tyler Bonnet is more than just a pretty accessory; it’s a keepsake filled with love and thoughtful details.
Ready to knit your own adorable bonnet? Great! Remember, THIS mohair photo prop pattern is right at the bottom of this post. But if you’re craving more cute newborn props, my free photo prop pattern page is just a click away.
Happy knitting, friends! Can’t wait to see your creations.

Materials and Info
Materials: 80-200 yds of lace weight (size 0) mohair yarn (I used knitpicks aloft), size 7 (4.5mm) straight needles, yarn needle, 2 stitch markers
Gauge: 5sts/in ~GAUGE IS VERY IMPORTANT~
Abbreviation Key:
K – knit
P – purl
k2tog – knit 2 together
Head circumference: nb (13ins). 0-3mths (14ins), 3-6mth (15ins), 6- 12mths (16ins)

Tyler Bonnet Pattern
NEWBORN
Cast on 158sts.
Work 7 rows in stockinette st (knit the right side, purl the wrong side) starting with a purl row.
Bind off loosely 54sts, knit 50sts, bind off loosely 54sts. cut yarn and finish off.
Starting on a purl row, pick up the center 50sts. Work in stockinette st until your work measures appx 4ins from cast on edge ending after completing a purl row. Place a stitch maker at either end of the last row worked.
DECREASES
Row 1 – k1 (k2tog, k4) repeat (to) across to last st, k1 (42sts)
Row 2 – purl across
Row 3 – k1 (k2tog, k3) repeat (to) across to last st, k1 (34ts)
Row 4 – purl across
Row 5 – k1 (k2tog, k2) repeat (to) across to last st, k1 (26sts)
Row 6 – purl across
Row 7 – k1 (k2tog, k1) repeat (to) across to last st, k1 (18sts)
Row 8 – purl across
Row 9 – k1 (k2tog) repeat (to) across to last st, k1 (10sts)
Do not bind off.
Cut yarn leaving appx 12ins and pull through remaining stitches. Using this end sew the crown together to your stitch markers. (I like to use the mattress stitch since it is nearly invisible). Weave in all ends.

0-3 MONTHS
Cast on 164sts.
Work 7 rows in stockinette st (knit the right side, purl the wrong side) starting with a purl row.
Bind off loosely 54sts, knit 56sts, bind off loosely 54sts. cut yarn and finish off.
Starting on a purl row, pick up the center 56sts. Work in stockinette st until your work measures appx 4.5ins from cast on edge ending after completing a purl row.
Place a stitch maker at either end of the last row worked.
DECREASES
Row 1 – k1 (k2tog, k4) repeat (to) across to last st, k1 (47sts)
Row 2 – purl across
Row 3 – k1 (k2tog, k3) repeat (to) across to last st, k1 (38sts)
Row 4 – purl across
Row 5 – k1 (k2tog, k2) repeat (to) across to last st, k1 (29sts)
Row 6 – purl across
Row 7 – k1 (k2tog, k1) repeat (to) across to last st, k1 (20sts)
Row 8 – purl across
Row 9 – k1 (k2tog) repeat (to) across to last st, k1 (11sts)
Do not bind off.
Cut yarn leaving appx 12ins and pull through remaining stitches. Using this end sew the crown together to your stitch markers. (I like to use the mattress stitch since it is nearly invisible). Weave in all ends.

3-6 MONTHS
Cast on 170sts.
Work 7 rows in stockinette st (knit the right side, purl the wrong side) starting with a purl row.
Bind off loosely 54sts, knit 62sts, bind off loosely 54sts. cut yarn and finish off.
Starting on a purl row, pick up the center 62sts. Work in stockinette st until your work measures appx 5ins from cast on edge ending after completing a purl row. Place a stitch maker at either end of the last row worked.
DECREASES
Row 1 – k1 (k2tog, k4) repeat (to) across to last st, k1 (52sts)
Row 2 – purl across
Row 3 – k1 (k2tog, k3) repeat (to) across to last st, k1 (42sts)
Row 4 – purl across
Row 5 – k1 (k2tog, k2) repeat (to) across to last st, k1 (32sts)
Row 6 – purl across
Row 7 – k1 (k2tog, k1) repeat (to) across to last st, k1 (22sts)
Row 8 – purl across
Row 9 – k1 (k2tog) repeat (to) across to last st, k1 (12sts)
Do not bind off.
Cut yarn leaving appx 12ins and pull through remaining stitches. Using this end sew the crown together to your stitch markers. (I like to use the mattress stitch since it is nearly invisible). Weave in all ends.

6-12 MONTHS
Cast on 176sts.
Work 7 rows in stockinette st (knit the right side, purl the wrong side) starting with a purl row.
Bind off loosely 54sts, knit 68sts, bind off loosely 54sts. cut yarn and finish off.
Starting on a purl row, pick up the center 68sts. Work in stockinette st until your work measures appx 5.5ins from cast on edge ending after completing a purl row.
Place a stitch maker at either end of the last row worked.
DECREASES
Row 1 – k1 (k2tog, k4) repeat (to) across to last st, k1 (57sts)
Row 2 – purl across
Row 3 – k1 (k2tog, k3) repeat (to) across to last st, k1 (46sts)
Row 4 – purl across
Row 5 – k1 (k2tog, k2) repeat (to) across to last st, k1 (35sts)
Row 6 – purl across
Row 7 – k1 (k2tog, k1) repeat (to) across to last st, k1 (24sts)
Row 8 – purl across
Row 9 – k1 (k2tog) repeat (to) across to last st, k1 (13sts)
Do not bind off.
Cut yarn leaving appx 12ins and pull through remaining stitches. Using this end sew the crown together to your stitch markers. (I like to use the mattress stitch since it is nearly invisible). Weave in all ends.

Tyler Bonnet PDF

Disclaimer: This page contains affiliate links. If you choose to make a purchase after clicking a link, I may receive a commission at no additional cost to you. Thank you for your support!