
Looking for a lace ankle sock pattern? My favorites are at the sock pattern page—and the Simone Ankle Socks are at the bottom of this post!

I’m a sucker for a good lace ankle sock pattern. There’s something about the way lace pops in a teeny sock that just does it for me. Maybe it’s the delicate vibe, maybe it’s the perfect excuse to show off a fun yarn, or maybe it’s just the satisfaction of finishing a pretty project in no time. Whatever the reason, I’ve knit my fair share of lace ankle sock patterns, and today I’m sharing my favorites—including one brand-new one I designed just for you.
If you’re also a fan of pretty socks that don’t take all week to knit, lace ankle sock patterns might just become your new obsession too.

Why I Love a Lace Ankle Sock Pattern
Let’s talk comfort: ankle socks are cool (literally and figuratively), perfect for spring and summer, and they look adorable peeking out from sneakers. Add a lace motif to the mix and now you’ve got a sock that’s breezy and beautiful. A lace ankle sock pattern is my go-to when I want something quick but still detailed.
Plus, they’re so stash-friendly! You don’t need a full skein of yarn to finish a pair, and if you’re like me with an overflowing bin of pretty fingering-weight yarns, this is the project category to turn to.

Meet the Simone Ankle Socks (New Pattern!)
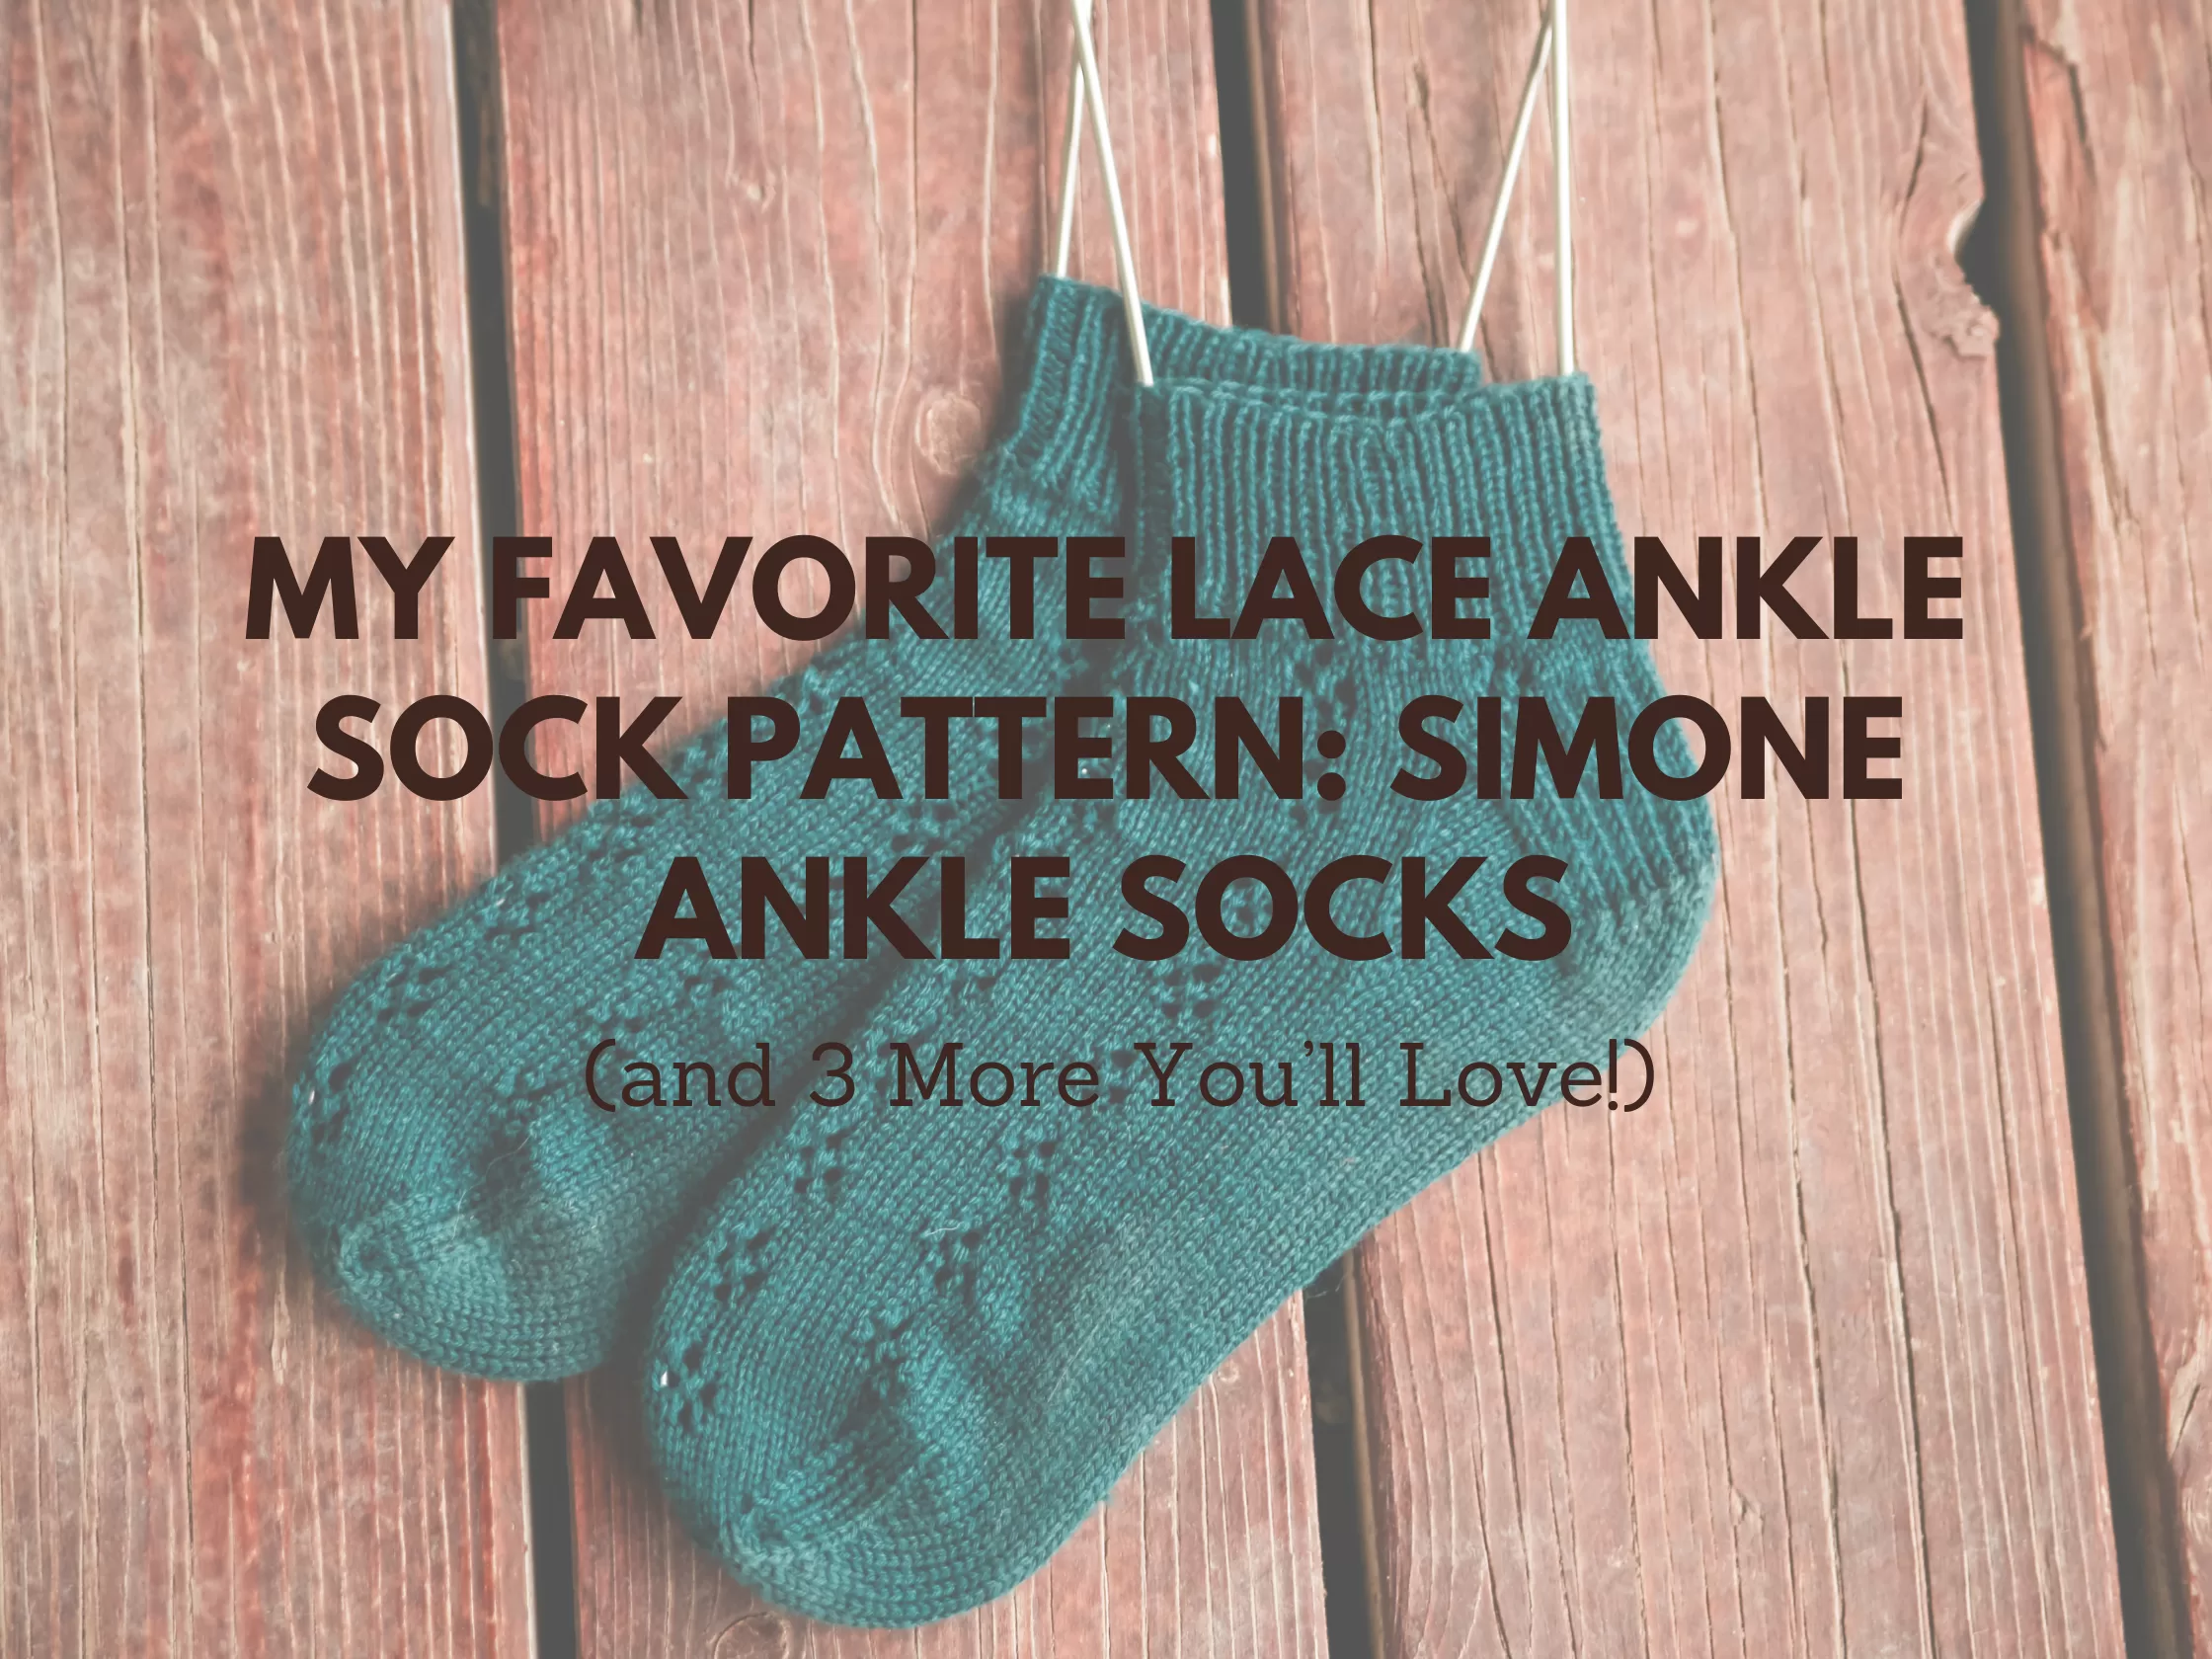
Okay, let’s get to the star of the show: the Simone Ankle Socks. This lace ankle sock pattern is knit top-down, features a classic heel flap, and has the cutest little diamond lace motif running down the top of the foot. It’s delicate, simple to memorize, and gives you just enough interest without having to stare at a chart the entire time.
I knit mine in Hobbii Unicorn Solid (affiliate link) using KnitPicks 1 (2.25mm) DPNs (affiliate link). The yarn has that perfect pop of solid color that makes the lace shine. If you haven’t tried Unicorn Solid yet, it’s smooth, strong, and holds up beautifully in socks.
Once they were done, I popped them on my sock blockers (affiliate link) to open up the lace and—chef’s kiss—they turned out exactly how I’d hoped.
This exact lace ankle sock pattern is linked at the bottom of this post, but don’t skip the rest. There are four more lace or lace-adjacent ankle socks that you’re going to want to check out!

Other Lace Ankle Sock Patterns I Love
If you’re ready to queue up a few more sock projects, these three are worth bookmarking. They’re each short and sweet with a little flair, and they pair beautifully with both solids and tonals.
👉 Vanilla Ankle Socks
Simple, sweet, and endlessly wearable, the Vanilla Ankle Socks are a perfect first sock pattern or palate cleanser in between more detailed knits. They’re not technically lace, but their minimal design makes them a great base to add your own lace touches if you’re feeling creative.
👉 Sophia Ankle Socks
These Sophia Ankle Socks bring soft feminine vibes with a gentle lace panel running across the foot. They’re a little different in construction to the Simone socks—top-down with a short row heel—and they look beautiful in both speckled and solid yarns. (I’m already planning a second pair.)
👉 Danielle Ankle Socks
If you like your lace ankle sock patterns a little cabled, the Danielle Ankle Socks bring a touch of drama. The faux cables run down the sides, and I love how it flows all the way to the toe. Like the Simone Socks, they use a standard top-down construction and look amazing blocked out with sock blockers (affiliate link).

My Favorite Yarn and Tools for Lace Ankle Socks
If you’re diving into lace ankle sock patterns, let me save you some trial and error with my go-to tools:
- Hobbii Unicorn Solid (affiliate link) – This yarn is soft, plump, and really shows off stitch definition. It’s my top pick for socks that need to highlight lace details.
- KnitPicks 1 (2.25mm) DPNs (affiliate link) – Perfect for ankle socks. They’re lightweight, durable, and great for those tighter stitches around the heel flap.
- Sock blockers (affiliate link) – Don’t skip this! Blocking makes your lace really bloom and gives your socks a finished, polished look. It’s a small step that makes a big difference.

Why Top-Down + Heel Flap = Winning Combo
All of my favorite lace ankle sock patterns, including the Simone Ankle Socks, use a top-down construction with a heel flap. Here’s why:
- Customization is easier. You can adjust the foot length after the heel is done.
- They fit well. The heel flap and gusset combo hugs the foot nicely.
- They’re classic for a reason. It’s a method that just works, especially with lace.

Tips for Knitting a Lace Ankle Sock Pattern
If you’re new to lace socks or just want a smoother experience, here are a few things I’ve learned the hard way:
- Use stitch markers to separate lace repeats—especially when the panel is centered on the foot.
- Read your lace. As you go, learn to recognize how the lace is supposed to look. That makes catching mistakes so much easier.
- Count rows in the heel flap carefully. Trust me, uneven heels are not the vibe.
- Block those socks! I said it once, I’ll say it again. Lace looks better after blocking. Use your sock blockers (affiliate link) and you’ll see what I mean.

Ready to Cast On?
If you’re hunting down a lace ankle sock pattern that’s satisfying, quick, and fun to wear, the Simone Ankle Socks are ready for your needles. Head to the bottom of this post to grab the free pattern, and don’t forget to browse the rest of my ankle sock collection over on the sock pattern page!
You’ll find tons of free options, from lacy to simple, and everything in between.

Simone Ankle Sock Pattern
Materials:
Yarn: 1 skein of Hobbii Unicorn Solids (Affiliate Link) 437yd/100g
Needles: US #1 / 2.25mm DPNs (or circular for magic loop)
Notions: stitch markers, needle
Gauge: 8sts x 11rows per inch
sizing:
baby (child,) adult S, (Adult L)
Finished measurements (unstretched):
Foot Length (adjustable): 4 (7.25) 9, (11.25)ins/ 10 (18) 22.5 (28)cms
Model is wearing an adult S.
Abbreviations can be found on the last page.

Stitch Chart A
Round 1 – knit around
Round 2 – knit around
Round 3 – knit around
Round 4 – knit around
Round 5 – knit around
Round 6 – k4, yo, k2tog, k4
Round 7 – knit around
Round 8 – k3, yo, k2tog, yo, k2tog, k3
Round 9 – knit around
Round 10 – k4, yo, k2tog, k4

Stitch Chart B
Round 1 – knit around
Round 2 – knit around
Round 3 – knit around
Round 4 – knit around
Round 5 – knit around
Round 6 – k2, yo, k2tog, k6
Round 7 – knit around
Round 8 – k1, yo, k2tog, yo, k2tog, k5
Round 9 – knit around
Round 10 – k2, yo, k2tog, k6
Cuff
Cast on 40 (50) 60, (70) sts, join for working in the round.
Separate stitches on your dpn as follows:
1st needle 20 (25) 30 (35) sts
2nd needle 10 (10) 15 (15) sts
3rd needle 10 (15) 15 (20) sts
Work in 1×1 rib (k1p1 around) for 16 (16) 20 (20) rounds
Then work in Stitch chart A (B) A (B) for 6 rounds.
Heel Flap
Next round: You will work the heel flap on the next 20 (25) 30 (35), sts.
Place the remaining 20 (25) 30 (35) sts on hold.
Row 1 (RS): (sl1, k1) to end, turn work.
Row 2 (WS): sl1, purl to end, turn work.
Repeat rows 1-2 a total of 8 (11) 14 (16) times.
This is a total of 16 (22) 28 (32) rows.

Heel Turn
Row 1 (RS): sl1, k12 (13) 16 (19), ssk, k1, turn work.
Row 2 (WS): sl1, p7 (4) 5 (6), p2tog, p1, turn work.
Row 3: sl1, knit to 1 st before the gap, ssk, k1, turn work.
Row 4: sl1, purl to 1 st before the gap, p2tog, p1, turn work.
Repeat rows 3-4 until all stitches have been worked:
14 (15) 18 (21) sts remain.
Knit across these heel stitches slipping the first st.
Gusset
Pick up and knit 9 (12) 15 (17) sts along the edge of heel flap, PM,
Knit across front 20 (25) 30 (35) keeping in established pattern, PM,
Pick up and knit 9 (12) 15 (17) sts along heel flap,
k7 (8) 9 (11) sts, mark the new BOR (located at the bottom of the foot).
[52 (64) 78 (90) sts]
Round 1: knit around
Round 2: knit to 3 sts before marker, k2tog, k1, sm, work in pattern to next marker, sm, k1, ssk, knit to end [2 sts dec]
Work rounds 1-2 a total of 6 (7) 9 (10) times.
[40 (50) 60 (70) sts]

Foot
Shift beginning of round (BOR) remove marker as follows: remove marker, k10 (13) 15, (17), place marker – this is the new BOR, located at the side of the foot.
Continue working in the round in pattern until the piece measures 3 (6) 7, (9)ins/ 7.5 (15) 17.5 (22.5) from back of heel or 1 (1.5) 2, (2.25)ins/ 2.5 (4) 5 (5.5)cms short of desired foot length ending on a round 1-5 of the stitch chart.
Toe
Note: For baby you will now start working in stockinette only.
Sizes child/adult S you will only do 1 more of the center diamond only then switch to stockinette only.
Adult large you will do only the center 2 diamonds 1 more time them switch to stockinette only.
Round 1: k1, ssk, work to 3 sts before marker, k2tog, k2, ssk, knit to 3 sts before end of round, k2tog, k1 [4 sts dec]
Round 2: work around no decreases
Work rounds 1-2 a total of 5 (7) 9 (11) times. until 16 (20) 24 (26) sts remain.
For a left-handed tutorial of these decreases visit my youtube here
Cut yarn leaving a 12” tail, then graft toe using Kitchener stitch.
Weave in all ends

Kitchener stitch:
Place half the stitches on one needle, half the stitches on the other needle, (top and bottom NOT side to side)
Cut yarn (leaving a long yarn tail) and thread through a blunt needle.
Set-up steps: Insert needle purlwise (back to front) through the first st on front needle, leaving the st on the needle. Then insert needle knitwise (front to back) through the first st on the back needle, leaving the st on the needle.
Step 1: Insert needle knitwise through first st on front needle, then slip this st off the needle.
Step 2: Insert needle purlwise through the second st on front needle, leaving the st on the needle.
Step 3: Insert needle purlwise through first st on back needle, then drop this stitch off the needle.
Step 4: Insert needle knitwise through second st on back needle, leaving the st on the needle.
From this point to the end, repeat steps 1-4.
Kitchener stitch can be intimidating, but you get into a rhythm:
Front needle: knitwise drop off, purlwise leave on,
Back needle: purlwise drop off, knitwise leave on,
Repeat!
At the end of the row, there is only 1 stitch left on each needle.
Work steps 1 and 3 once more.
For a left-handed video tutorial of this visit my youtube here
Abbreviations
k – knit
P – purl
sm – slip maker
pm – place marker
st – stich
sts – stitches
k2tog -knit 2 stitches together
ssk – slip next st knitwise, slip next st knitwise, place stitches back onto left needle, knit both slipped sts together
Simone Ankle Sock PDF
Affiliate Disclaimer:
This post contains affiliate links. That means I may earn a small commission if you click through and purchase, at no extra cost to you. I only recommend products I genuinely use and love.
I love the look of the Vanilla ankle socks. Going to get those on my needles this evening. Will start with baby size and am finding socks stay of baby’s feet better than booties. Except will have to find a yarn without wool and wool is not acceptable for babies in the hospital. They would make excellent bed socks for patients as well. Thank you for the pattern.