
Looking for a free knit fingerless mitts pattern that is stretchy, comfortable, and still lets you use your phone? The Ezra Mitts are this Monday’s free pattern, and they are such a fun little project to add to your cold-weather knitting list! You can also find even more cozy options on my free mittens knitting patterns page.
These fingerless mitts are worked in a stretchy k1, p2, k1 ribbing with a pretty cable detail running along the wrist and fingers. The ribbed fabric gives them plenty of stretch while keeping the fit nice and snug, and the fingerless design leaves your fingertips free for texting, scrolling, or grabbing your keys without pulling your mitts off.
If you have been wanting a knitted fingerless mitts pattern that feels a little more special than plain ribbing but is still practical enough for everyday wear, the Ezra Mitts are a great one to cast on.
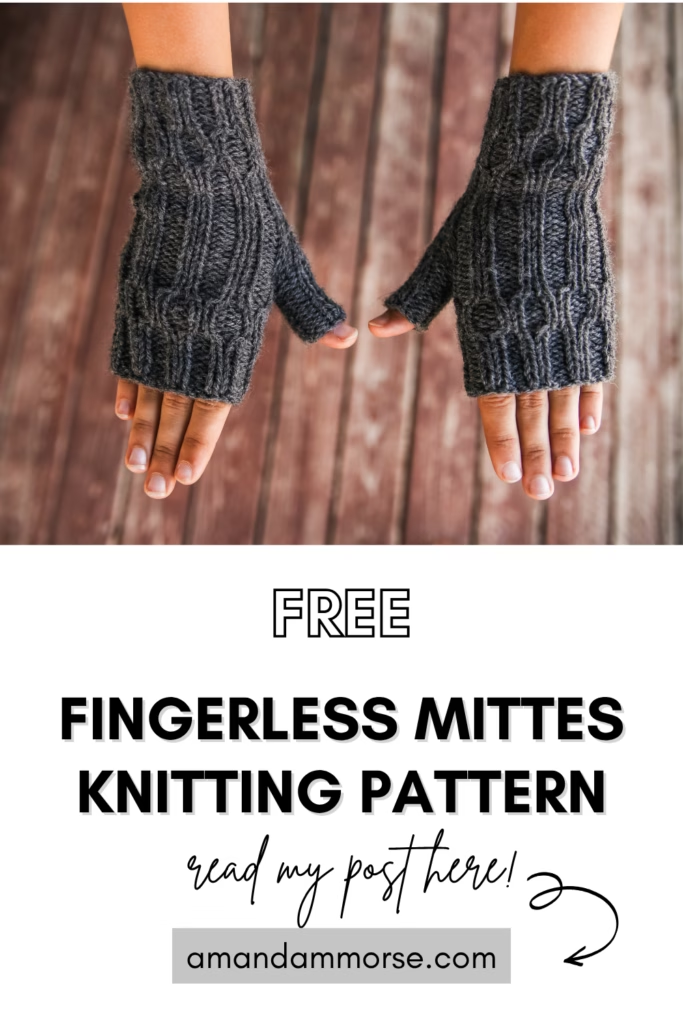
One of my favorite things about this free knit mitts pattern is the size range. The pattern includes instructions from child all the way through adult large, so you can make a pair for just about everyone on your list.
And because the ribbing stretches so nicely, these mitts have that comfortable, flexible fit you want around the hand and wrist.
They also make a perfect matching set with the Ezra Earwarmer. Knit both in the same yarn and color for an easy handmade winter set that would be wonderful for gifting!
What Yarn and Needles Do You Need for the Ezra Mitts?
I knit my Ezra Mitts with Berroco Vintage and US size 6 (4 mm) needles. Berroco Vintage works beautifully for this design because it creates a soft, comfortable fabric while still giving the ribbing and cable enough definition to stand out.
Since the mitts use a ribbed stitch pattern throughout, you want a yarn that will show off those knit and purl columns without making the finished fabric feel stiff. The stretch in the ribbing does much of the work when it comes to getting that cozy fit.
The cable detail adds just enough texture to make these feel interesting to knit without covering the entire project in complicated stitches.
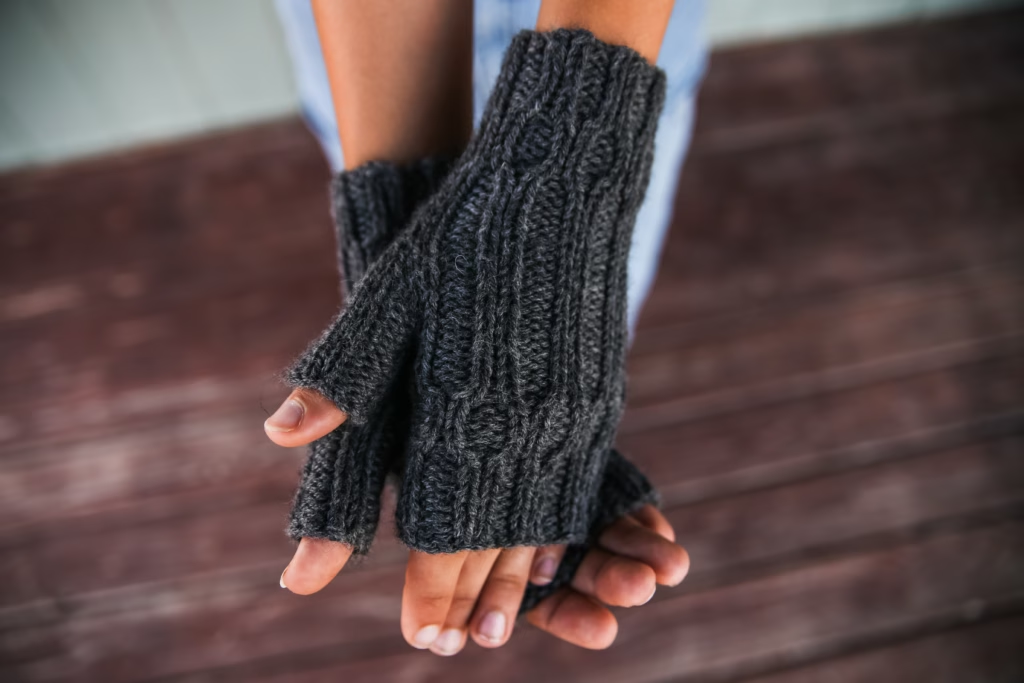
This is also a nice project when you have yarn in your stash that would be perfect for a smaller accessory. A pair of fingerless mitts is a satisfying way to turn that yarn into something you can actually wear all winter.
And if you are making the matching Ezra Earwarmer, using the same Berroco Vintage for both pieces makes the two patterns look like they were meant to be together—because they were!
How Are These Free Knit Mitts Worked?
The Ezra Mitts are knit in the round, so there is no seaming to do when you finish. I used double-pointed needles for mine, but if you prefer knitting small circumferences with magic loop, you can absolutely use that method instead.
Choose whichever way of knitting in the round feels most comfortable to you. The finished mitts will be the same either way.
The k1, p2, k1 ribbing continues throughout the mitts, with the cable adding a decorative detail along the wrist and finger area. That combination gives you lots of elasticity without making the knitting feel boring.
Because these are fingerless mitts, your fingers stay free while the rest of your hand gets an extra layer of warmth. They are especially handy if you use a smartphone frequently and do not want to keep taking your gloves on and off.
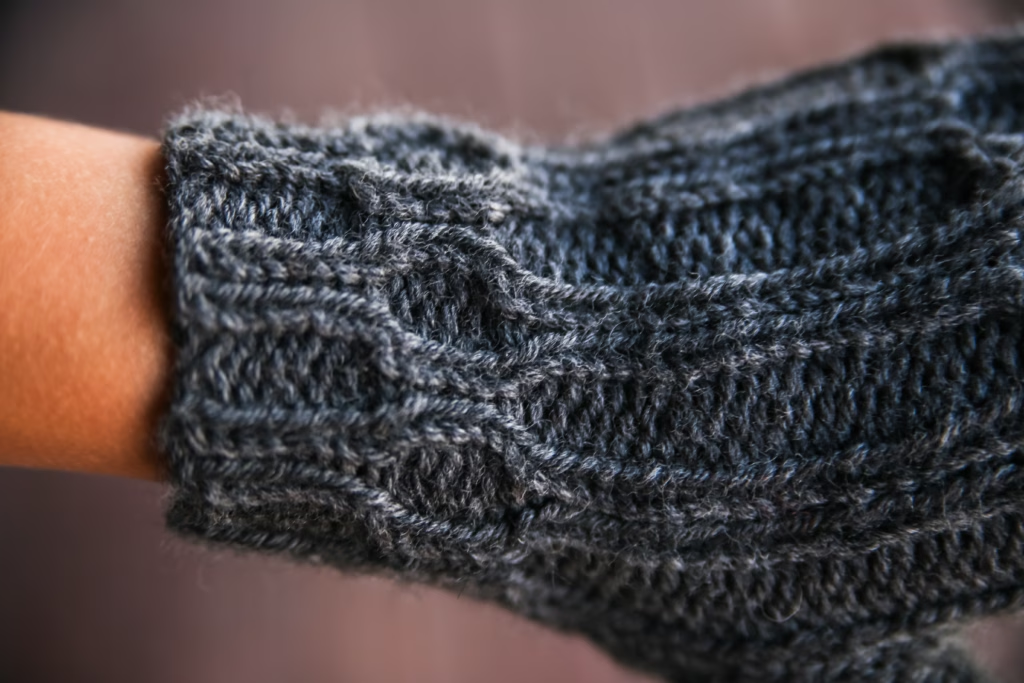
When you are working the ribbing, pay attention to keeping your knit and purl columns lined up as you work around. Once the stitch pattern becomes established, it develops a nice rhythm and is easy to recognize on your needles.
The cable gives you a fun little feature to look forward to while the surrounding ribbing keeps the project moving along.
What Should You Knit Next?
If the Ezra Mitts have you ready to fill your winter accessory drawer, here are a few more mitten patterns to cast on next:
The bulky mitten patterns are especially nice when you are craving a quick, cozy knit, while the Ezra Earwarmer is the natural choice if you want to turn your new mitts into a matching set.
Having a few different mitten and fingerless glove patterns on hand also makes handmade gift knitting much easier. You can choose the style and yarn that best fit the person you are knitting for.
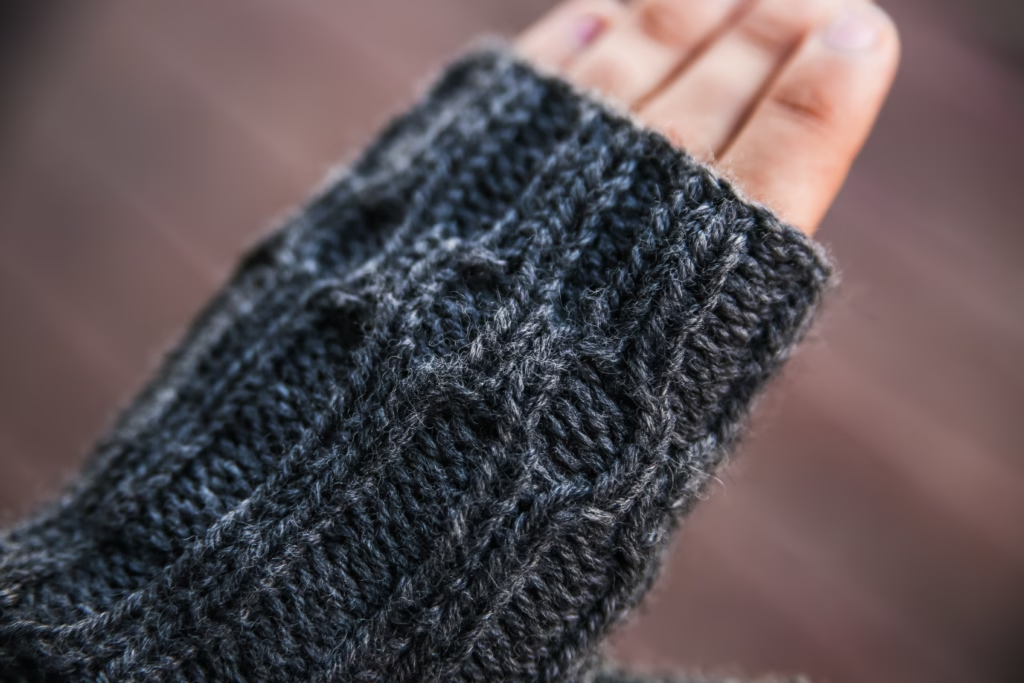
The Ezra Mitts are a fun mix of practical and pretty: stretchy ribbing, a cable detail, a wide range of sizes, and fingers free for using your phone. They are the kind of small project that is easy to reach for when you want something cozy without committing to a huge amount of knitting.
Make a pair in your favorite color, coordinate them with your Ezra Earwarmer, or start working your way through the sizes for everyone in the family.
Ezra Mitts Free Pattern
Materials: Berroco Vintage yarn (218y/100g)approximately 80 (100, 120, 140) yards, US 6 (4 mm) circular needles for magic loop or DPNs, Stitch markers, Yarn needle, Waste yarn or locking stitch markers
Gauge: 20 stitches and 28 rounds = 4″ in stockinette stitch worked in the round.
GAUGE IS IMPORTANT! SWATCH FIRST!
Sizes – Child (Adult Small, Adult Medium, Adult Large)
Finished hand circumference:
Child: approximately 6ins/15cms
Adult Small: approximately 7ins/17.5cms
Adult Medium: approximately 8ins/20cms
Adult Large: approximately 9ins/22.5cms
Choose a size approximately ½–1ins/1-2cms smaller than the actual hand circumference for a comfortable fit.
- Stitch Chart
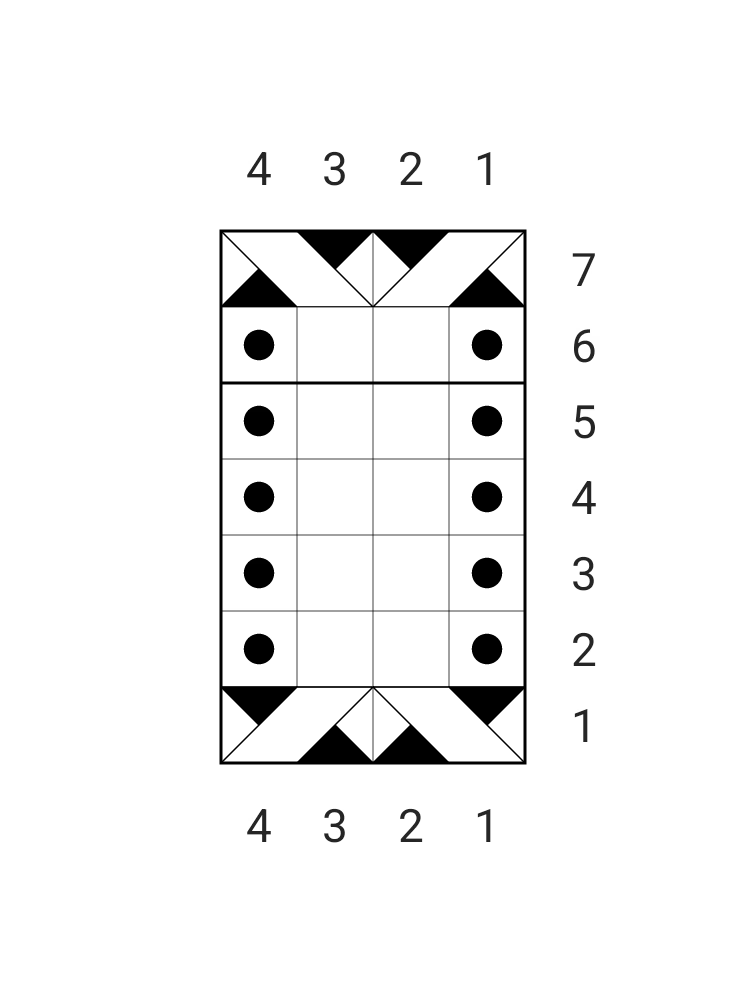
Round 1 – t2f, t2b around
Round 2 – [p1, k2, p1] around
Round 3 – [p1, k2, p1] around
Round 4 – [p1, k2, p1] around
Round 5 – [p1, k2, p1] around
Round 6 – [p1, k2, p1] around
Round 7 – [t2b, t2f] around - Right Mitt
CO 28 (32, 36, 40) stitches.
Join to work in the round, being careful not to twist.
PM for beginning of round.
Work [k1, p2, k1 around for 2in/5cms.
Work charted stitch pattern around 1 time.
Work [k1, p2, k1] around until 3ins/7.5cms
Thumb Gusset
The thumb gusset is worked at the beginning of the round.
Gusset Round 1:K1, PM, M1L, P2, M1R, PM, work remaining stitches in established [k1, p2, k1] stitch pattern.
You now have 2 additional gusset stitches.
Round 2:Knit the gusset stitches and work remaining stitches in established [k1, p2, k1] stitch pattern.
Round 3:
K1, SM, M1L, work in established stitch pattern to marker, M1R, SM, K1, work remaining stitches in established [k1, p2, k1] stitch pattern.
Repeat Gusset Rounds 2–3 until there are:
8 (8, 12, 12) gusset stitches.
Work 1 round without increases.
Separate Thumb
On the next round:
K1, remove marker, place the gusset stitches onto waste yarn, CO 2 stitches over the thumb opening, remove marker, continue working the remaining hand stitches in the round in established [k1, p2, k1] pattern.
You should again have:
28 (32, 36, 40) stitches.
Upper Hand
Continue working in the established [k1, p2, k1] stitch pattern until the upper hand measures .5 (1, 1.25, 1.5)ins/1 (2.5, 3, 4)cms from the top of the thumb opening. Work charted stitch chart around 1 time.
Work in [k1, p2, k1] pattern for 1in/2.5cms.
Bind off loosely in pattern.
Thumb
Place the thumb stitches on needles.
Pick up and knit 2 stitches across the cast-on edge of the thumb opening, work in established [k1, p2, k1] stitch pattern across next 8 (8, 12, 12)sts, pick up and knit 2 stitch at cast on edge of thumb opening, pm.
You will have approximately:
12 (12, 16, 16) stitches.
Join to work in the round.
Work in established [k1, p2, k1] pattern approximately 1 (1.25, 1.5, 1.75)ins/2.5 (3, 4, 4.5)cms.
Bind off loosely in pattern. - Left Mitt
CO 28 (32, 36, 40) stitches.
Join to work in the round, being careful not to twist.
PM for beginning of round.
Work [k1, p2, k1 around for 2in/5cms.
Work charted stitch pattern around 1 time.
Work [k1, p2, k1] around until 3ins/7.5cms
Thumb Gusset
Gusset Round 1:
Work in established stitch [k1, p2, k1] stitch pattern to the last 3 stitches of the round, PM, M1L, P2, M1R, PM, K1,
Round 2:
Work in established [k1, p2, k1] stitch pattern to marker, SM, then knit the gusset stitches in established pattern to marker, SM, K1.
Gusset Round 3:
Work in established [k1, p2, k1] stitch pattern to marker, SM, K1, M1L, work in established pattern to marker, M1R, SM, K1.
Repeat Gusset Rounds 2–3 until there are:
8 (8, 12, 12) gusset stitches.
Work 1 round without increases.
Separate Thumb
On the next round:
Work in established [k1, p2, k1] pattern to marker, remover marker, place the gusset stitches onto waste yarn, CO 2 stitches over the thumb opening, remove marker, K1.
You should again have:
28 (32, 36, 40) stitches.
Upper Hand
Continue working in the established [k1, p2, k1] stitch pattern until the upper hand measures .5 (1, 1.25, 1.5)ins/1 (2.5, 3, 4)cms from the top of the thumb opening. Work charted stitch chart around 1 time.
Work in [k1, p2, k1] pattern for 1in/2.5cms.
Bind off loosely in pattern.
Thumb
Place the thumb stitches on needles.
Pick up and knit 2 stitches across the cast-on edge of the thumb opening, work in established [k1, p2, k1] stitch pattern across next 8 (8, 12, 12)sts, pick up and knit 2 stitch at cast on edge of thumb opening, pm.
You will have approximately:
12 (12, 16, 16) stitches.
Join to work in the round.
Work in established [k1, p2, k1] pattern approximately 1 (1.25, 1.5, 1.75)ins/2.5 (3, 4, 4.5)cms.
Bind off loosely in pattern. - Finishing
Weave in all yarn ends.
If desired, lightly wet block the gloves and lay them flat to dry.
Customizing the Length
For longer wrist warmers, simply work additional cuff rounds before beginning the thumb gusset.
For more finger coverage, continue the [k1, p2, k1] section farther up the hand before beginning the Ezra Stitch Pattern.
For a shorter glove, begin the Ezra Stitch Pattern sooner. - Stitch Key
K – knit
m1l – pick up from front to back the strand between the 2sts on your needles, knit through back loop
m1r – pick up from back to front the strand between the 2sts on your needles, knit through the front loop
P – purl
pm – place marker
sm – slip marker
t2b – slide next st onto cable needle, hold in back, k next st, p st from cable needle t2f – slide next st onto cable needle, hold in front, p next st, k st from cable needle
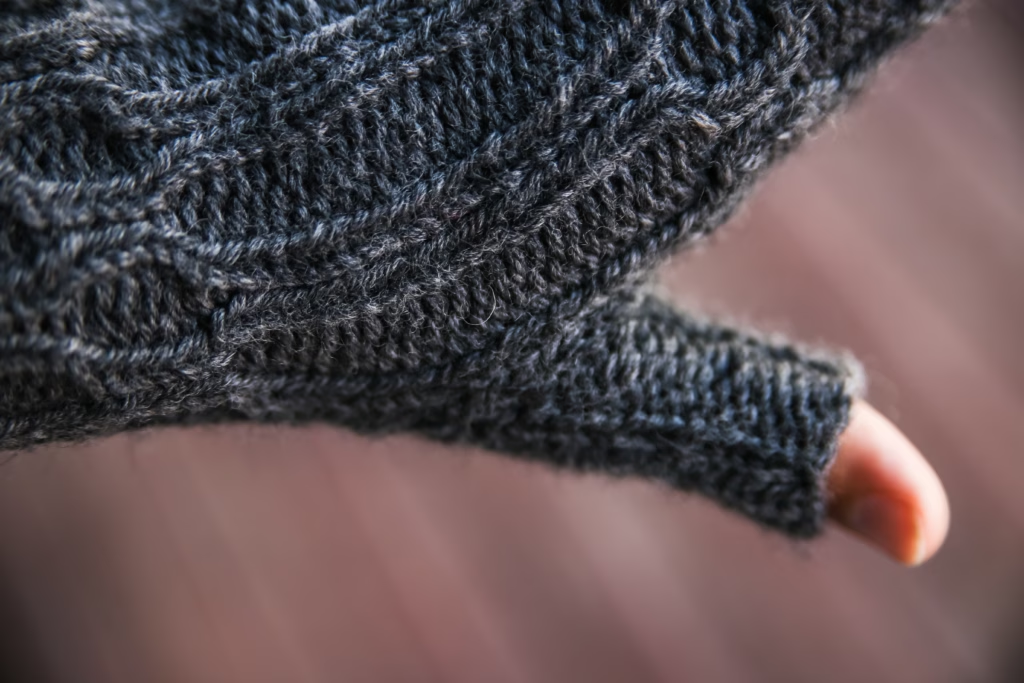
If you knit the Ezra Mitts, I would love to hear about them! Leave a comment and tell me what color you chose and whether you knit yours with DPNs or magic loop.
This post may contain affiliate links. If you purchase something through one of these links, I may earn a small commission at no additional cost to you.