
This baby bonnet knitting pattern combines stripes of garter stitch and 1×1 ribbing in a lightweight design, and it’s the newest addition to my collection of free bonnet knitting patterns.
Sometimes you want a little texture without pulling out a cable needle or keeping track of lace. The Peace Bonnet gets its detail from familiar knit and purl stitches, with alternating bands that give the fabric a sweet, understated look. With four sizes from newborn through toddler, it’s a lovely little project for your own child or a handmade baby gift.
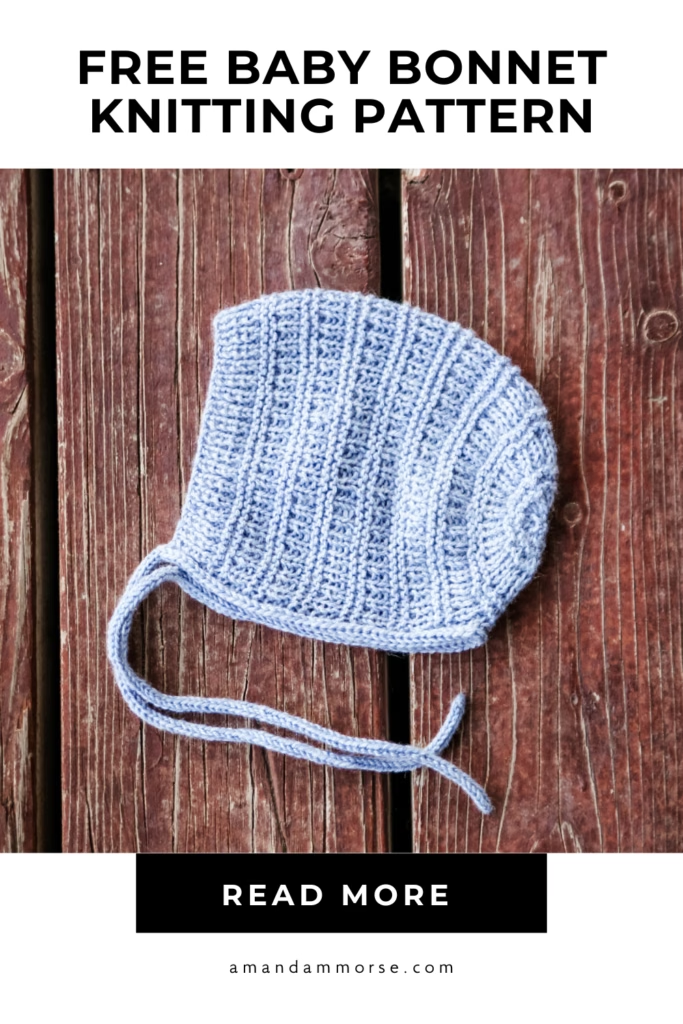
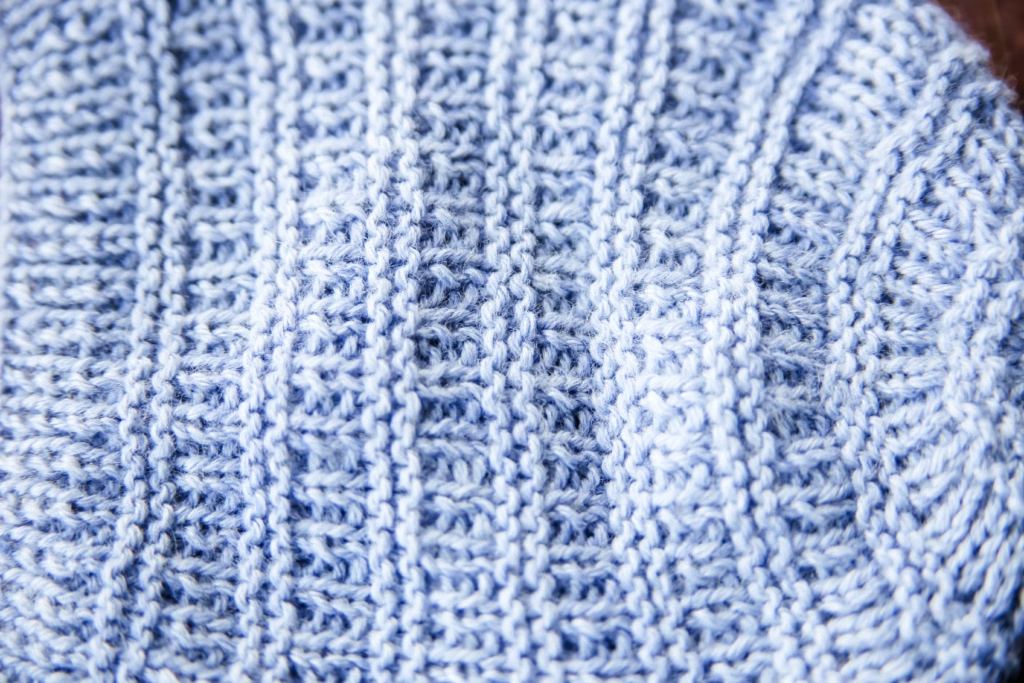
The stripes in this bonnet come from the stitches themselves. You can work the whole thing in one color and still see the contrast between the garter ridges and the tidy little columns of ribbing.
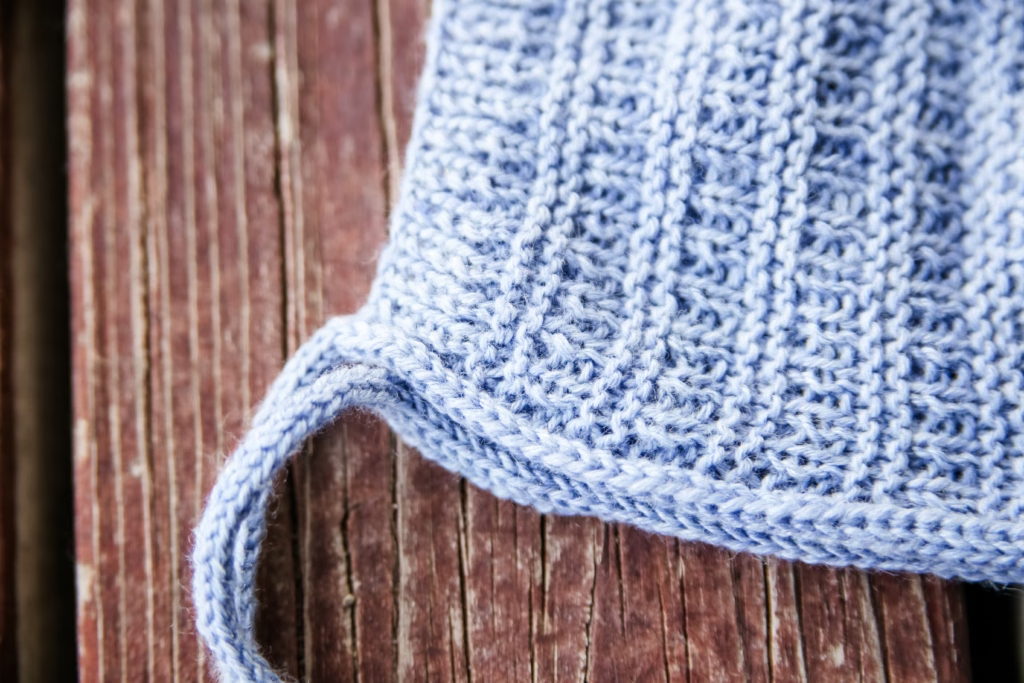
A ribbed front edge frames the face, while applied i-cord along the lower edge flows into matching ties. Those finishing details bring the whole design together without taking attention away from the texture.
What yarn and needles do you need for this baby bonnet knitting pattern?
I used KnitPicks Mighty Stitch Fingering and 3 mm needles for the Peace Bonnet. Fingering weight yarn keeps the stitch pattern small and delicate, so you get plenty of texture without a bulky fabric.
If you’re deciding whether to use the same yarn, take a look at my Mighty Stitch Fingering yarn review. It’s a helpful place to start before choosing yarn for your bonnet.
Here’s what you’ll need:
- Yarn: Approximately 60–100 yards of KnitPicks Mighty Stitch Fingering, depending on size.
- Needles: 3 mm circular needles and double-pointed needles, or your preferred setup for a small circumference.
- Finishing tool: A yarn needle for closing the crown and weaving in ends.
- Gauge: 28 stitches and 40 rows per 10 cm square.
A smooth, solid-colored yarn is a lovely choice here because it lets the garter and ribbing stand out. Think soft cream, a cheerful color, or a quiet neutral—the stitch pattern supplies the detail.
Before casting on, check your gauge and adjust your needle size if needed. The 3 mm needles are what I used, but matching the pattern gauge is what helps your bonnet come out the intended size.
How is the Peace Bonnet knitted?
The Peace Bonnet begins at the front edge and is worked flat through the body. You’ll start with 1×1 ribbing, then move into the repeating bands of garter stitch and ribbing that cover the bonnet.
This gives you a small project with a little variety as you go. The stitch changes break up the knitting while keeping the design centered on those familiar knit and purl stitches.
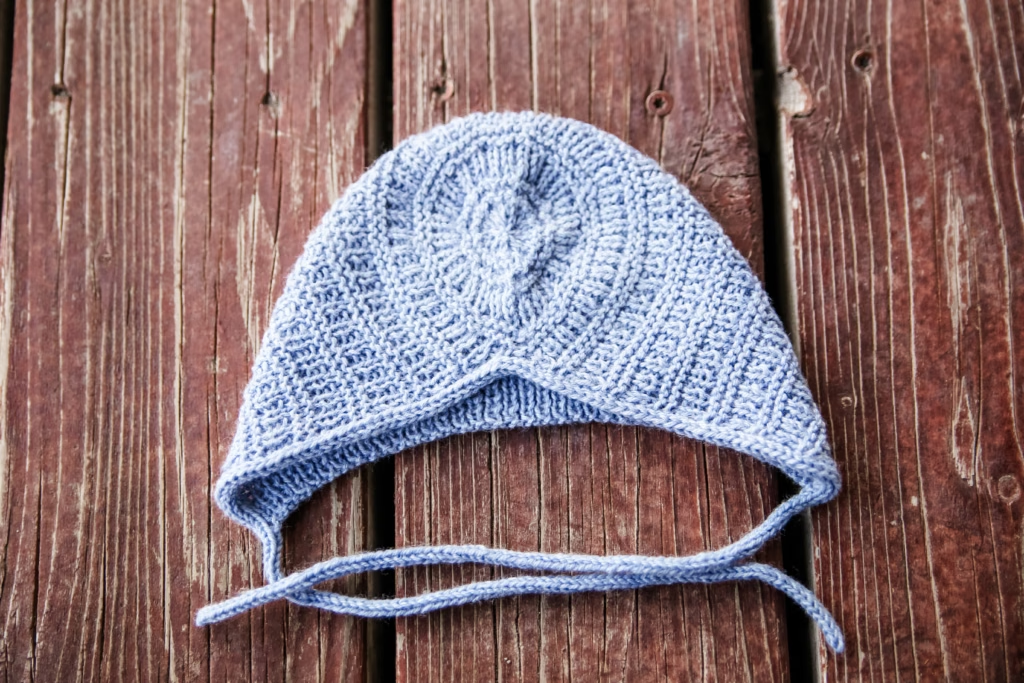
When the body reaches the length for your chosen size, you’ll join in the round to work the crown. The decreases shape and close the back, and the remaining stitches are drawn together with the yarn tail.
Pay attention to the change from rows to rounds when you reach the crown. Garter stitch is worked differently in the round than it is flat, so follow the crown instructions rather than continuing the body repeat.
The final detail is the i-cord finishing. You’ll work a tie, continue with applied i-cord along the lower edge, and finish with a second tie to match.
Which Peace Bonnet size should you knit?
This baby bonnet knitting pattern includes newborn, infant, baby, and toddler sizes. Choose a size using the child’s head measurement rather than relying on an age label alone.
The head measurement ranges are:
| Size | Head measurement |
|---|---|
| Newborn | 12–14 inches / 30–35 cm |
| Infant | 14–16 inches / 35–40 cm |
| Baby | 15–17 inches / 38–43 cm |
| Toddler | 16–18 inches / 41–46 cm |
These are head measurement ranges, rather than the finished circumference of the bonnet. Checking both the measurement and your gauge gives you a better starting point for a comfortable fit.
The smaller sizes make such sweet baby gifts, and I love that the same texture carries through to the toddler size. You can choose the size you need while keeping all those little garter-and-rib details.
What should you knit after the Peace Bonnet?
If your bonnet knitting list is already growing, here are four more free patterns to explore:
- Lydia Bonnet — Another lightweight bonnet to add to your knitting queue.
- The Sorek Bonnet — Try this one when you’re ready for a bonnet with cable detail.
- Simone Bonnet — A pretty option with delicate lace and a picot edge.
- Chain Bonnet — Explore another textured design with a chain-inspired stitch motif.
Each one gives you a different way to dress up that classic bonnet shape. You can stay with subtle texture or move on to lace, cables, and other stitch details.
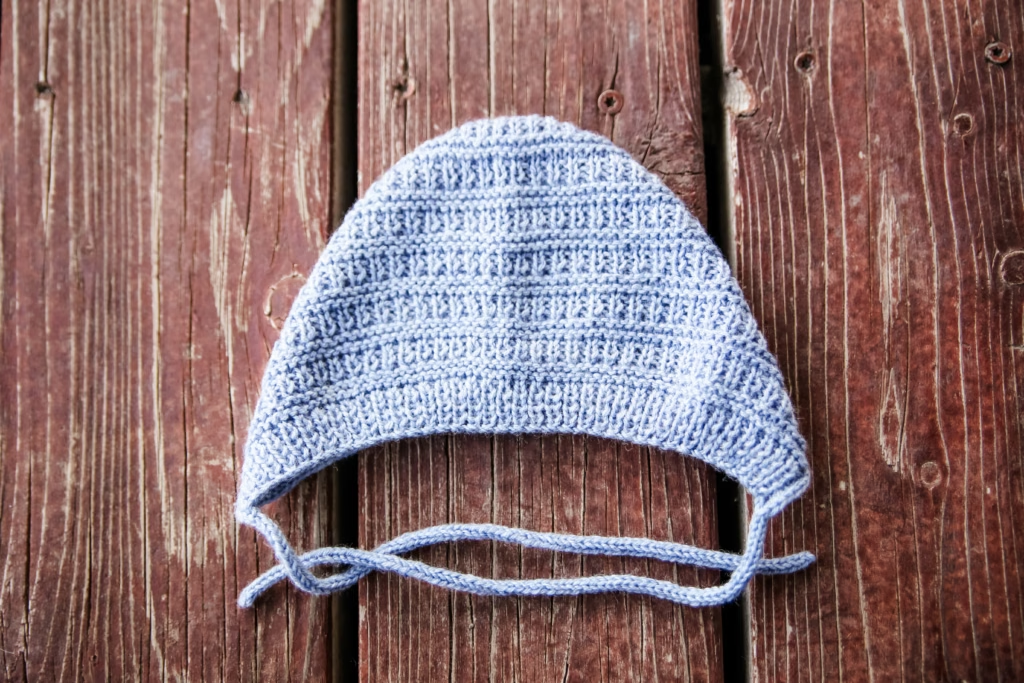
For the Peace Bonnet, it’s the simple combination of garter ridges and ribbing that makes the design special. Add the lightweight yarn and neat i-cord finish, and you have a sweet little knit with plenty of detail to enjoy.
Peace Bonnet Free Pattern
Yarn: Approximately 60–100 yds / 55–90 m of fingering-weight yarn (I used KnitPicks Mighty Stitch Fingering, 437 yds / 100 g).
Gauge: 28 sts × 40 rows = 4 × 4 in / 10 × 10 cm using US 2 / 3 mm needles.
Needles: US 2 / 3 mm circular needles and DPNs, or preferred small-circumference method. Sizes – newborn, (infant, baby), toddler
Head Measurement:
Newborn – 12-14in/30-35cm
Infant – 14-16in/ 35–40 cm
Baby – 15–17 in / 38–43 cm
Toddler – 16–18 in / 41–46 cm
Other –yarn needle
Abbreviations can be found on the last page.
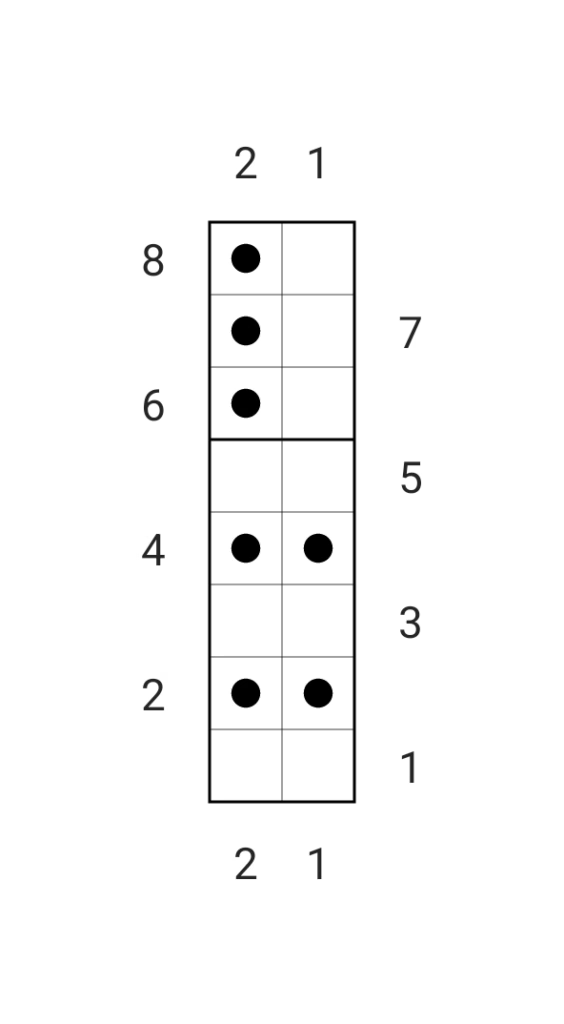
Stitch Pattern
Row 1 – k2
Row 2 – k2
Row 3 – k2
Row 4 – k2
Row 5 – k2
Row 6 – p1, k1
Row 7 – k1, p1
Row 8 – p1, k1
BODY
Cast on 72 (78, 84) 90 sts. I used the long tail cast on.
Work in K1P1 ribbing for 0.75 in / 2 cm.
You will now start the body of the bonnet using the chart above.
Repeat Rows 1–8 until the piece measures approximately 3.5 (4.25, 5) 5.5 in / 9 (10.75, 12.75) 14 cm from the cast-on edge, ending after Row 1.
Join in the round, taking care not to twist, and place a beginning-of-round marker.
DECREASES
Round 1 – [p2tog, p4] around [60 (65, 70, 75)sts]
Round 2 – knit around
Round 3 – [p2tog, p3] around [48 (52, 56) 60sts]
Round 4 – knit around
Round 5 – [k1, p1] around
Round 6 – [k1, p1] around
Round 7 – [k1, p1] around
Round 8 – knit around
Round 9 – [p2tog, p2] around [36 (39, 42) 45sts]
Round 10 – knit around
Round 11 – [p2tog, p1] around [24 (26, 28) 30sts]
Round 12 – knit around
Round 13 – [k2tog] around [12 (13, 14) 15sts]
Round 14 – [k2tog] around (for sizes infant & toddler there will be 1st leftover, knit that st) [6 (7, 7) 8sts]
Cut yarn, leaving a 6–8 in / 15–20 cm tail. Thread the tail through the remaining stitches and cinch tightly.
I-cord Ties: Work approximately 9–10 in / 23–25.5 cm of I-cord for the first tie, or 12–14 in / 30.5–35.5 cm if making the longer photography version. Begin the applied I-cord edging with the I-cord already worked. Knit 2 I-cord sts, slip the third st, pick up and knit 1 st through the selvedge edge of the bonnet, then knit the slipped I-cord st together with the picked-up st. Continue in this manner across the selvedge edge. Once the edging is complete, work the second I-cord tie to the same length as the first.
If you are struggling with the applied icord YouTube is beneficial here. Just search applied icord. I have a left-handed video for this here.
Weave in ends.
ABBREVIATIONS
BOR – beginning of round
DPN – double-pointed needle
k – knit
k2tog -knit 2 stitches together
P – purl
p2tog -purl 2 stitches together
st – stitch
sts – stitches
Who would you knit a Peace Bonnet for, and what color would you choose? Let me know in the comments!
This post may contain affiliate links. If you purchase through one of these links, I may earn a small commission at no extra cost to you. Thank you for supporting my free patterns!