
If you have been looking for a free cable bonnet knitting pattern, the Sorek Bonnet is a lovely little project to add to your needles. This new design joins my collection of free bonnet knitting patterns and features the beautiful texture that makes cable knitting so satisfying.
The Sorek Bonnet is a great choice when you want something classic, cozy, and a little more interesting than plain stockinette. The cables give the finished bonnet plenty of visual detail while still keeping that timeless hand-knit look. If you already love cable projects—or you have been wanting to try one—this free knit bonnet pattern is a fun one to add to your project list.
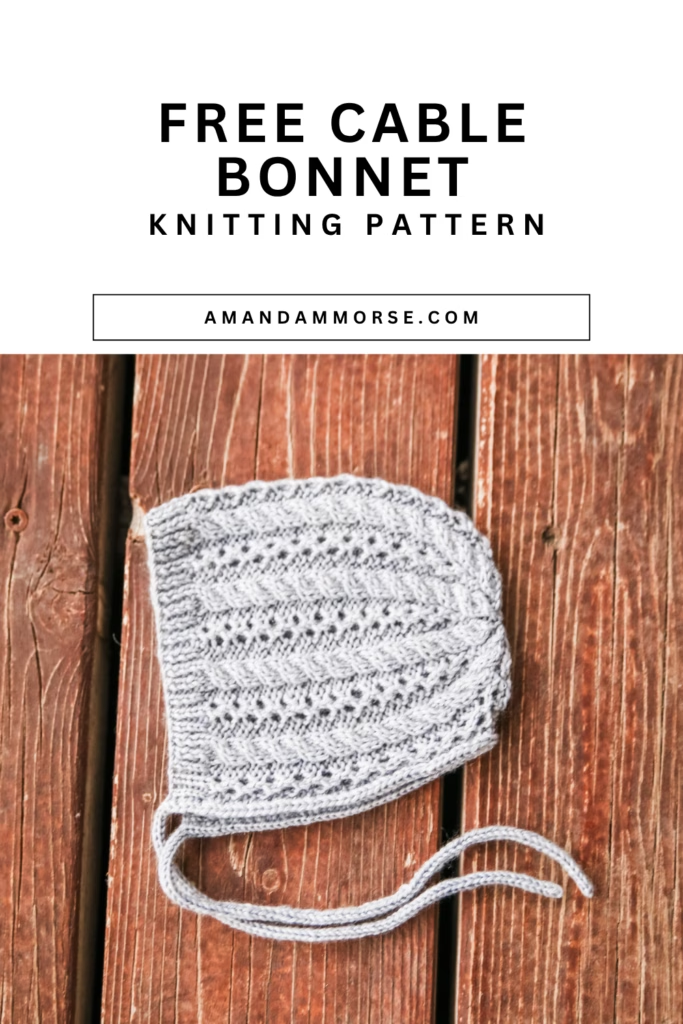
There is just something special about a knitted bonnet with cables. The texture adds dimension without taking away from the simple, wearable shape of the bonnet.
And because the Sorek Bonnet is available as a free knitting pattern, you can grab your needles, choose your yarn, and get started whenever the knitting mood strikes.
What do you need to knit the Sorek Bonnet?
For my Sorek Bonnet, I used Knit Picks Capretta and 3 mm knitting needles. Capretta gives the knitting a soft, polished look that works beautifully with textured stitches like cables.
Cables tend to look their best when the stitches are clear and defined, so choosing a yarn that lets that texture show can make a big difference in the finished bonnet. The smaller 3 mm needles also help create a neat fabric where the cable details can really stand out.
As always, your own knitting tension can affect the finished fabric, so follow the pattern information closely as you work.
If you enjoy the look of this cable motif, you may also want to knit the coordinating Free Cable Knit Beanie Pattern: The Sorek Beanie. It is an easy way to carry the same textured style into another project.
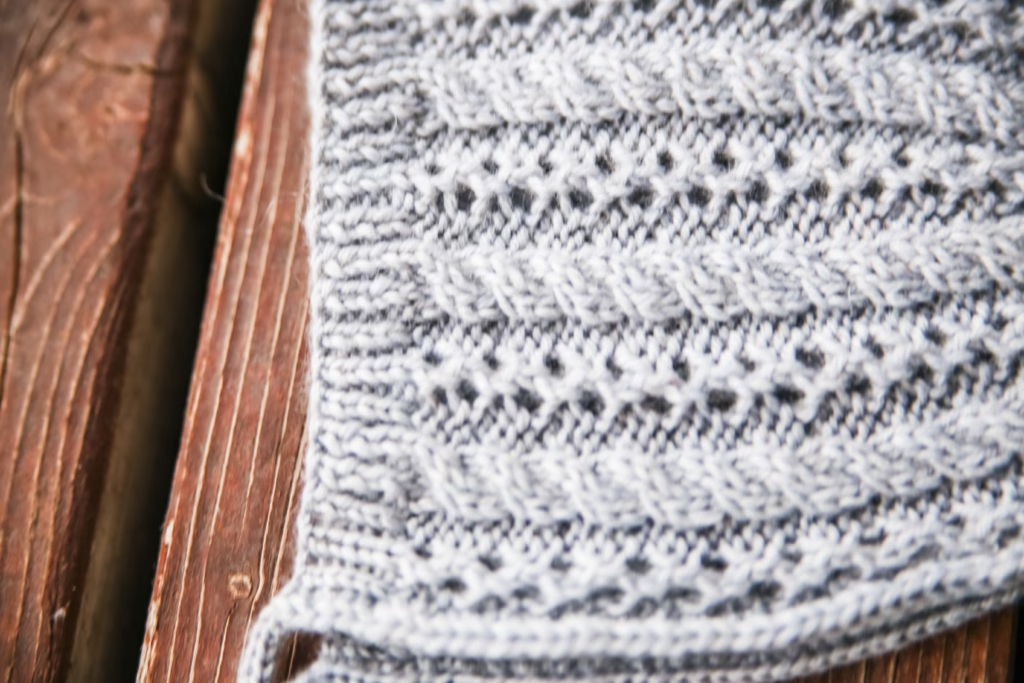
There is something especially fun about knitting related designs—you get to enjoy a familiar stitch pattern while making a completely different finished piece.
How do you knit the Sorek Bonnet?
The full Sorek Bonnet instructions are included in the free pattern below, so you can work through the project one section at a time.
When you are knitting cables, it helps to slow down around each cable section and make sure your stitches are crossing in the correct direction before continuing. A quick check after each cable repeat can save you from discovering a twisted or misplaced cable several rows later.
Cable knitting may look complicated at first, but each cable is really just a matter of changing the order of a small group of stitches. Once the repeats begin to feel familiar, the pattern becomes wonderfully rhythmic.
Keep an eye on your stitch count as you work, especially around the textured sections. That small habit makes it much easier to catch a missed stitch or accidental increase before it travels too far through the bonnet.
And don’t forget to take a moment to admire those cables as they grow—they are one of the most satisfying parts of this free cable bonnet knitting pattern.
Looking for more free bonnet knitting patterns?
If bonnets are one of your favorite things to knit, there are plenty more designs to add to your queue:
Each bonnet has its own personality, so you can choose a design based on the texture or stitch pattern you are in the mood to knit. Try a few and you may find yourself with an entire collection of handmade bonnets.
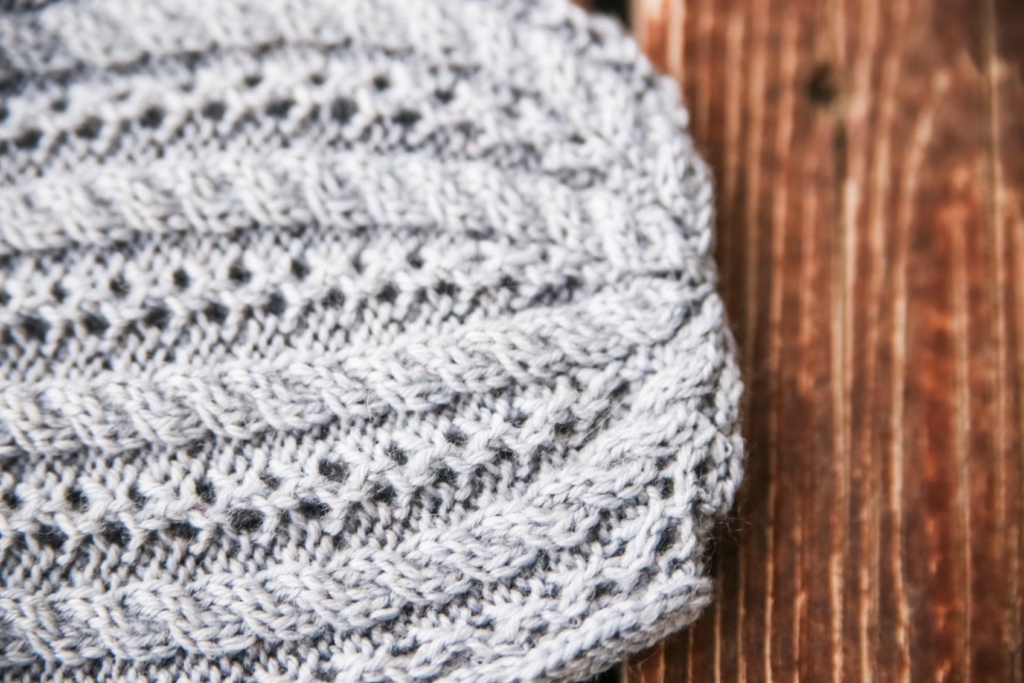
The Sorek Bonnet is especially lovely if you enjoy traditional cable texture and projects that feel interesting without losing that classic knitted look.
It is also a natural companion to the Sorek Beanie, making it easy to explore the same cable-inspired style in more than one free knitting pattern.
Sorek Bonnet Free Pattern
Yarn – 60-100yds or 1 skein KnitPicks Capretta (50g 230yd)
Gauge – 32x44sts per 4x4in or 10x10cm
Needles – 2 (3mm) circular and dpn
Sizes – newborn, (infant, baby), toddler
Head Measurement –
12-14in/30-35cm
14-16in/35/40cm
15-17in/37.5-42.5
16-18in/52.5-57.5cm
Other –yarn needle
.
Abbreviations can be found on the last page.
- Charted Stitch Pattern
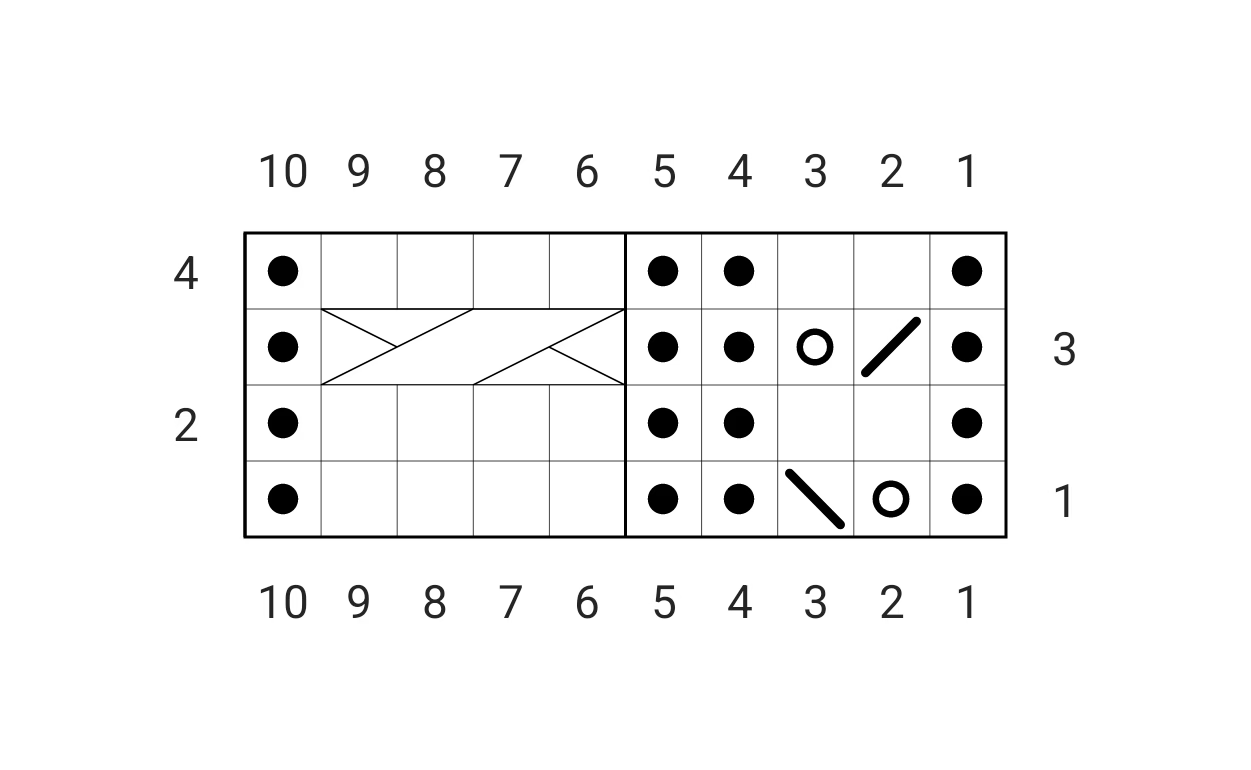
Row 1 – p1, yo, ssk, p2, k4, p1
Row 2 – k1, p2, k2, p4, k1
Row 3 – p1, k2tog, yo, p2, cb2/2, p1
Row 4 – k1, p2, k2, p4, k1 - Bonnet
Cast on 82 (92, 102) 112 sts. I used the long tail cast on.
Work in 1×1 rib for.75ins or 2cms
You will now start the body of the bonnet using the chart above. There is 1 salvage stitch at each end of the row. Always knit this stitch.
Repeat rows 1-4 of the stitch pattern until your work measures appx 3.5in (4.25, 5) 5.5/8.75 (10.5, 12.5) 14cm ending after completing a row 3.
Join in the Round.
Next round – purl the first 2sts and the last 2sts together, working the rest of the round in established pattern.
80 (90, 100) 110 sts
Transfer sts to dpn.
Join in the round. - Decreases
Round 1 – [p1, yo, ssk, p2tog, k4, p1] Repeat [to] around {72 (81, 90) 99sts}
Round 2 – [p1, k2, p1, k4, p1] repeat [to] around
Round 3 – [p1, k2tog, yo, p1, cb2/2, p1] Repeat [to] around
Round 4 – [k2tog, k1, p1, k4, p1] repeat [to] around {64 (72, 80) 88 sts}
Round 5 – [k2tog, p1, k4, p1] Repeat [to] around {56 (63, 70) 77sts}
Round 6 – [p2tog, k4, p1] Repeat [to] around {48 (54, 60) 66sts}
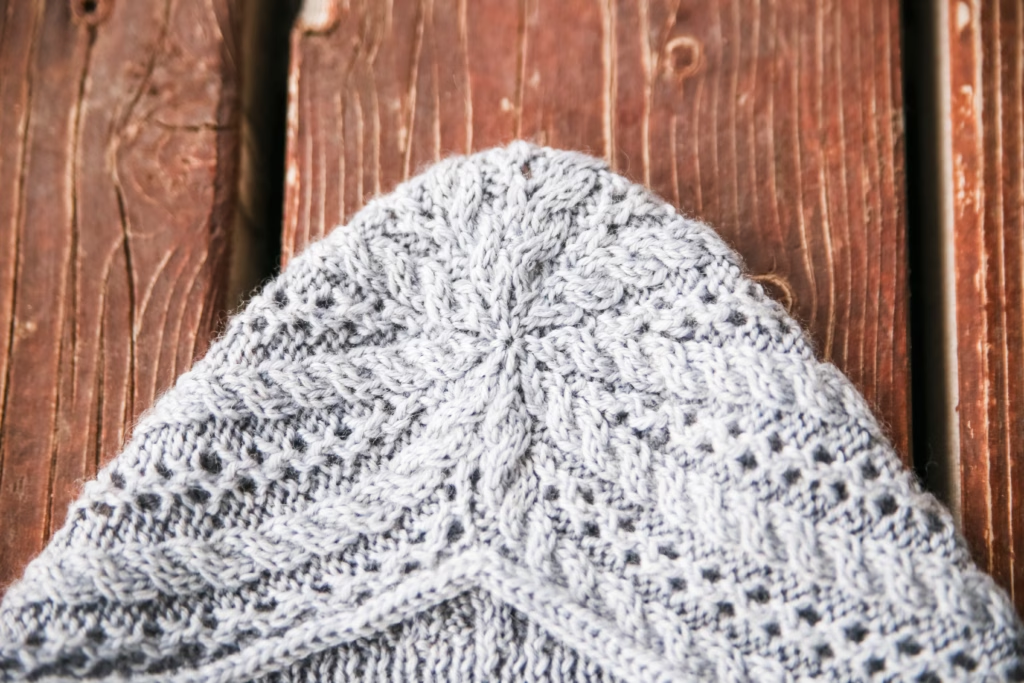
Round 7 – [p1, cb2/2, p1] Repeat [to] around
Round 8 – [k2tog, k3, p1] Repeat [to] around {40 (45, 50) 55sts}
Round 9 – [ssk, k2tog, p1] Repeat [to] around {24 (27, 30) 33sts}
Round 10 – [k2tog, p1] Repeat [to] around {16 (18, 20) 22sts}
Round 11 – [ssk] around {8 (9, 10) 11 sts}
Do not bind off. Cut a tail appx 6-8ins long. Using a yarn needle, pull through remaining stitches and cinch sts closed tightly. Weave in ends. - I-cord Ties:
Cast on 3sts on double pointed needles and work appx 9-10ins for personal use and 12-14ins for photography use of i-cord. Begin applied i-cord edging by using the length of i-cord you have already worked. Do so by knitting 2 icord sts, slip the last st, dip the needle into the edge of the back loop of the bonnet, and bringing the yarn around to knit, pick up a stitch in your salvage edge. Knit the last stitch of Icord together with the picked up stitch of the bonnet. Once you have picked up and knit across salvage edge stitches, work an additional length of i-cord that matches the other tie.
If you are struggling with the applied icord youtube is beneficial here. Just search applied icord. I have a left-handed video for this here.
Weave in ends. - ABBREVIATIONS
cb2/2 – place the next 2 sts on your cable needle, hold in back, knit the next 2 sts, knit the 2 sts on your cable needle
k – knit
k2tog -knit 2 stitches together
P – purl
sl – slip stitch
ssk – slip next st knitwise, slip next st knitwise, place stitches back onto left needle, knit both slipped sts together
yo – yarn over
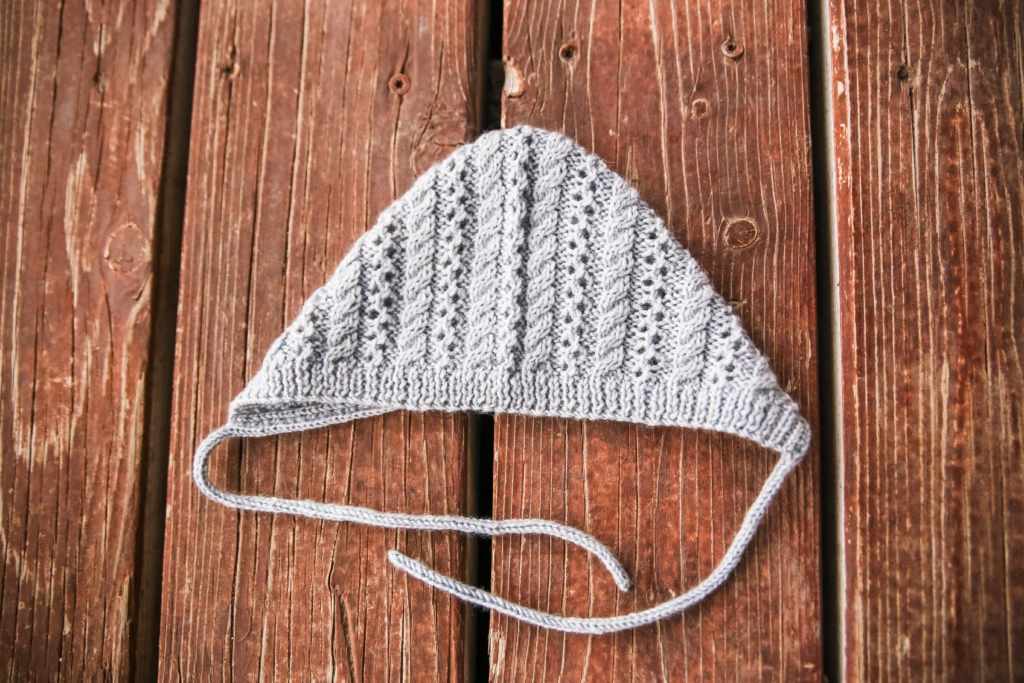
If you knit the Sorek Bonnet, I would love to hear about it! Leave a comment and tell me what yarn or color you chose for yours.
This post may contain affiliate links. If you make a purchase through one of these links, I may earn a small commission at no additional cost to you.