
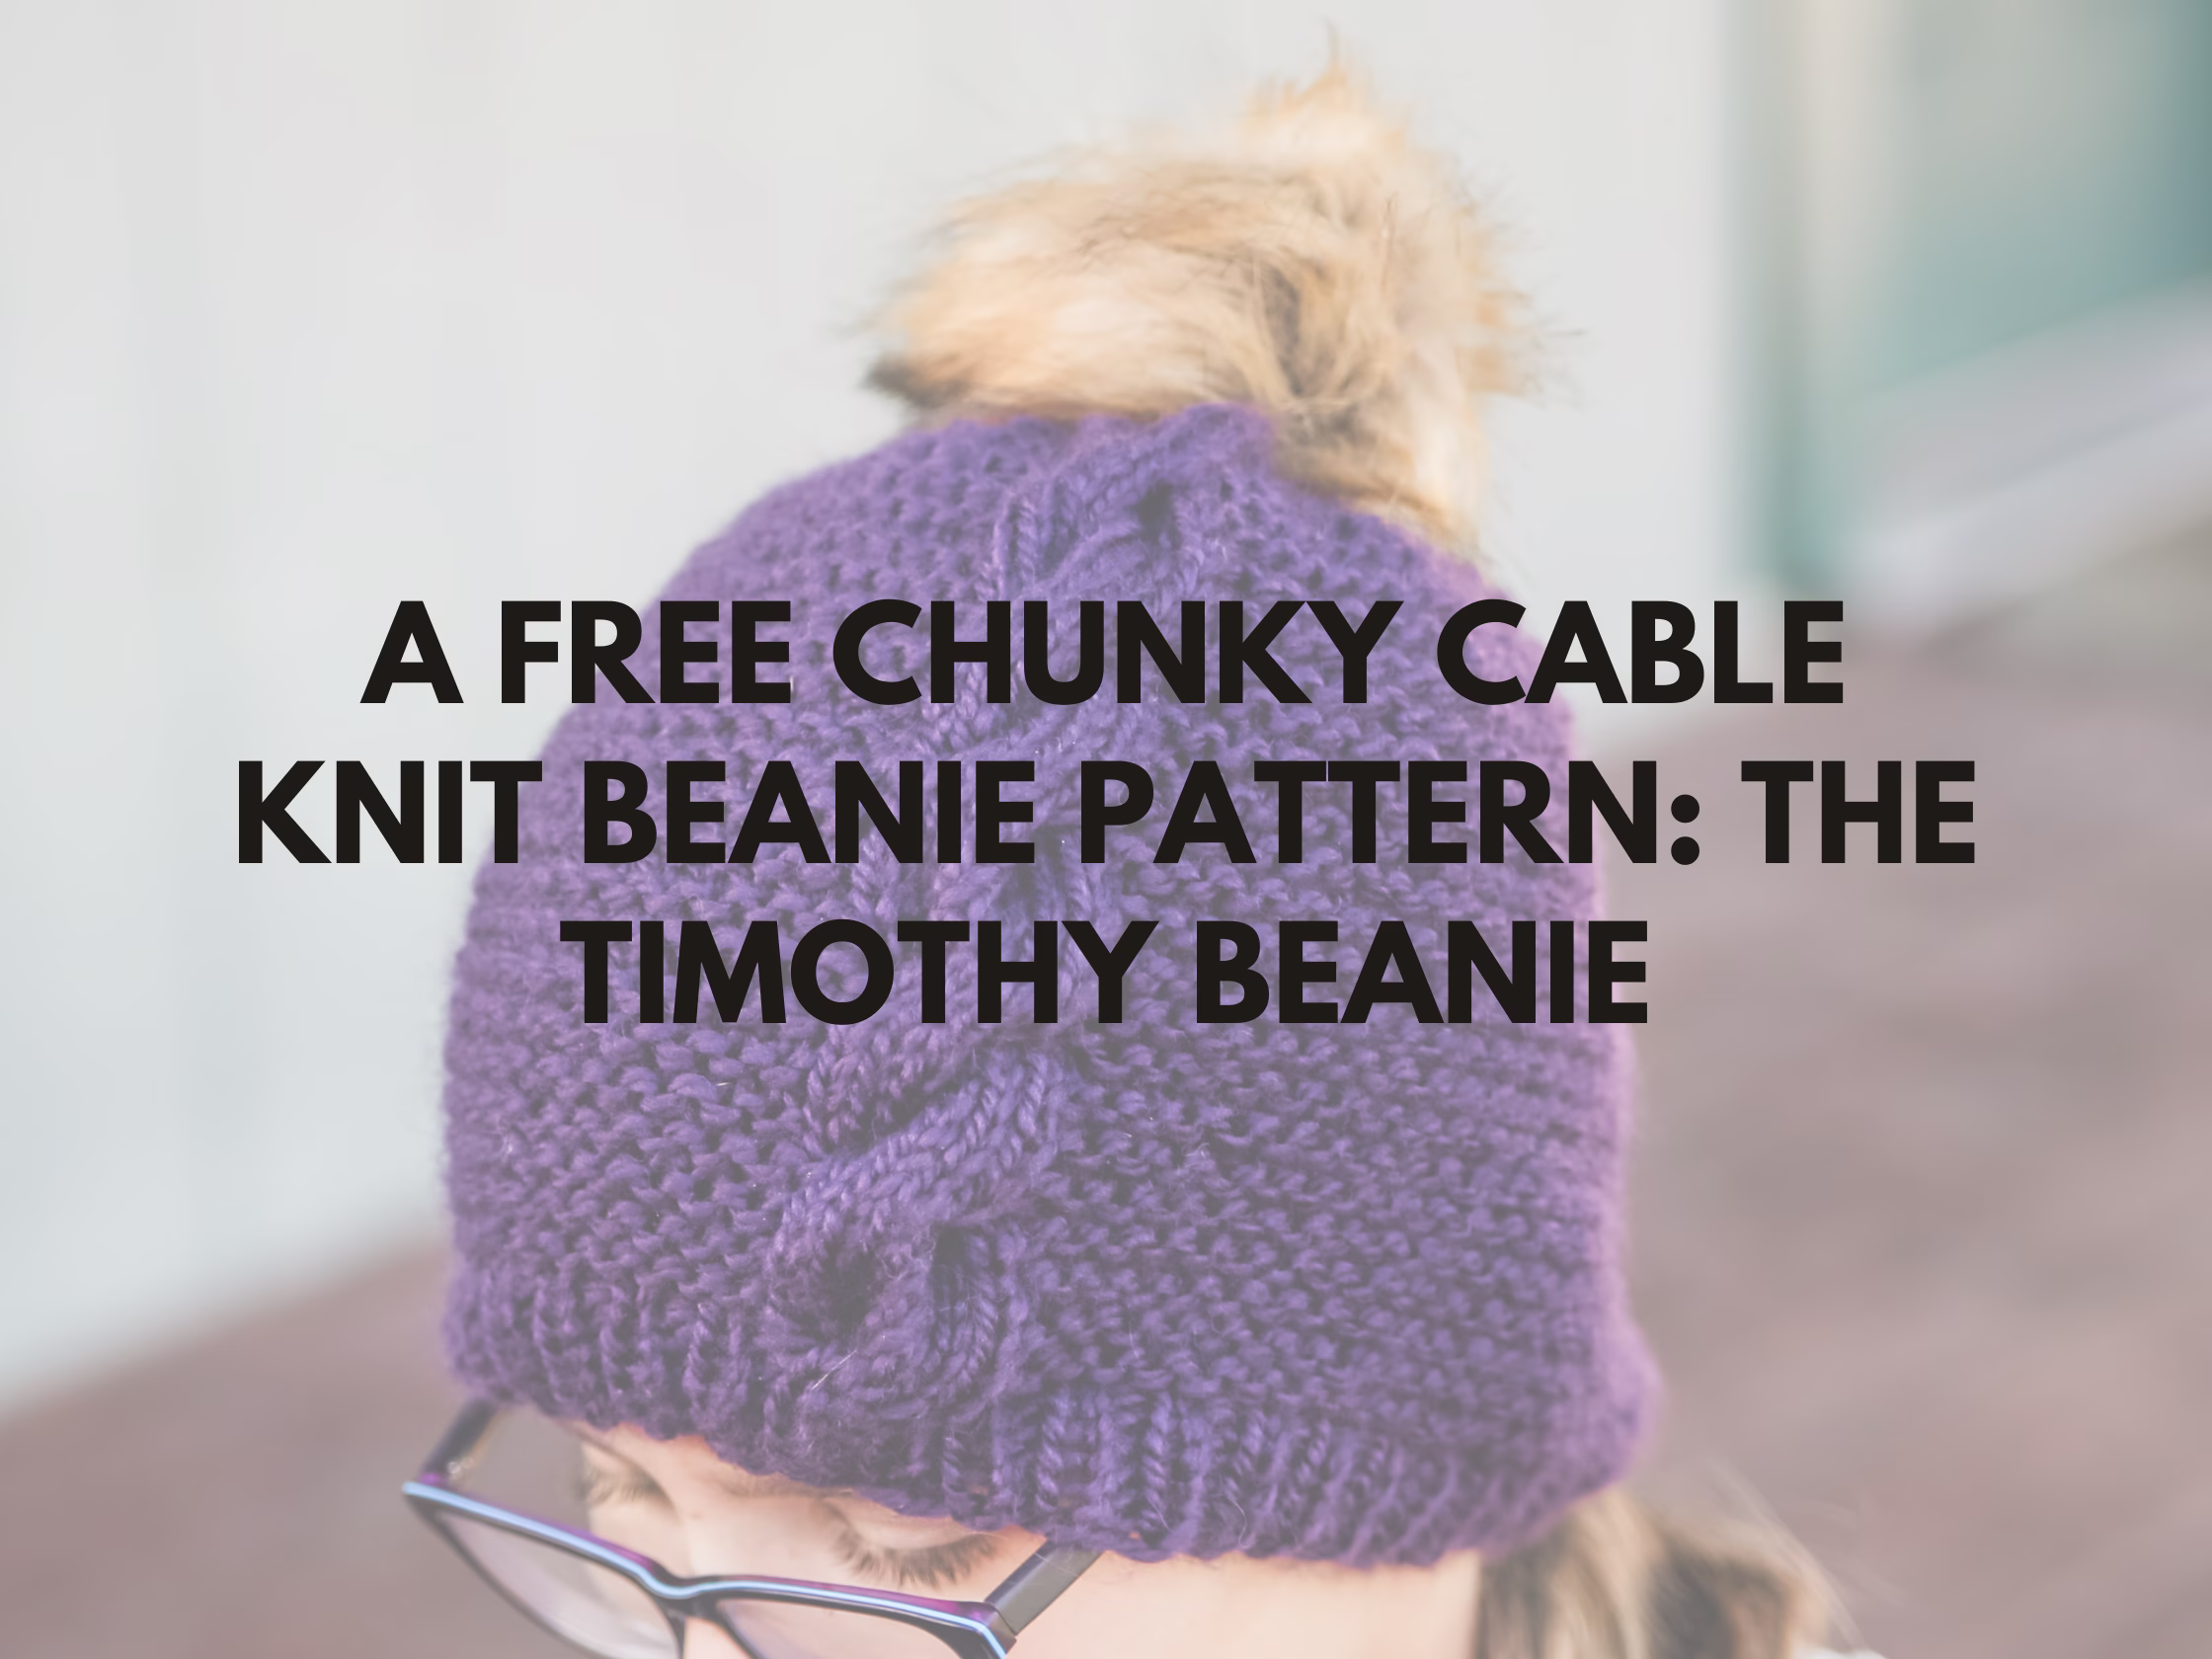
This Chunky Cable Knit Beanie Pattern is a quick and textured hat project to add to your collection of free hat knitting patterns. If you are looking for a hat that works up quickly, has bold cable detail, and still keeps the knitting simple, the Timothy Beanie is a great choice. This post walks through the yarn, needles, construction, and simple details that make this Chunky Cable Knit Beanie Pattern a fun project for chunky yarn. The wide cable gives the hat its main texture, while the garter stitch keeps the rest of the beanie simple, stretchy, and easy to work.

The Timothy Beanie is a good option when you want a handmade hat that does not take forever to finish. Chunky yarn helps the project move along quickly, and the single cable gives the beanie enough detail without making the whole project feel complicated.
It is also a nice pattern for gift knitting because it comes in several sizes. You can make it with or without a pompom depending on the look you want.
What Materials Do You Need for This Chunky Cable Knit Beanie Pattern?
For this Chunky Cable Knit Beanie Pattern, I used Premier Yarns Elle by Me Charlotte, which is a chunky weight yarn with enough softness and stretch for a hat. The garter stitch and cable both show up well in this yarn, and the thicker weight helps the beanie knit up faster than a lighter yarn would.
You will also need size 10 US, 6mm knitting needles, a stitch marker, and double pointed needles for the decreases. A removable pompom is optional, but it is a fun finish if you like that look.

The pompom button is also helpful if you want to remove the pompom before washing. It keeps the top of the hat neat and makes the finished beanie easier to care for.
This pattern uses simple supplies, but the finished hat still has a lot of texture. That is one of the reasons chunky cable hat patterns are so satisfying to knit.
How Do You Knit the Timothy Beanie?
The Timothy Beanie is knit in the round, beginning with a stretchy cast on and a short section of 1×1 ribbing. After the ribbing, the body of the hat is worked in garter stitch with one wide cable running up the center.
The cable pattern uses a C8B, which means you hold 4 stitches to the back, knit the next 4 stitches, and then knit the 4 stitches from the cable needle. The rest of the hat is kept simple so the cable can stay centered and easy to follow.

The decreases are worked so they blend into the garter stitch and reduce the cable evenly at the top of the hat. You do not bind off at the end. Instead, you cut the yarn, pull it through the remaining stitches, and cinch the top closed.
This makes the top of the beanie clean and simple. After weaving in the ends, you can block the hat as desired and add a yarn or faux fur pompom if you want one.
What Other Free Hat Knitting Patterns Should You Try?
If you like this Chunky Cable Knit Beanie Pattern, you may also enjoy these free hat knitting patterns:
• grace beanie
• ezra beanie
• peace beanie
• everyday beanie chunky
• selah beanie
These patterns are great options if you enjoy knitting hats with texture, ribbing, cables, or simple everyday shapes. They are also nice patterns to keep on hand when you want a smaller project that is useful and giftable.

The Timothy Beanie is a good chunky hat pattern when you want something quick, warm, and textured. The wide cable gives it a classic handmade look, while the garter stitch keeps the knitting simple enough to enjoy.
Timothy Beanie Free Pattern
Size
newborn, baby (toddler, child) adult small, adult large
Materials: Approximately 1, 1 (1, 1) 1, 1 balls of Premier Elle By Me Charlotte (164yd/150g) needle, stitch marker
Needle Size: 10(US) 6mm straight and dpn
Gauge (tension): 16sts & 32 rows to make 10cm square, using size 10(US) 6mm needles in garter
Head Measurement
12, 14 (16, 18) 20, 22 ins or 30, 35 (40, 45) 50, 55 cm
METHOD
This hat pattern is knit in the round. The decreases are hidden in the garter and the cable is decreased evenly to create a pretty top of the hat.
Stitch Pattern

Round 1 – c8b
Round 2 – k8
Round 3 – k8
Round 4 – k8
Round 5 – k8
Round 6 – k8
Round 7 – k8
Round 8 – k8
BEANIE
Cast on 44, 52 (60, 68) 76, 84 stitches using your favorite stretchy cast on.
Join for working in the round being careful not to twist stitches.
Place a stitch marker on your right needle to mark the beginning of the round (bor marker).
Work in a [K1P1] ribbing for 1in/2.5cms
Set-up round – [m1, k1] 4 times, pm, k40, 48 (56, 64) 72, 80 [48, 56 (64, 72) 80, 88sts]
Work the body of hat as follows: work in garter st (knit 1 round, purl 1 round) to first marker, sm, work in charted stitch pattern to next marker, sm, work in garter to bor marker.
Work as above for 3.5, 4 (5, 5.5) 6.5, 7.5ins/9, 10 (12.5, 14) 17, 19.5cms ending after completing a purl round of your garter.
DECREASES
Round 1 – Work in charted stitch pattern, sm, [k2, k2tog] to beginning or round marker [38, 44 (50, 56) 62, 68sts]
Round 2 –work in charted stitch pattern, sm, purl to bor marker
Round 3 –work in charted stitch pattern, sm, [k1, k2tog] to beginning or round marker [28, 32 (36, 40) 44, 48sts]
Round 4 –ssk, k4, k2tog, sm, purl to bor marker [26, 30 (34, 38) 42, 46sts]
Round 5 –ssk, k2, k2tog, sm, [k2tog] to beginning or round marker [14, 16 (18, 20) 22, 24sts]
Round 6 –ssk, k2tog, sm, purl to bor marker [12, 14 (16, 18) 20, 22sts]
Round 7 – [k2tog] around [6, 7 (8, 9) 10, 11sts]
DO NOT BIND OFF. Cut yarn leaving a tail long enough to weave in ends. Pull yarn through remaining stitches and cinch the top tight. Weave in ends. Block as desired. Adding a pompom (yarn or fur) is adorable but is optional.
ABBREVIATIONS
BOR – beginning of round
C8B – cable 8 back – place the 4 sts on your cable needle, hold in back, knit the next 4 sts, then knit the 4 sts on the cable needle
K – knit
K2TOG – knit 2 stitches together
P – purl
PM – place marker
SM – slip marker
SSK – slip, slip, knit – slip the next stitch as if to knit, slip the next stitch as if to knit, knit the 2 slipped stitches together
ST – stitch
STS – stitches

Have you knit a chunky cable hat before? I would love to hear what yarn you used or whether you would add the pompom to this one, so leave a comment below and let me know.
Affiliate Disclaimer: This post contains affiliate links, meaning I may earn a small commission if you make a purchase through them at no extra cost to you.
Comments are closed.