
Looking for a free turtleneck sweater knitting pattern that is cozy, wearable, and a little bit elegant? Meet the Miriam Turtleneck Sweater, my first new free pattern of the week! Free sweater knitting patterns are perfect for building a handmade wardrobe, and the Miriam Turtleneck Sweater adds a cozy cropped option to the mix.
I designed Miriam specifically to wear over dresses and with high-waisted skirts. I wanted a sweater that would add warmth without covering up the shape of the outfit underneath, and the cropped length does exactly that. Add in a wonderfully cozy turtleneck, soft fuzzy yarn, and simple raglan construction, and you have a sweater that fits right into a handmade fall and winter wardrobe.
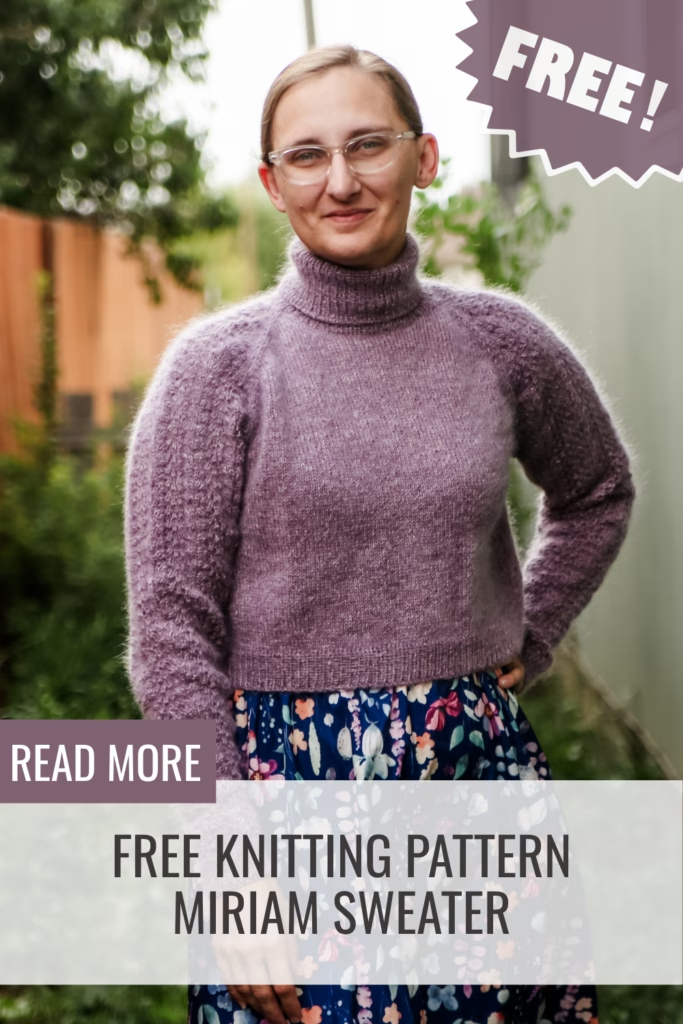
This free turtleneck sweater knitting pattern is worked from the top down, but there is a little twist to the construction: you don’t actually begin with the turtleneck.
Instead, the sweater begins at the upper neckline and is worked flat while you shape both the neck and raglan at the same time. Once the front neck has been created, you cast on the center-front stitches, join everything together, and continue working the sweater in the round.
It gives you that classic top-down raglan construction while allowing the neckline to sit nicely before the turtleneck is added afterward.
What Yarn Do You Need for This Free Turtleneck Sweater Knitting Pattern?
For the Miriam Turtleneck Sweater, I used Hobbii Soft Alpaca and Hobbii Kid Silk held together.
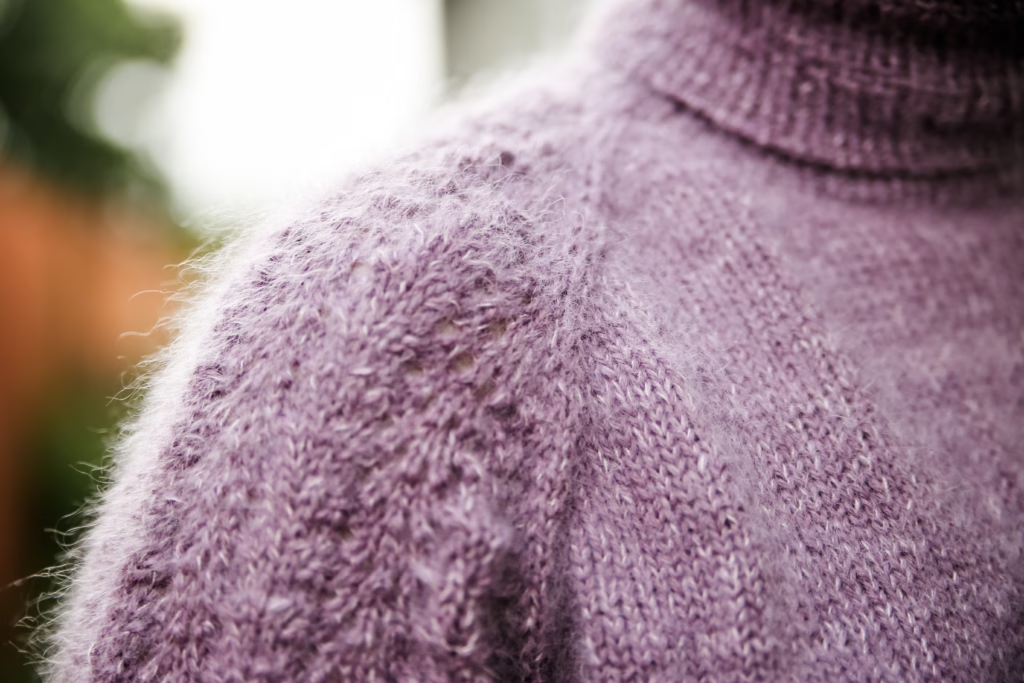
Holding these two yarns together creates such a lovely fabric for this style of sweater. The alpaca brings softness and warmth, while the Kid Silk adds that light, fuzzy halo that makes the finished sweater feel extra cozy without taking away from the simple shape of the design.
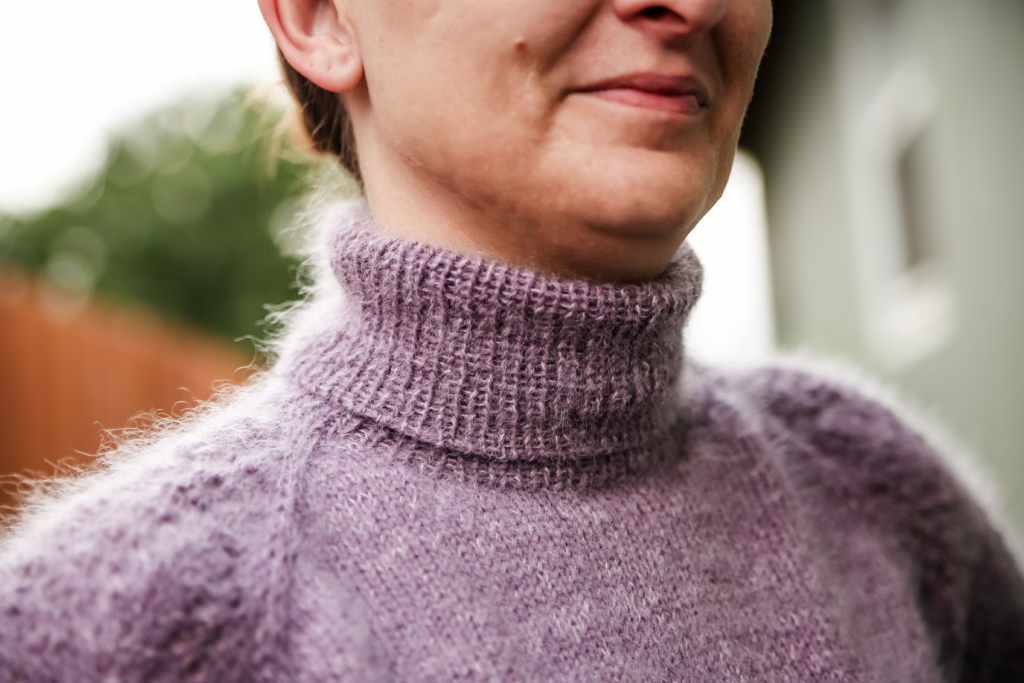
The combination works especially well for a turtleneck sweater because you get warmth around the neck while still creating a fabric that feels soft and comfortable to wear.
If you decide to substitute yarn, remember that the important thing is matching the gauge of the pattern rather than simply choosing two yarns of similar-looking weights. Different fiber combinations can behave very differently once they’re held together.
And definitely make your swatch with both yarns held together, just as you’ll knit the sweater. That way you can check both your gauge and whether you like the finished fabric before committing to an entire sweater.
The Miriam Turtleneck Sweater is available in women’s sizes XS through 4X, covering bust measurements from approximately 30 inches to 58 inches.
How Is the Miriam Turtleneck Sweater Knitted?
Miriam is a top-down raglan sweater, which means you’ll begin at the neckline and increase to create the yoke before separating the body and sleeves.
The beginning is the part where you’ll want to pay a little extra attention. You’ll cast on and work flat while increasing both around the raglan lines and along the neckline. Those two sets of increases are happening at the same time, so this is one place where your stitch markers are going to be very good friends!
I recommend using markers to clearly identify each raglan increase point. It makes it much easier to see where you are in the row without having to stop and count everything over and over again.
Once you have increased enough to shape the neck, you’ll cast on the stitches for the middle of the front neckline and join your knitting in the round.
From there, things become wonderfully straightforward. You continue working the raglan increases in the round until the yoke is complete.
And because this is a top-down sweater, you get the nice advantage of watching the shape develop as you knit. If you’ve knitted raglan sweaters before, the construction will feel familiar, while the flat-worked neckline gives this free raglan sweater pattern a slightly different start.
The turtleneck itself is added afterward. This allows you to create the neck opening first and then finish it with that cozy folded-up look that makes the Miriam sweater perfect for cooler weather.
Why Did I Make This Turtleneck Sweater Cropped?
The cropped length was very intentional.
I designed this sweater because I wanted something I could wear over dresses or with a high-waisted skirt. A longer sweater can sometimes hide the waistline of a dress or skirt completely, so I wanted Miriam to finish at a length that would work with those pieces instead of fighting with them.
It’s one of those knits that fills a very specific gap in my wardrobe—which is one of my favorite reasons to knit something in the first place.
Wear it over a dress when you want a little extra warmth, pair it with a high-waisted skirt, or style it with your favorite high-rise pants or jeans. The simple raglan shape keeps it versatile, while the turtleneck and fuzzy yarn give it plenty of personality.
If you’re searching for a free turtleneck sweater knitting pattern that can work as part of an outfit rather than simply being your entire outfit, Miriam is exactly the kind of sweater I had in mind.
What Should You Knit After the Miriam Turtleneck Sweater?
If Miriam has you ready to fill your closet with handknit sweaters, there are a few more free sweater patterns you might want to add to your knitting queue:
Each one gives you another way to play with sweater construction, texture, and styling, so you can choose your next project based on the kind of sweater you actually want to wear.
If you’re especially fond of cozy necklines, take a look at the Wisdom Pullover next. Or browse the Saffron and Micheal Pullovers for even more ideas for your handmade sweater wardrobe.
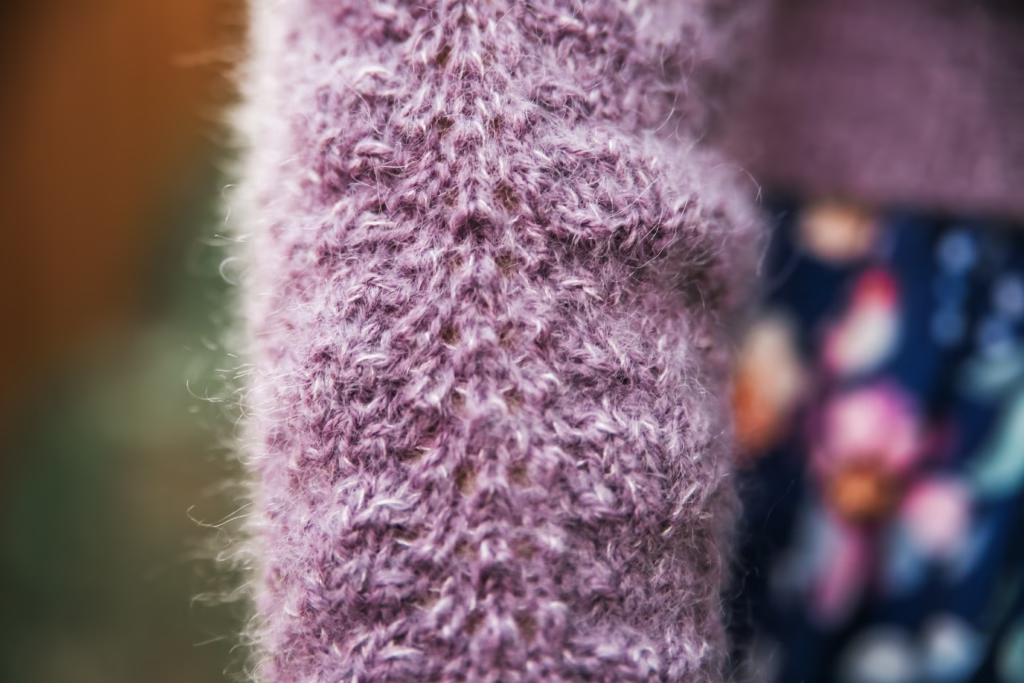
For now, though, I’m very excited to have Miriam joining my collection of free sweater patterns. Between the soft alpaca-and-mohair fabric, top-down raglan construction, cropped silhouette, and wonderfully cozy neck, it’s exactly the sort of sweater I want to reach for when dress-and-skirt season starts getting chilly.
And with sizes ranging from XS through 4X for approximately 30-58 inch busts, there are plenty of options for choosing the size that works for you.
Miriam Turtleneck Sweater Free Pattern
Size: XS, S (M, L) XL, 2X (3X, 4X)
Materials: Approximately 1381, 1479 (1645, 1823) 2010, 2176 (2399, 2607) of Hobbii Soft Alapaca (50g/180y) and Hobbii Kid Silk (25g/213yds), needle, stitch markers
Needle Size: 6(US) 4mm & 4(US) 3.5mm straight and dpn
Gauge (tension): 24sts & 32 rows to make 10cm square, using size 6(US) 4mm needles
Chest Measurement: (75, 85 (95, 105) 115, 125 (135, 145) cm or 30, 34 (38, 42) 46, 50 (54, 58) ins
METHOD
This pattern is a top-down raglan that is worked flat until the neck is shaped then joined in the round with 10cm of ease.
-
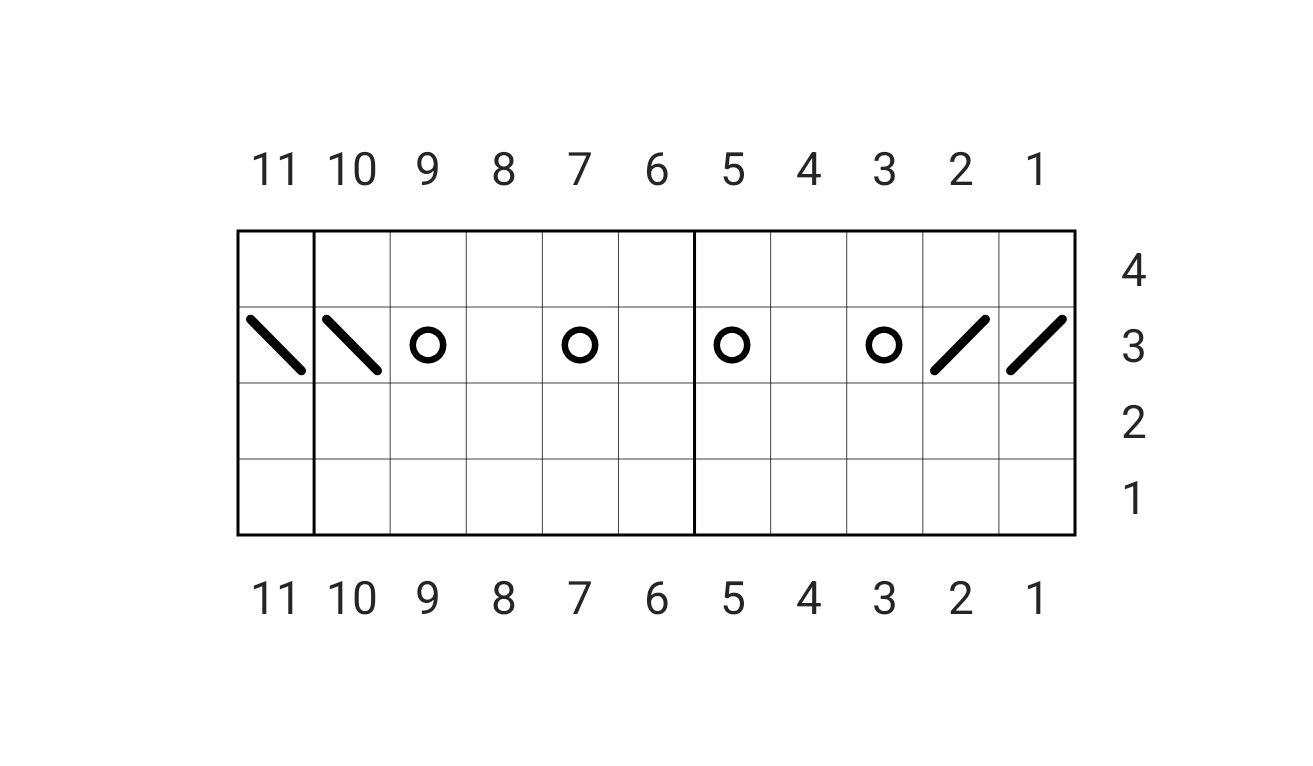
In the Round
Round 1 – knit across
Round 2 – knit across
Round 3 – [k2tog, k2tog, yo, k1, yo, k1, yo, k1, yo, ssk, ssk] across
Round 4 – knit across
Flat
Row 1 – knit across
Row 2 – purl across
Row 3 – [k2tog, k2tog, yo, k1, yo, k1, yo, k1, yo, ssk, ssk] across
Row 4 – purl across
- NECK
Cast on 50, 52 (54, 56) 58, 64 (64, 68) sts in using larger needles
SET-UP ROUND
Purl 2, 2 (2, 2) 2, 2 (2, 2) (front), pm,
Purl 6, 6 (6, 6) 6, 6 (6, 6) (sleeve), pm,
Purl 34, 36 (38, 40) 42, 48 (48, 52) (back), pm,
Purl 6, 6 (6, 6) 6, 6 (6, 6) (sleeve), pm,
Purl 2, 2 (2, 2) 2, 2 (2, 2) (front), place bor marker
Note: From here on out the sleeves will be worked in the charted stitch pattern while the body will be worked in stockinette.
Raglan shaping and neck shaping are worked AT THE SAME TIME! - RAGLAN SHAPING
Shape raglan seams by increasing 1 st each side of each marker, a total of 8 sts increased per round
Work each raglan round as follows:
Inc round – Work in stockinette to 1st before marker, m1r, k1, sm, k1, m1l, work in charted stitch pattern to 1 st before marker, m1r, k1, sm, k1, m1l, work stockinette to 1 st before marker, m1r, k1, sm, k1, m1l, work in charted stitch pattern to 1 st before marker, m1r, k1, sm, k1, m1l, work in stockinette across to end of row [8sts increased]
Work raglan increases as described above:
Every Row/round – 6, 6 (12, 18) 24, 29 (38, 42)
Every other round/row 25, 28 (27, 26) 25, 24 (20, 20) times - NECK SHAPING
Stitches are increased at the beginning and end of each row to shape the front neck.
Start front neck shaping after working 2, 2 (3, 7) 5, 3 (3, 4) rows after the set-up row:
Increase 1sts at each end of front neck
Work 3 more rows without neckline shaping.
Increase 1 st at each end of front neck each following (1 rows.
Work 1 more row.
Increase 1 st at each end of front neck each following 3, 4 (4, 3) 3, 5 (5, 6) rows.
Cast on 20, 20 (22, 26) 28, 28 (28, 30) sts at the end of the next right side row.
Join in the round. - STITCH COUNT CHECK
Total stitches: 336, 356 (400, 444) 488, 524 (572, 612)
Front/Back: 98, 104 (116, 128) 140, 152 (164, 176)
Sleeves: 70, 74 (84, 94) 104, 110 (122, 130) - DIVIDE FOR BODY AND SLEEVES
Knit to marker, sm, (this is now your bor marker), place 70, 74 (84, 94) 104, 110 (122, 130) sleeve stitches on stitch holder,
Cast on 10, 10 (10, 10) 10, 10 (10, 10) sts, remove raglan marker,
Work across 98, 104 (116, 128) 140, 152 (164, 176) back stitches, remove raglan marker,
Place 70, 74 (84, 94) 104, 110 (122, 130) sleeve stitches on stitch holder, remove raglan marker
Cast on 10, 10 (10, 10) 10, 10 (10, 10) sts, remove, raglan marker,
Work across 98, 104 (116, 128) 140, 152 (164, 176) front stitches
[210, 236 (240, 266) 292, 326 (348, 378) sts] - BODY
Continue in pattern as established for 17, 17.5 (17.5, 18.5) 18.5, 20 (21, 22.5) cm (or desired length) or 6.75, 7 (7, 7.5) 7.5, 8 (8.5, 9) in measuring from underarm (or desired length)
Switch to smaller needles.
Work in k1p1 ribbing for 4cms or 1.5ins
Bind off in pattern. - SLEEVE (REPEAT FOR BOTH SLEEVES)
Using larger needles (you may need to use dpn or magic loop),
Keeping in established charted stitch pattern, work each sleeve one at a time as follows: Pick up 5, 5 (5, 5) 5, 5 (5, 5) sts from underarm,
Work 70, 74 (84, 94) 104, 110 (122, 130) sts in pattern off the sleeve on the holder,
Pick up 5, 5 (5, 5) 5, 5 (5, 5) sts from underarm
Place bor marker.
80, 84 (94, 104) 114, 120 (132, 140) sts
Work in established stitch chart pattern for 2, 2.5 (2.5, 2.5) 2.5, 2.5 (2.5, 2.5)ins/ 5, 6 (6, 6) 6, 6 (6, 6)cms
Decrease 1 stitch at each side of marker next round then every 6th, 6th (6th, 4th) 4th, 4th (4th, 4th) round 16,11 (4, 24) 21, 20 (15, 22) times.
Then decrease each side of marker every following 2nd, 4th (4th, 2nd) 2nd, 2nd (2nd, 2nd) rounds 2, 9 (20, 5) 12, 15 (25, 12) times
42, 42 (44, 44) 46, 48 (50, 70) sts.
Continue in established charted stitch pattern until sleeve measures 37.5, 40 (40, 41) 41, 42.5 (42.5, 44)cms or 15, 16 (16, 16.5) 16.5, 17 (17, 17.5) ins (or desired length) measuring from underarm.
CUFF
Switch to smaller dpn needles
Work in 1×1 rib for 4 cms or 1.5ins. Bind off in pattern. - NECK
With right side facing, using smaller needle, beginning at the back left raglan, pick up and knit:
6, 6 (6, 6) 6, 6 (6, 6) sts from left sleeve,
6, 6 (6, 6) 6, 8 (9, 10) sts down left front,
20, 20 (22, 24) 28, 28 (28, 30) sts along center front,
6, 6 (6, 6) 6, 8 (9, 10) sts up right front,
6, 6 (6, 6) 6, 6 (6, 6) sts, from right sleeve,
34, 36 (38, 40) 42, 48 (48, 52) sts from back.
[78, 80 (84, 88) 94, 106 (106, 114) sts]
Join in the round and place beginning of round marker.
Work for 15 cms or 6ins.
Bind off in pattern. - FINISHING
Weave in all ends and block accordingly.
- ABBREVIATIONS
BOR – beginning of round
CO – cast on
K – knit
K2tog -knit 2 stitches together
M1L – With left needle pick up strand between 2 stitches front to back. Knit through back loop
M1R – With left needle pick up strand between 2 stitches back to front. Knit through front loop
P – purl
PM – place marker
SM – slip marker
SSK – slip, slip, knit the slipped sts together
STS – stitches
YO – yarn over
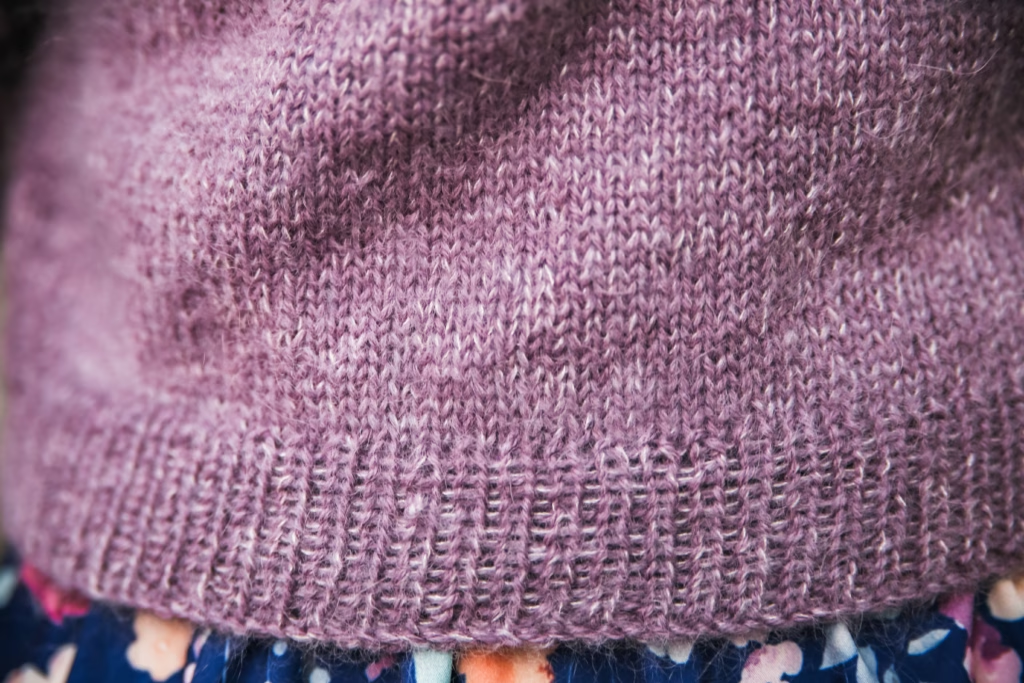
What would you wear your Miriam Turtleneck Sweater with—a dress, a high-waisted skirt, jeans, or something else entirely? Tell me in the comments! I always love hearing how you’re planning to style your knits.
This post may contain affiliate links. If you purchase through one of these links, I may earn a small commission at no additional cost to you. Thank you for supporting my free knitting patterns!