
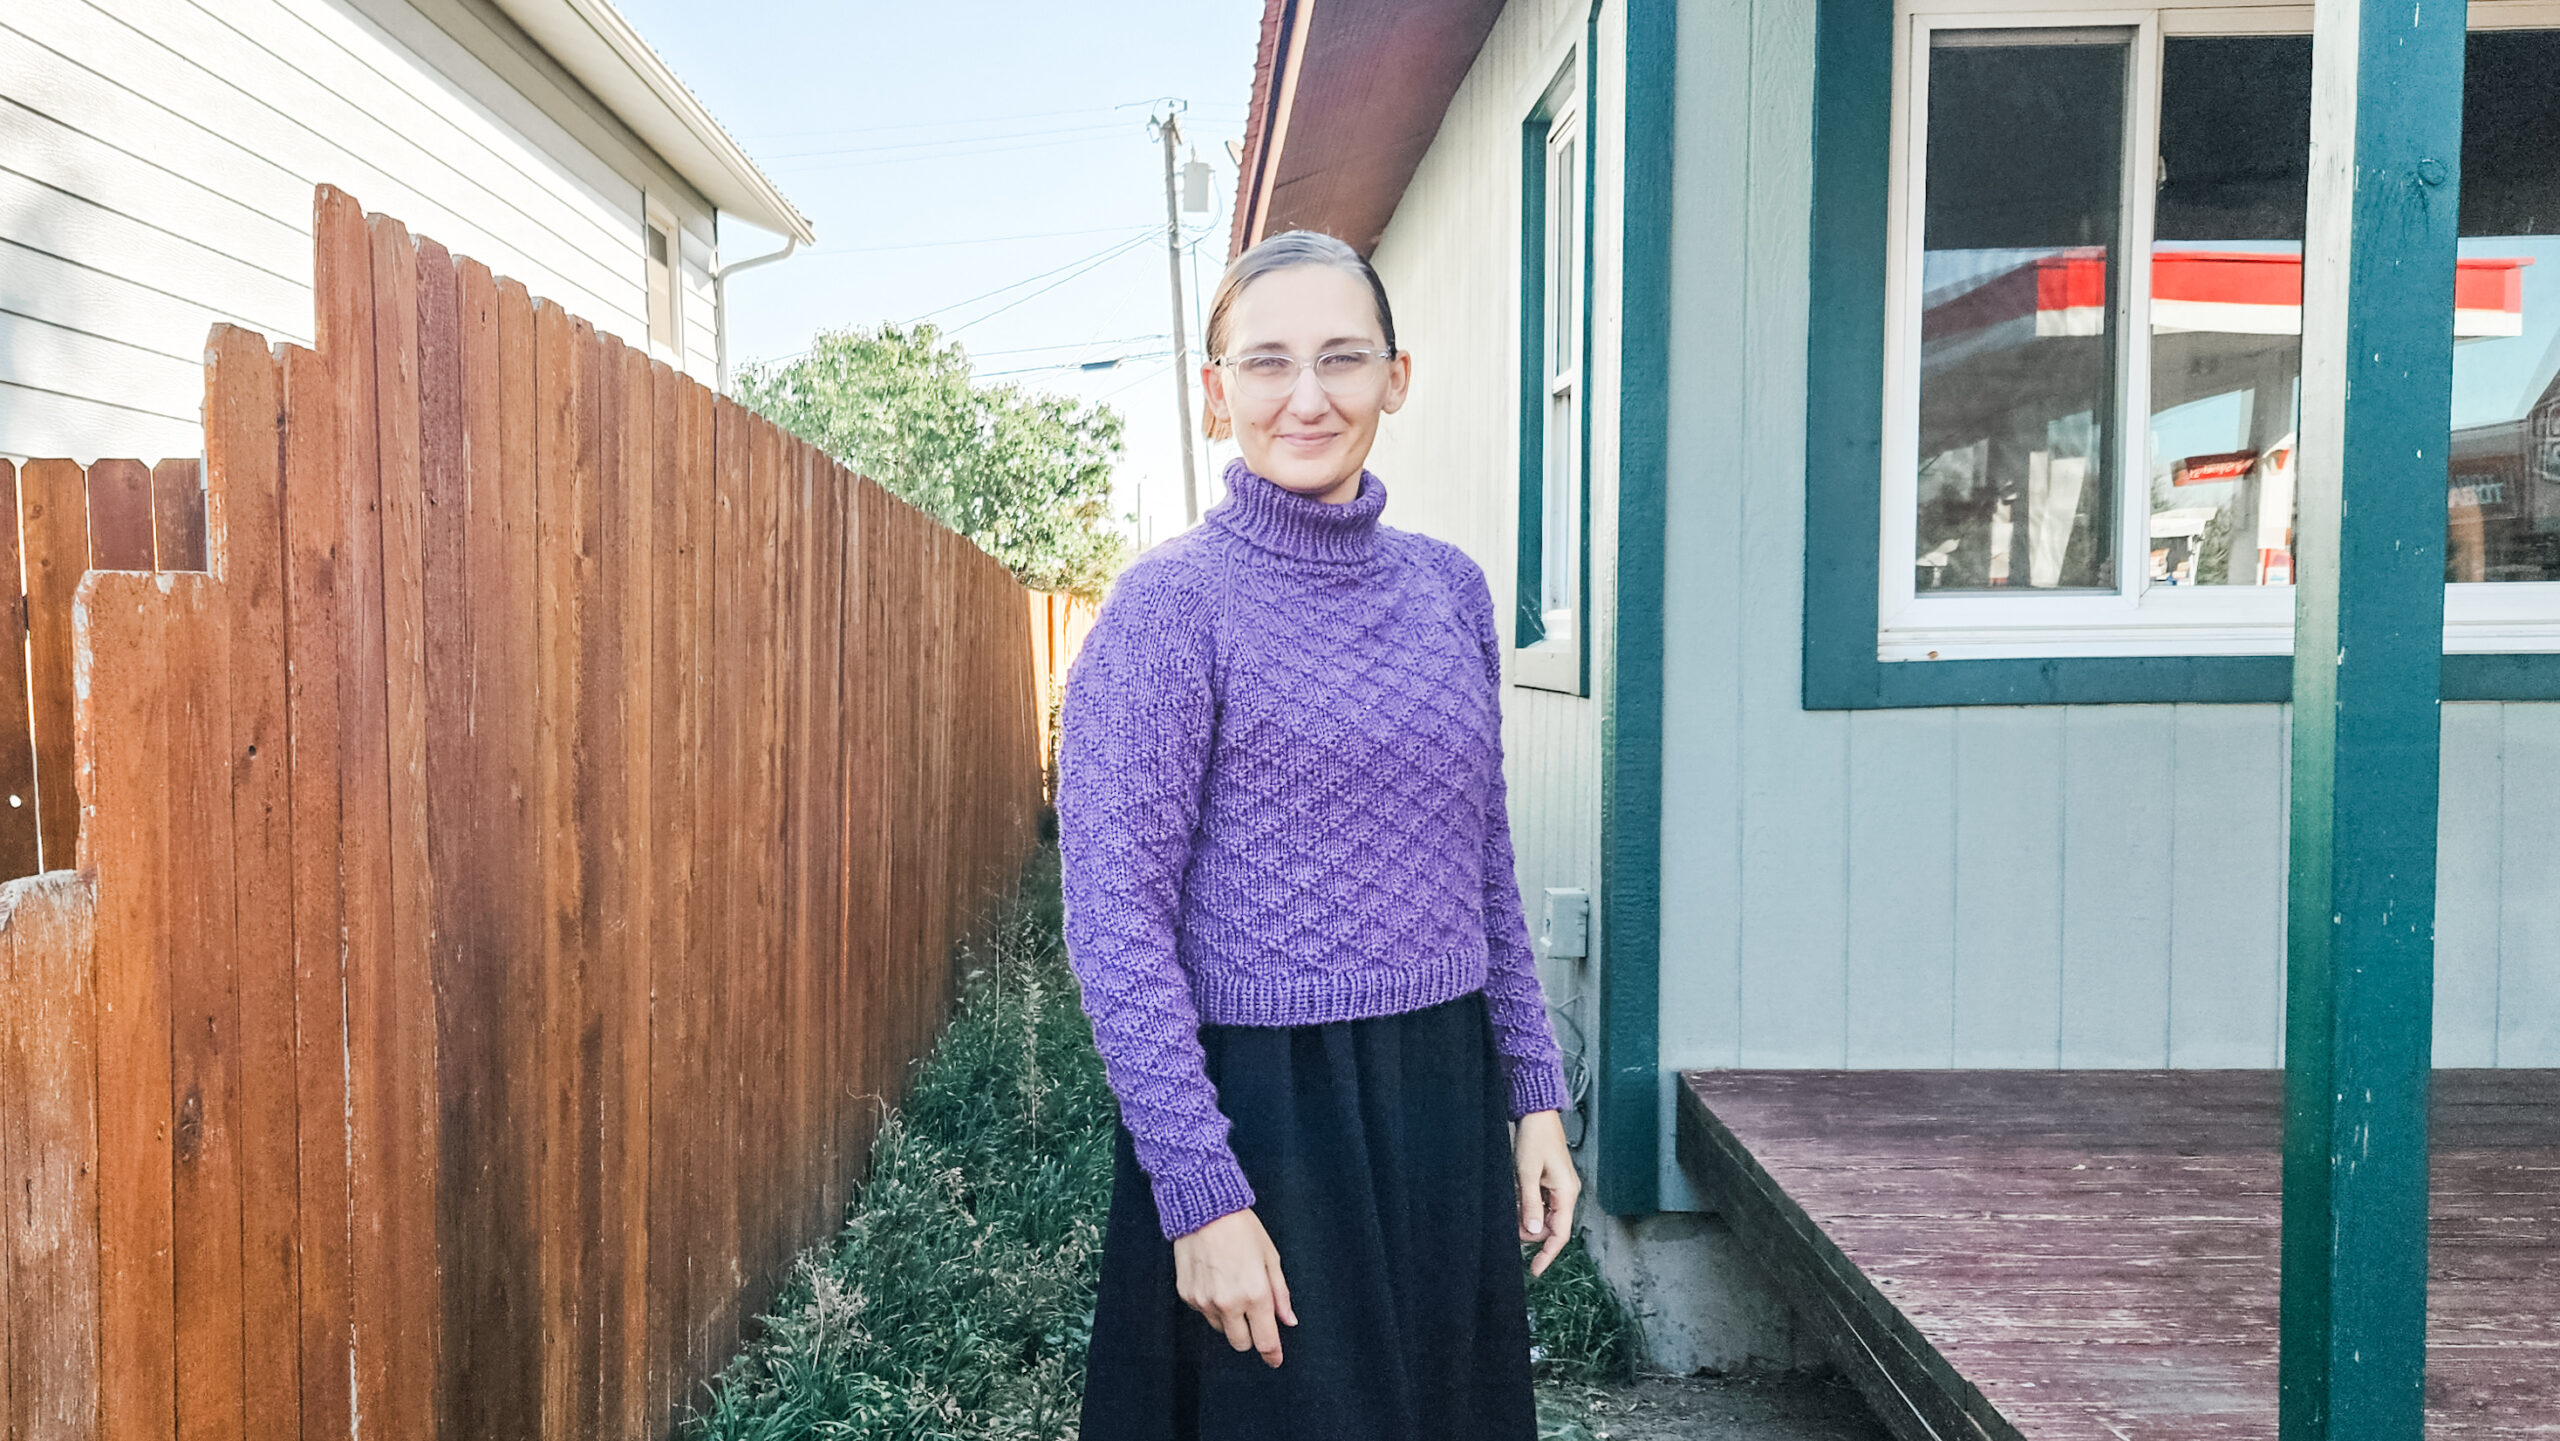
This free Turtleneck Sweater pattern is a simple, wearable design that also works as a free sweater knitting pattern you’ll actually reach for again and again.
If you’ve been wanting a sweater that feels polished without being complicated, this is exactly what you need. The Wisdom design solves that in-between problem—something interesting enough to keep your hands engaged, but not so detailed that it slows you down. With its top-down construction, flexible fit, and easy-to-follow stitch pattern, this free Turtleneck Sweater pattern makes it easy to create a sweater that fits into real life.

If your goal is a sweater that looks put-together but still feels doable, this one checks all the boxes. The texture adds interest, the fit is adjustable, and the overall process stays relaxing.
It’s the kind of project you can pick up at the end of the day without overthinking it. And when you’re finished, you actually want to wear it.
What materials work best for this free Turtleneck Sweater pattern?
When I designed this free Turtleneck Sweater pattern, I wanted something soft, practical, and durable. That’s why I chose Premier Yarns Anti-Pilling Bamboo Chunky. It has a smooth feel, a nice drape, and it holds up well even with regular wear.
The chunky weight also means faster progress, which makes this free sweater knitting pattern feel really satisfying from the start. You get to see that texture build quickly, and it keeps the momentum going.
I also recommend sticking with the suggested needle sizes so your fabric doesn’t get too loose. The stitch pattern looks best when it has a little structure, so your gauge matters here.

Once you get your yarn and needles sorted, everything else starts to fall into place. It’s a very forgiving setup that works well for a wide range of knitters.
How does this free Turtleneck Sweater pattern come together?
This free sweater knitting pattern is worked from the top down with raglan shaping, which makes it easy to adjust as you go. You start with the turtleneck, build out the yoke, and then separate for the body and sleeves.
The stitch pattern is made with simple knits and purls, so once you get into the rhythm, it becomes second nature. That’s one of my favorite parts of this free Turtleneck Sweater pattern—it looks detailed, but it doesn’t feel complicated while you’re knitting it.
If you’re unsure about fit, you can try it on as you go and tweak the length or shaping. That flexibility makes a big difference, especially if you want something that fits just right.

Take your time with the first few rounds of the stitch pattern, and after that it really flows. It’s a steady, enjoyable knit from start to finish.
What other free sweater knitting pattern designs should you try?
If you enjoy this free Turtleneck Sweater pattern, there are a few other designs that pair really well with it:
• Cedar Pullover
• Saffron Pullover
• Rosemary Cardigan
• Peace Sweater
• Michael Sweater
These all follow a similar idea—simple construction with thoughtful texture that keeps things interesting without making the project overwhelming.

They’re great options if you want to build a handmade wardrobe that actually gets worn. Each one brings something slightly different, but they all stay practical and approachable.
Wisdom Pullover Free Pattern
Size: XS, S (M, L) 1X, 2X (3X, 4X)
Materials: Approximately 8, 8 (8, 9) 10, 11 (12, 13) balls of Premier Anti-Pilling Bamboo Chunky (131yd/100g) needle, stitch markers
Needle Size: 9(US) 5.5mm & 10(US) 6mm straight and dpn
Gauge (tension): 15sts & 22 rows to make 10cm square, using size 10(US) 6mm needles
Chest Measurement: 74, 78 (82, 90) 98, 107 (119, 131) cm
METHOD
Wisdom Pullover is top-down seamless turtleneck raglan in a warm and soft yarn. Created for myself to wear over short sleeve dress in the winter, I wanted a classic and warm knit for her for our frigid Montana winters.
Abbreviations can be found on the last page.
Note: choose size based on bust measurement for best fit
1X1 RIB PATTERN
Row 1 (right side row) – (k1, p1) across Row 2 – knit all the knit stitches, purl all the purl stitches.
WISDOM STITCH PATTERN

Round 1 – k7, p1
Round 2 – p1, k5, p1, k1
Round 3 – k1, p1, k3, p1,k2
Round 4 – k2, p1, k1, p1, k3
Round 5 – k3, p1, k4
Round 6 – repeat round 4
Round 7 – repeat round 3
Round 8 – repeat round 2
RAGLAN INCREASES Inc row – [k1, m1l, knit to 1 st before next marker, m1r, k1, sm] repeat [to] 3 more times, then continue to end of row/round. 8 sts increased
ABBREVIATIONS
K – knit
P – purl
PM – place marker
SM – slip marker
K2tog -knit 2 stitches together
SSK – slip, slip, knit the slipped sts together
M1L – With left needle pick up strand between 2 stitches front to back. Knit through back loop
M1R – With left needle pick up strand between 2 stitches back to front. Knit through front loop

NECK
Cast on using smaller circular needle: 54, 56 (60, 60) 64, 68 (72, 76) sts.
I used an Italian cast on. Join in the round.
Work in 1×1 ribbing for 15cms.
Switch to larger needles.
YOKE
Set up row (worked in wisdom stitch pattern) –
k21, 22 (24, 24) 26, 28 (30, 32) pm,
k6, 6 (6, 6) 6, 6 (6, 6) pm,
k21, 22 (24, 24) 26, 28 (30, 32) pm,
k6, 6 (6, 6) 6, 6 (6, 6)
Begin working in stockinette stich (knit every round)
RAGLAN SHAPING ROWS/ROUNDS
Work raglan increases as described above:
Every round 0, 0 (0, 2) 4, 6 (8, 14) times
Then every other round 20, 20 (20, 21) 21, 21 (22, 20) times
Work 3, 3 (3, 3) 3, 0 (0, 0) rounds with no increase in wisdom stitch pattern.
STITCH COUNT CHECK
Once all the raglan and neck increases have been completed you will have
214, 216 (220, 244) 264, 284 (312, 348) sts on your needles divided as follows:
61, 62 (64, 70) 76, 82 (90, 100) sts (front),
46, 46 (46, 52) 56, 60 (66, 74) (sleeve),
61, 62 (64, 70) 76, 82 (90, 100) sts (back),
46, 46 (46, 52) 56, 60 (66, 74) sts (sleeve)
DIVIDE FOR SLEEVES
Remove markers as you get to them.
Work across the front sts,
Place the next 46, 46 (46, 52) 56, 60 (66, 74) sts on a holder or waste yarn (left sleeve),
Cast on using the backwards loop method 3, 2 (8, 2) 4, 6 (6, 4) sts (left underarm),
Knit 61, 62 (64, 72) 76, 82 (90, 100) sts (back),
Place the next 46, 46 (46, 52) 56, 60 (66, 74) sts on a holder or waste yarn (right sleeve),
Cast on using the backwards loop method 3, 2 (8, 2) 4, 6 (6, 4) sts (right underarm),
Knit to beginning of round marker.
128, 128 (144, 144) 160, 176 (192, 208) sts
SWEATER BODY
Work in wisdom stitch pattern until piece measures 21cms for a more cropped length and 31cms for a regular length measuring from underarm.
Switch to smaller circular needle.
Using work in 1×1 rib for 4 cm. Bind off all sts in pattern.
SLEEVES
Keeping in stockinette stitch pattern as already established, work each sleeve one at a time as follows:
Pick up 2, 2 (4, 4) 3, 3 (3, 3) sts from underarm,
Work 46, 46 (46, 52) 56, 60 (66, 74) sts of the sleeve on the holder,
Pick up 2, 2 (4, 4) 4, 3 (3, 3) sts from underarm on to larger double pointed needles,
Place marker at center underarm to keep track of the beginning of round.
50, 50 (54, 56) 62, 66 (72, 80) sts
Work 3, 13 (5, 13) 13, 15 (13, 15) rounds.
DECREASES
Decrease 1 st at each side of marker every:
10th round 9, 4, (0, 0) 0, 0 (0, 0)
Then every 8th round 0, 5 (11, 8) 0, 0 (0, 0)
Then every 6th round 0, 0 (0, 3) 13, 11 (8, 2)
Then every 4th round 0, 0 (0, 0) 1, 4 (9, 18)
[32, 32 (32, 34) 34, 36 (38, 40) sts].
Continue in granite stitch pattern until sleeve measures 39, 39.5 (40, 41) 42, 42.5 (43, 43.5) (or desired length) measuring from underarm.
CUFF
Switch to smaller dpn needles
Work in 1×1 rib for 4 cm.
Bind off in pattern.
FINISHING
Weave in all ends and block as desired.

If you’ve been looking for a free sweater knitting pattern that feels both doable and worth your time, this is a great place to start. I’d love to hear what version you make—cropped or regular—so let me know in the comments!
This post may contain affiliate links. This means that if you click on a link and make a purchase, I may earn a small commission at no extra cost to you. I only recommend products and services that I trust and believe will add value to my readers.
Comments are closed.