
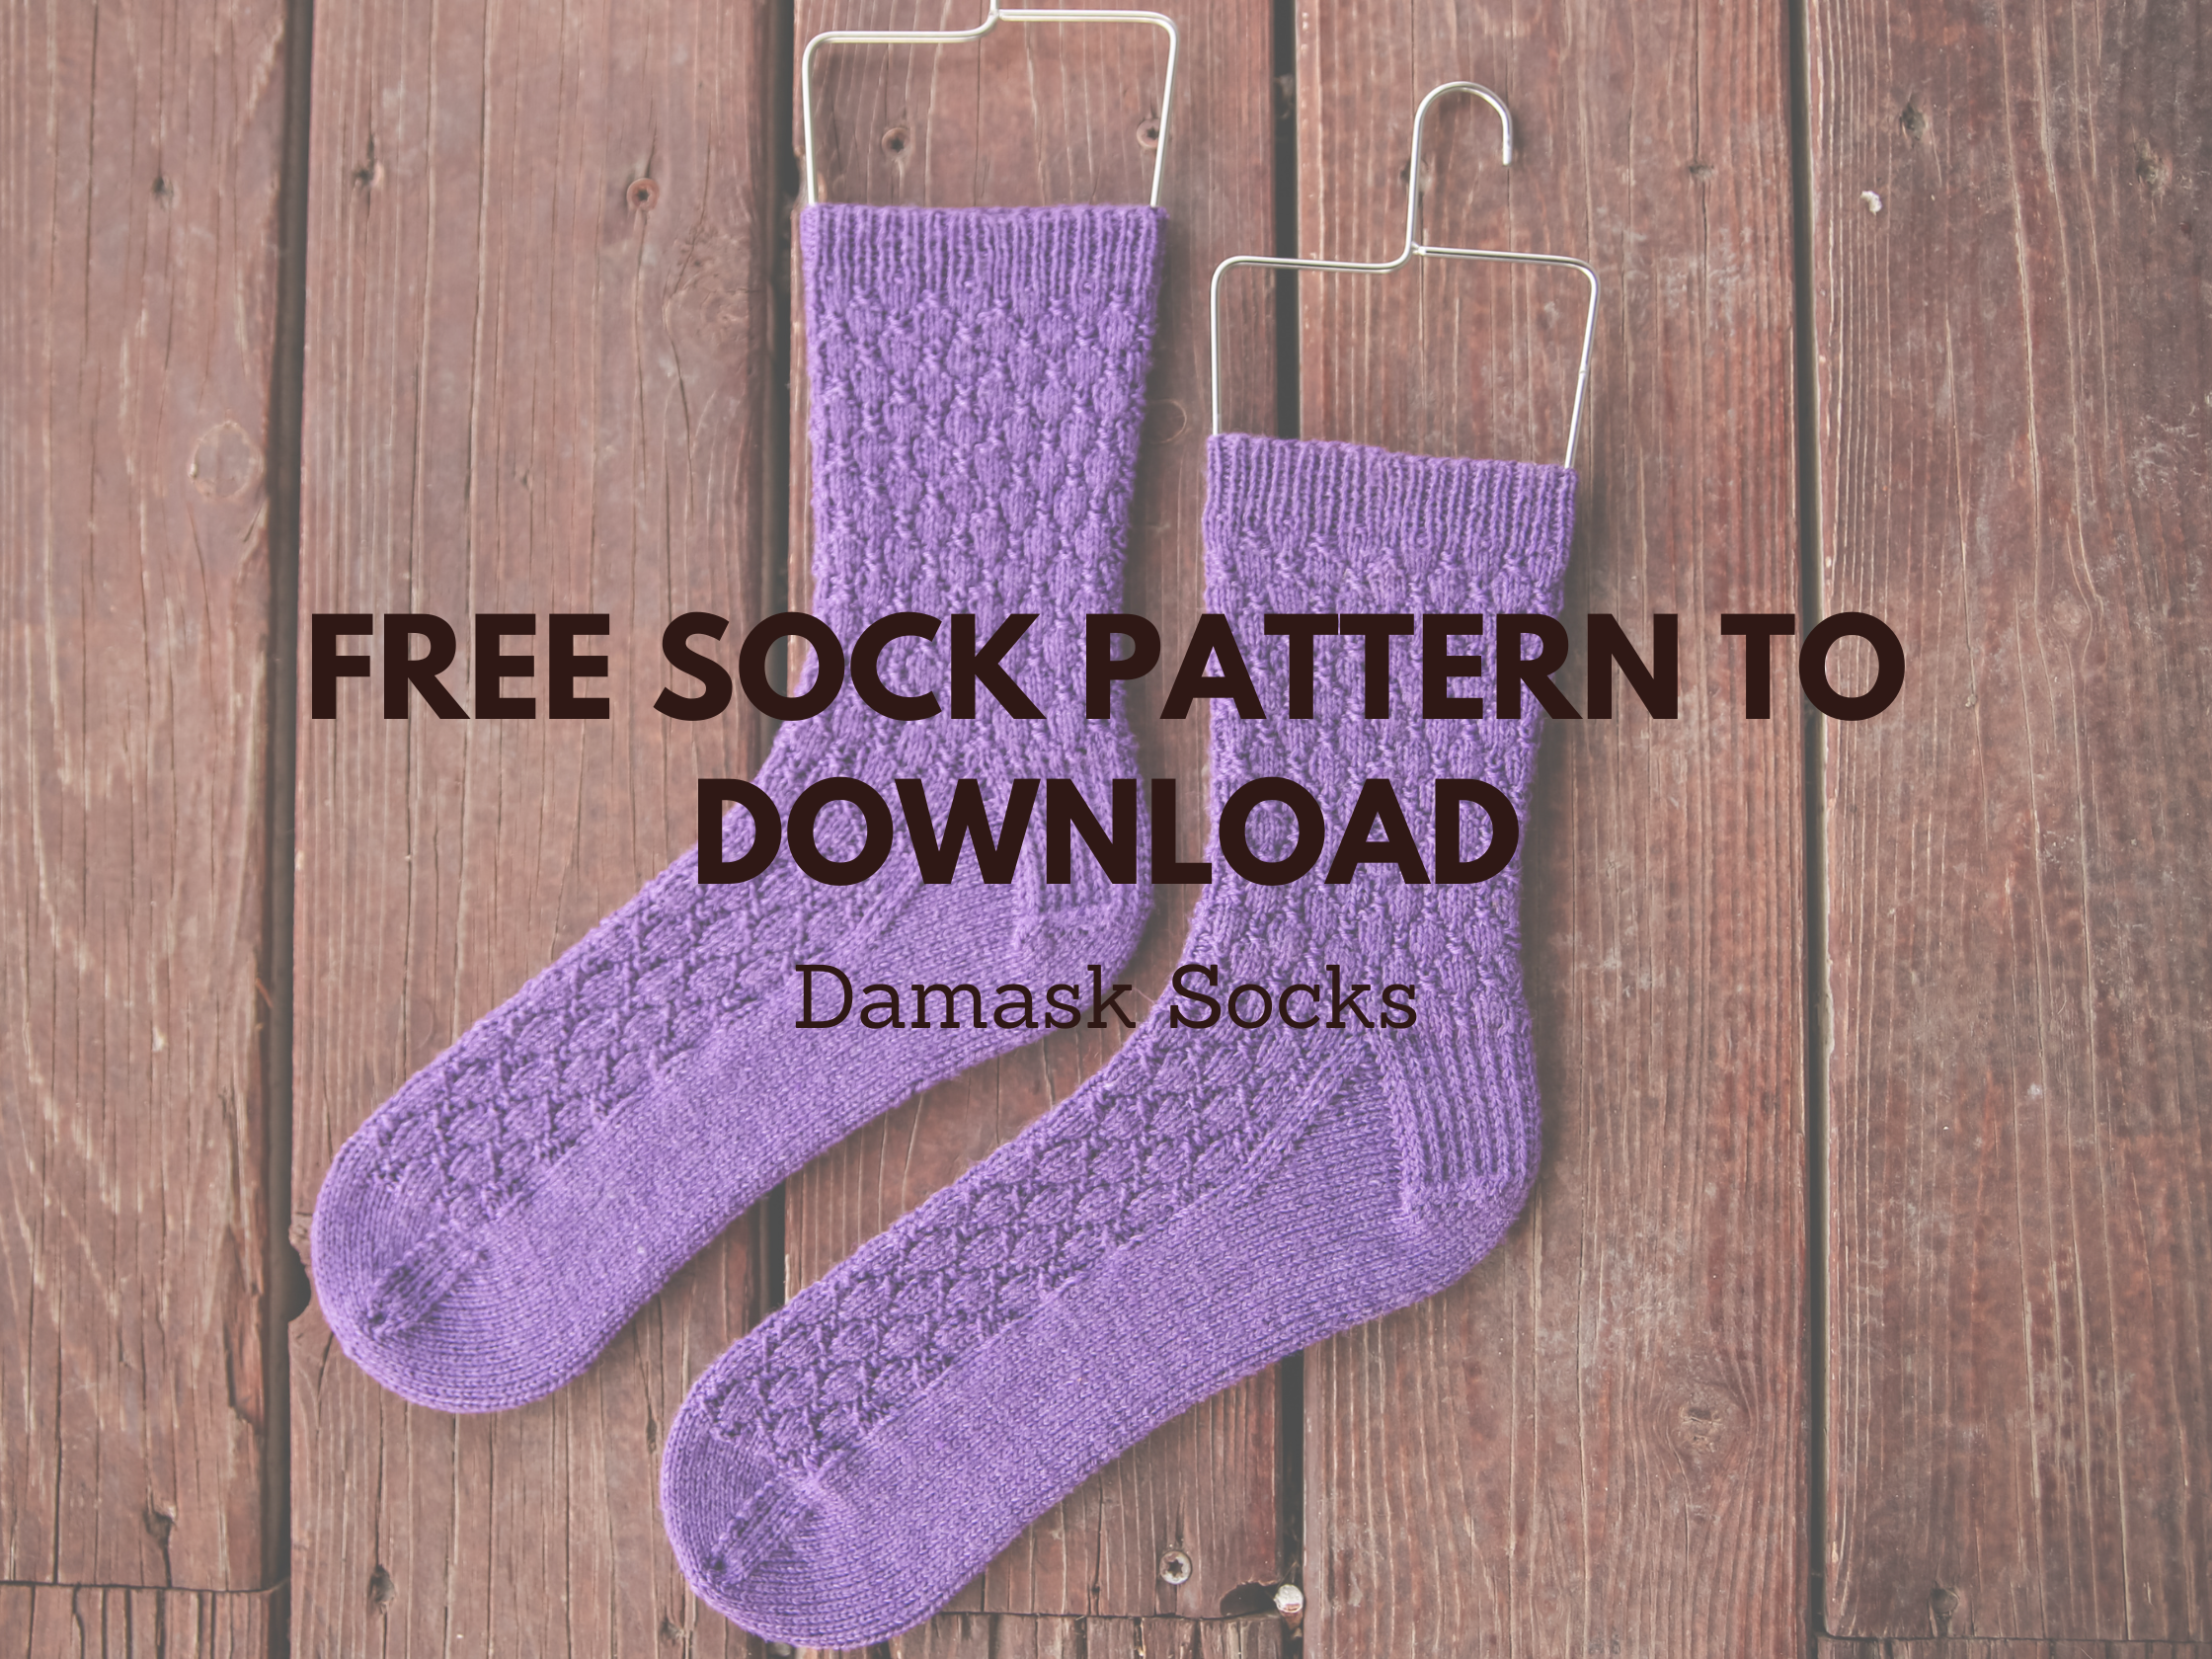
This free sock patterns to download post walks you through a textured, top-down sock design that fits beautifully and keeps your knitting interesting from start to finish.
If you’ve been searching for free sock patterns to download that don’t feel boring or repetitive, this one solves that with a simple but eye-catching knit and purl texture. These socks are worked top down with a classic heel flap construction, giving you a reliable fit while still adding visual interest. I used Hobbii Friends Sock Wool yarn and 2.25mm needles, and I’ve also knit them in Berroco Vintage Sock with equally great results.

If you want socks that look detailed but are easy to memorize, this pattern is exactly that. It’s a great option when you want something relaxing but still satisfying to knit, and it works well for gifting or everyday wear.
What materials do you need for free sock patterns to download like this?
For this free sock patterns to download design, I kept things simple so you can jump right in without overthinking it.
Hobbii Friends Sock Wool Yarn
Berroco Vintage Sock Yarn
2.25mm knitting needles
I love using Hobbii Friends Sock Wool for its smooth stitch definition, especially with textured patterns like this. Berroco Vintage Sock is another favorite because it gives a slightly softer, more classic look while still holding the texture well. Both yarns make the knit and purl pattern really stand out without extra effort.

This combination gives you a sock that feels durable but still comfortable enough for everyday wear. The smaller needle size helps create a nice, snug fabric that holds its shape over time.
How do you knit textured socks using free sock patterns to download?
This free sock patterns to download design is worked from the top down with a heel flap, which makes it easy to adjust and customize as you go. The all-over knit and purl texture is simple to follow and becomes very rhythmic after a few repeats.
If you’ve knit basic socks before, this will feel like a natural next step. The texture adds interest without requiring complicated techniques, which makes it perfect for knitting while watching a show or keeping your hands busy during a quiet moment.

The key tip here is to stay consistent with your tension so the texture really pops. Once you get into the flow, it’s one of those patterns you’ll want to knit again and again.
Looking for more free sock patterns to download?
If you love this style, here are a few more patterns to try:
• Anna Socks
• Dathan Socks
• Michael Socks
• Deborah Socks
• Judah Socks
Each of these patterns brings something a little different, whether it’s a new texture, construction detail, or stitch pattern. They’re all great options if you’re building a collection of go-to sock patterns that you can rely on.

The fun part about socks like this is how easy they are to customize with different yarns and colors. You can keep things classic or switch it up depending on your mood or what you have in your stash.
Damask Socks Pattern
Materials:
Yarn: 1 (1, 1), 2, 2 (2, 3) skeins of Hobbii Friends Sock Wool (affiliate link), 229 yds / 209 m per 50 g.
Needles: US 1 (2.25 mm) DPNs or circular needles suitable for working small circumferences.
Notions: Stitch markers and tapestry needle.
Gauge: 32 sts and 44 rounds per 4 × 4 in / 10 × 10 cm in stockinette stitch worked in the round, after blocking.
sizing:
Baby (Toddler, Child), Large Child, Adult S (M, L).
Finished foot length, adjustable: 4 (6, 7¼), 8, 9 (10, 11¼) in / 10 (15, 18.5), 20.5, 23 (25.5, 28.5) cm.
The sample is Adult M, shown on a wearer with a ladies’ US shoe size 10. The instructions can be followed by both right- and left-handed knitters as is.
Abbreviations can be found on the last page.

Round 1 – [k3, p1, k1, p1] around
Round 2 – [k3, p3] around
Round 3 – repeat round 1
Round 4 – repeat round 2
Round 5 – repeat round 1
Round 6 – [p1, k1, p1, k3] around
Round 7 – [p3, k3] around
Round 8 – repeat round 6
Round 9 – repeat round 7
Round 10 – repeat round 6
The Damask Stitch Pattern is worked over a multiple of 6 stitches around the leg. Continue each repeat across needle boundaries without restarting it at the beginning of a needle.
On the instep, maintain the established pattern columns. Toddler, Large Child, and Adult M have an additional half-repeat of 3 stitches at the end of the instep. Work those stitches according to the established pattern.
Cuff
Cast on 36 (42, 48), 54, 60 (66, 72) sts. Distribute the stitches as follows:
Needle 1: 9 (9, 12), 12, 15 (15, 18) sts.
Needle 2: 9 (12, 12), 15, 15 (18, 18) sts.
Needle 3: 18 (21, 24), 27, 30 (33, 36) sts.
Place a beginning-of-round marker before Needle 1 and join for working in the round, taking care not to twist the stitches. If using circular needles, use markers to identify these sections.
Work in 1×1 rib (k1p1 around) for 8 (8, 10) 10, 12 (12, 14) rounds
Work 8 (8, 10), 10, 12 (12, 14) rounds of [k1, p1] ribbing.
Continue in the Damask Stitch Pattern until the sock measures approximately 2½ (3½, 4), 4½, 5 (6, 7) in / 6.5 (9, 10), 11.5, 12.5 (15, 18) cm from the cast-on edge, or to the desired leg length.
Heel Flap
Next round: work needles 1 and 2 in pattern. These worked stitches will now be placed on hold (you will NOT be using them for the heel). Record the Damask round just completed across the instep. Resume with the following pattern round when these stitches are worked again during the gusset setup.
Work the heel flap over the 18 (21, 24), 27, 30 (33, 36) stitches on Needle 3. Leave the instep stitches on hold.
Row 1 (RS): Repeat [sl1, k1] while at least 2 sts remain. If 1 st remains, knit it. Turn.
Row 2 (WS): Sl1, purl to the end. Turn.
Slip stitches purlwise, with yarn at the back on RS rows and at the front on WS rows.
Work Rows 1–2 a total of 8 (10, 11), 12, 14 (15, 17) times.
[16 (20, 22), 24, 28 (30, 34) rows]
Heel Turn
Row 1 (RS): Sl1, k10 (13, 14), 15, 16 (19, 20), ssk, k1, turn.
Row 2 (WS): Sl1, p5 (8, 7), 7, 6 (8, 7), p2tog, p1, turn.
Row 3: Sl1, knit to 1 st before the gap, ssk, k1 if a stitch remains beyond the decrease, turn.
Row 4: Sl1, purl to 1 st before the gap, p2tog, p1 if a stitch remains beyond the decrease, turn.
Repeat Rows 3–4 until all heel stitches have been incorporated, ending after a WS row.
[12 (15, 16), 17, 18 (21, 22) sts]
Next row (RS): Sl1, knit across the remaining heel stitches.
Gusset
Pick up and knit 9 (10, 12), 14, 15 (16, 19) sts evenly along the first heel-flap edge. Include any corner pickup within this total. PM.
Work the next Damask pattern round across the 18 (21, 24), 27, 30 (33, 36) held instep sts, maintaining the established pattern columns. PM.
Pick up and knit 9 (10, 12), 14, 15 (16, 19) sts evenly along the second heel-flap edge. Include any corner pickup within this total.
K6 (8, 8), 9, 9 (11, 11) heel sts. Place a new beginning-of-round marker on the sole.
[48 (56, 64), 72, 78 (86, 96) sts]
Round 1: Knit to the instep marker, sm, work the next Damask round across the instep, sm, knit to the beginning of round.
Round 2: Knit to 3 sts before the instep marker, k2tog, k1, sm, work the next Damask round across the instep, sm, k1, ssk, knit to the beginning of round.
Advance one Damask pattern round on every gusset round.
Work Gusset Rounds 1–2 a total of 6 (7, 8), 9, 9 (10, 12) times.
[36 (42, 48), 54, 60 (66, 72) sts]
Foot
Continue with the Damask Stitch Pattern across the instep and stockinette stitch across the sole until the foot measures approximately 3 (5, 6), 6½, 7¼ (8¼, 9) in / 7.5 (12.5, 15), 16.5, 18.5 (21, 23) cm from the back of the heel.
Adjust the foot length as needed. The toe instructions below add 10 (12, 14), 16, 18 (20, 24) stockinette rounds before grafting.
Toe
From the existing beginning of round, knit 9 (10, 12), 13, 15 (16, 18) sts to the first instep marker.
Make this marker the new beginning-of-round marker. Remove the old sole beginning-of-round marker. Keep the marker at the other end of the instep.
You now have 18 (21, 24), 27, 30 (33, 36) instep sts followed by the same number of sole sts.
Work all stitches in stockinette from this point.
Round 1: K1, ssk, knit to 3 sts before the instep-end marker, k2tog, k1, sm; k1, ssk, knit to 3 sts before the beginning of round, k2tog, k1. [4 sts decreased]
Round 2: Knit around.
Work Rounds 1–2 a total of 5 (6, 7), 8, 9 (10, 12) times.
[16 (18, 20), 22, 24 (26, 24) sts]
For a left-handed tutorial of these decreases visit my youtube here
Cut yarn, leaving a tail approximately 12 in / 30.5 cm long. Arrange the instep stitches on one needle and the sole stitches on the other, with equal numbers on each needle. Graft using Kitchener stitch.
Kitchener stitch:
Hold the two needles parallel, with the instep stitches on one needle and sole stitches on the other. Thread the yarn tail onto a tapestry needle.
Set-up: Insert the tapestry needle purlwise through the first stitch on the front needle, leaving it on the knitting needle. Insert the tapestry needle knitwise through the first stitch on the back needle, leaving it on the knitting needle.
Step 1: Insert the tapestry needle knitwise through the first front stitch and slip that stitch off.
Step 2: Insert the tapestry needle purlwise through the next front stitch, leaving it on the knitting needle.
Step 3: Insert the tapestry needle purlwise through the first back stitch and slip that stitch off.
Step 4: Insert the tapestry needle knitwise through the next back stitch, leaving it on the knitting needle.
Repeat Steps 1–4 until one stitch remains on each needle. Work Steps 1 and 3 once more. Adjust the grafting tension and weave in the end.
For a left-handed video tutorial of this visit my youtube here
Abbreviations
BOR — beginning of round
k — knit
k2tog — knit 2 stitches together; 1 stitch decreased
p — purl
p2tog — purl 2 stitches together; 1 stitch decreased
pm — place marker
RS — right side
sl — slip purlwise unless otherwise specified
sm — slip marker
ssk — slip 2 stitches individually knitwise, then knit them together through the back loops; 1 stitch decreased
st/sts — stitch/stitches
WS — wrong side

If you try this pattern, I’d love to hear how it went for you. Leave a comment and let me know what yarn you used or who you’re knitting these for. Your feedback always helps me create better patterns for you!
This post may contain affiliate links, which means I may earn a small commission at no extra cost to you if you make a purchase through these links.
Comments are closed.