
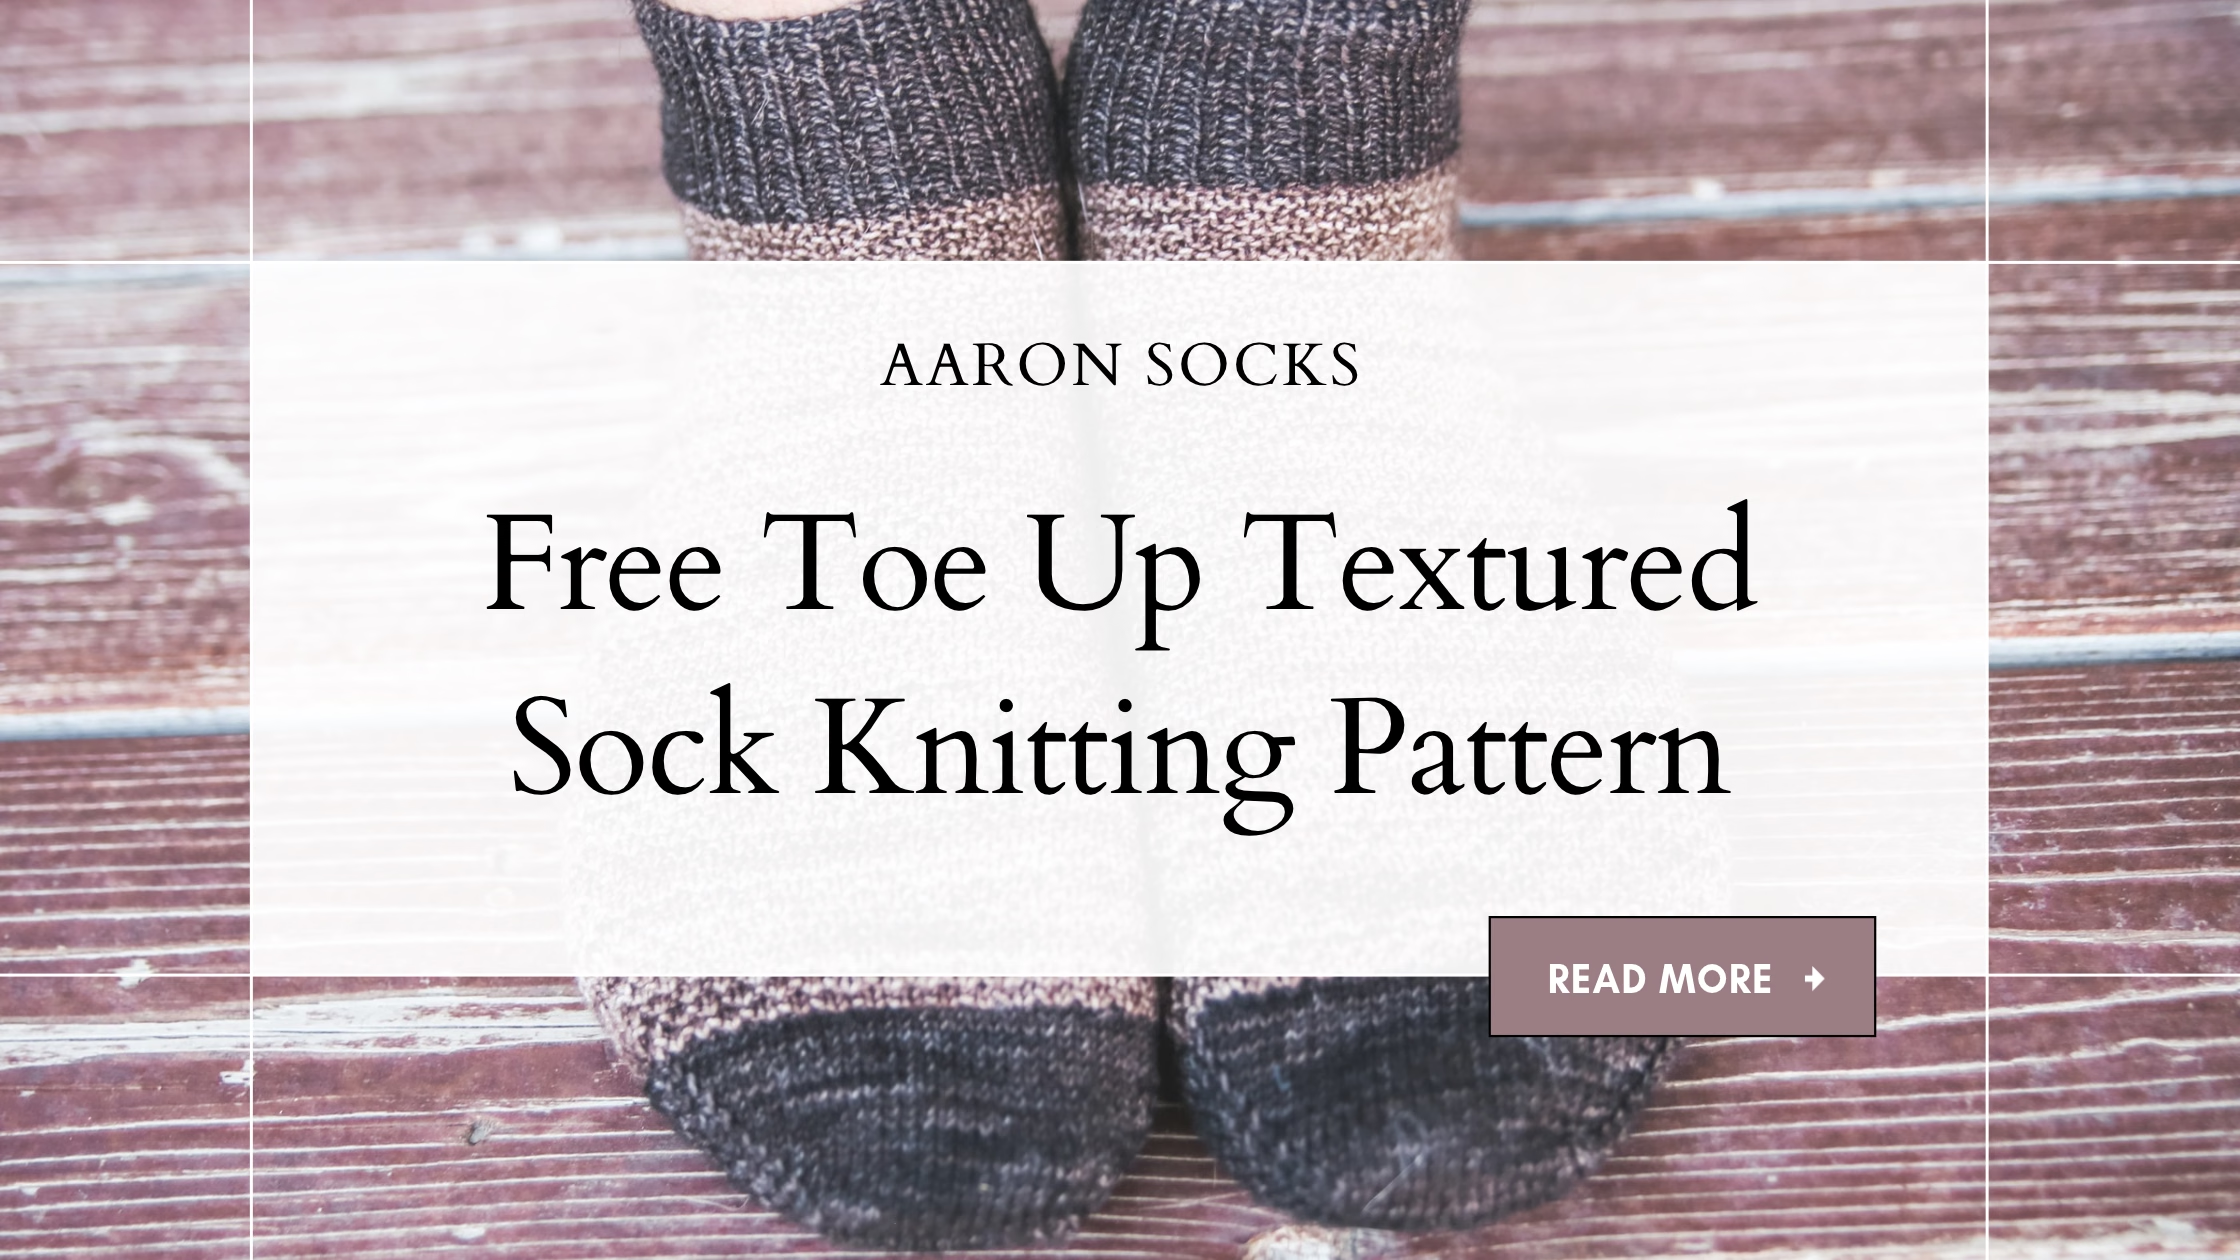
This toe up textured sock knitting pattern combines broken seed stitch with contrasting toes, heels, and ribbed cuffs for a pair that brings a little extra personality to your sock drawer. The Aaron Socks are the newest addition to my Free Sock Knitting Patterns collection, with seven sizes ranging from baby through adult large.
If you enjoy knitting everyday socks but want something beyond plain stockinette, this pattern gives your needles a change of pace. The repeating knit-and-purl texture keeps the knitting interesting, while the toe-up construction lets you adjust the foot and leg lengths for the person who will wear them.
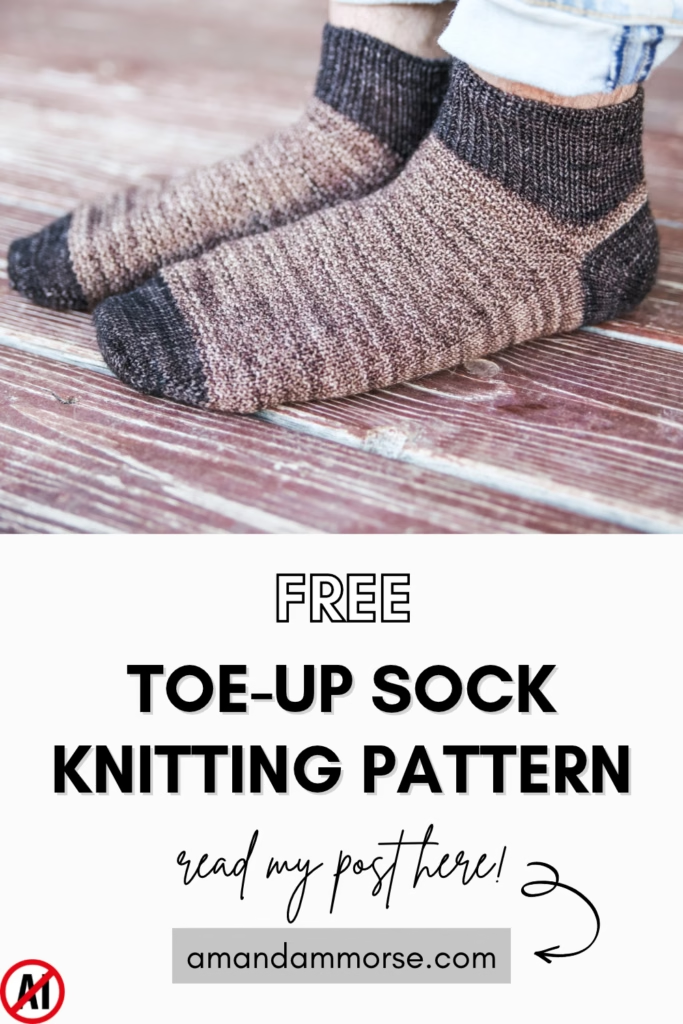
There is something especially satisfying about pairing a textured main color with matching contrast details. On the Aaron Socks, the toes, heels, and top ribbing frame the broken seed stitch and give the finished pair a coordinated look.
You can keep the colors close for a subtle combination or choose a stronger contrast to make those details stand out. Either way, the texture adds interest without needing cables or lace.
What Yarn and Needles Do You Need for This Toe Up Textured Sock Knitting Pattern?
I used Knit Picks Hawthorne and US size 1 / 2.25 mm needles for the Aaron Socks. You will need two colors: a main color for the textured sections and a contrast color for the toes, heels, and ribbed cuffs.
For my pair, I combined a lighter brown main color with darker brown accents. The earthy shades work beautifully together while giving the contrast sections enough definition to stand out.
Gather these supplies before casting on:
- Fingering-weight sock yarn in a main color and a contrast color
- US size 1 / 2.25 mm double-pointed needles or a circular needle for your preferred small-circumference method
- Stitch markers
- Smooth waste yarn for marking the heel placement
- A tapestry needle
- Scissors
Choose your needle size based on the pattern gauge rather than the number alone. Small changes in gauge can make a noticeable difference in the fit of a sock, especially when you are working at this fine scale.
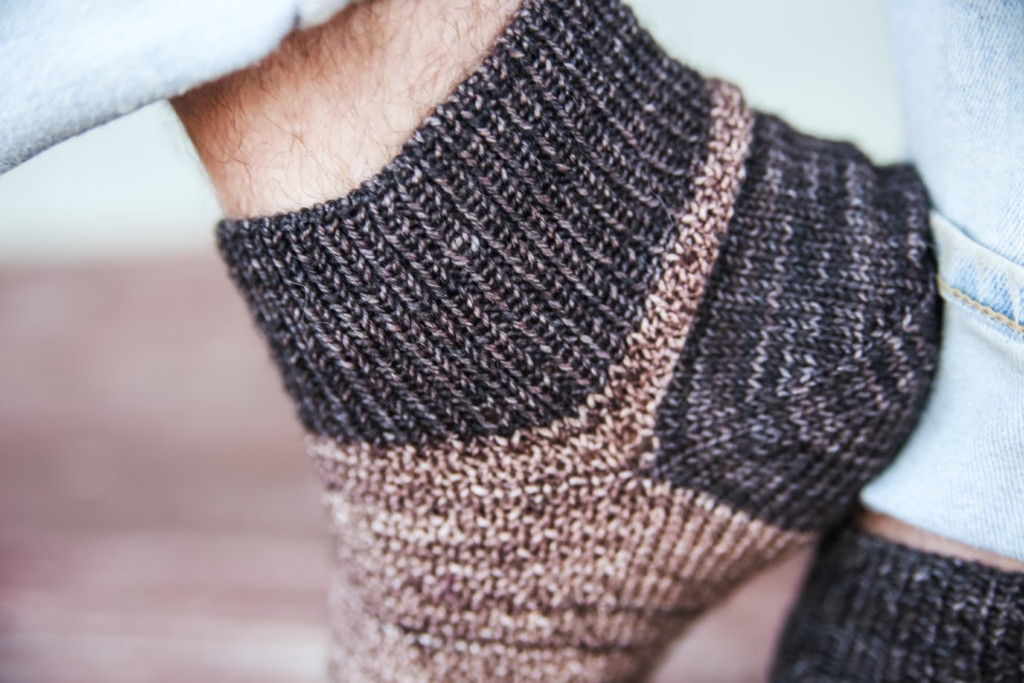
When choosing colors, think about how clearly you want the broken seed stitch to show. A solid or gently changing main color will make the texture easier to see, while a busier colorway may draw more attention to the yarn itself.
If you are comparing yarn options, visit The Best Yarn for Knitting Socks You’ll Actually Love. It is a helpful place to start when deciding what you want from your next pair of handmade socks.
How Do You Knit the Aaron Socks From the Toe Up?
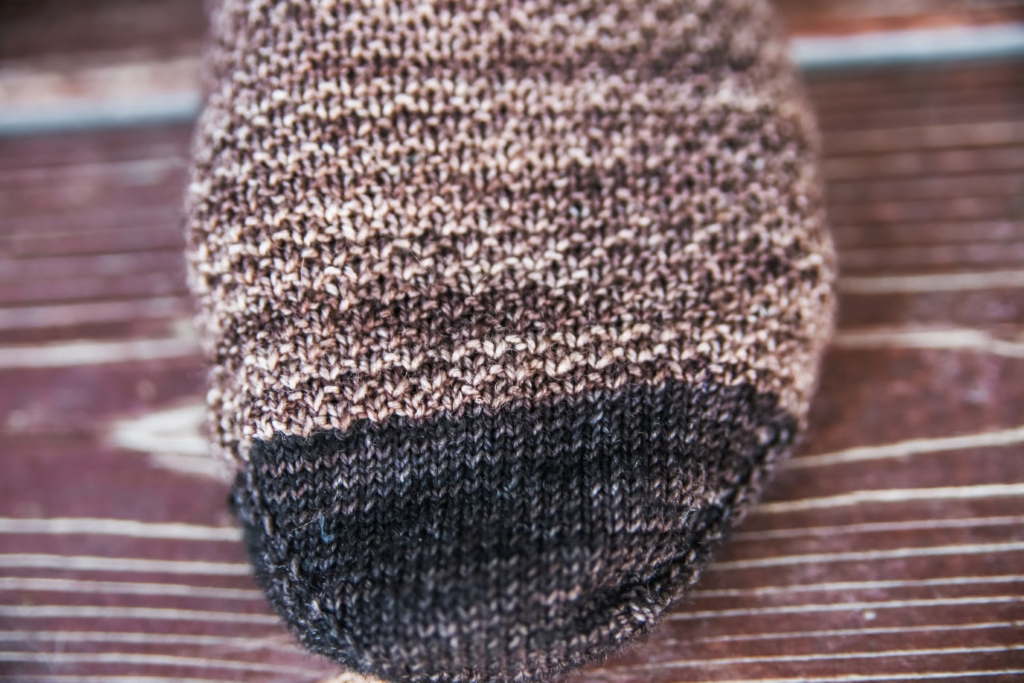
The Aaron Socks begin with the contrast-color toe and are worked upward in the round. Once the toe shaping is complete, you switch to the main color and begin the broken seed stitch across the top of the foot, keeping the sole smooth in stockinette.
That combination gives you visible texture where you can enjoy it without putting the same bumps underneath your foot. It is a practical detail for socks you plan to wear inside shoes.
The broken seed stitch uses a short repeating sequence of knit and purl stitches, with plain knit rounds between the textured rounds. Those plain rounds provide a little breathing room while the textured rounds build the scattered pattern.
Before deciding where to place your heel, take a look at How to Measure Foot Length for Toe Up Socks. Measuring first helps you plan the foot length while allowing room for the heel that will be added later.
This pattern uses an afterthought heel, with waste yarn marking the heel opening as you knit. You continue through the leg and finish the contrast-color ribbing before returning to work the heel.
I especially like how that construction works with contrasting colors. The heel becomes its own little section of knitting, and the matching toe, heel, and cuff tie the whole pair together.
Keep your cuff bind-off stretchy enough to pass comfortably over the heel. After all those tiny stitches, you want the finished socks to be easy to pull on!
What Sizes Can You Make With the Aaron Socks Pattern?
The Aaron Socks include instructions for baby, toddler, child, large child, adult small, adult medium, and adult large. That gives you plenty of options, whether you are making a tiny pair or adding another handmade pair to your own drawer.
Both the foot length and leg length are adjustable. Start by comparing the pattern’s finished measurements with the wearer’s actual measurements, then follow the instructions for adjusting length where needed.
The size names are a starting point, but measurements will help you make a better choice than age or shoe size alone. Check your gauge, measure carefully, and remember that adding extra length will also increase the amount of yarn you need.
This is also a fun design to repeat in different color combinations. You could make coordinating family pairs without having every pair look exactly alike.
What Should You Knit Next?
Once your Aaron Socks are finished, there are plenty of other sock designs to explore. These patterns give you more ways to enjoy toe-up construction while changing up the texture, details, or overall style:
Try the Lydia Socks when you are ready for a decorative lace panel, or add the Sorek Socks to your list for a shorter pair with lace-and-cable detail. The September, Peace, and Jacob designs offer even more options for your next sock project.
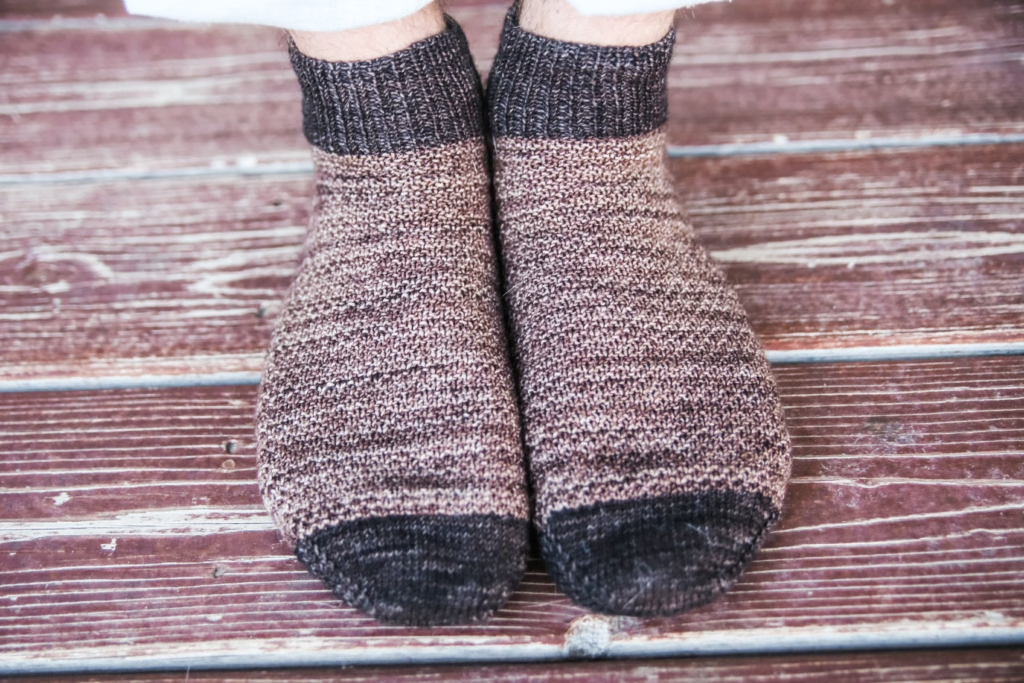
The Aaron Socks are a lovely choice when you want the usefulness of an everyday pair with a little more happening on the needles. Broken seed stitch gives them their texture, and those matching contrast sections are the finishing touch.
Choose two colors you enjoy together, pick your size, and start with the toes. Your sock drawer has room for another pair, right?
Aaron Socks Free Pattern
MATERIALS
Yarn: Approximately 120 (180, 240), 300, 320 (380, 480) yards total of KnitPicks Hawthorne (357 yards/100 g), divided between two colors. MC: light brown. CC: dark brown.
Needles: US 1 (2.25 mm) double-pointed needles or a circular needle suitable for working small circumferences in the round.
Notions: Stitch markers, smooth waste yarn in a contrasting color for holding the heel stitches, and a blunt yarn needle for grafting and weaving in ends.
Gauge: 8 sts × 11 rounds = 1 in (2.5 cm) in stockinette stitch worked in the round, after blocking.
sizing:
Baby (Toddler, Child), Large Child, Adult S (Adult M, Adult L).
Finished Measurements (unstretched):
Sock circumference: 5 (5½, 6½), 7, 7½ (8, 9) in / 12.5 (14, 16.5), 18, 19 (20.5, 23) cm.
Leg length above the heel opening, excluding cuff (adjustable): 1 (1, 3), 3, 3 (5, 5) in / 2.5 (2.5, 7.5), 7.5, 7.5 (12.5, 12.5) cm.
Foot length (adjustable): 4 (6, 7¼), 8, 9 (10, 11¼) in / 10 (15, 18.5), 20.5, 23 (25.5, 28.5) cm.
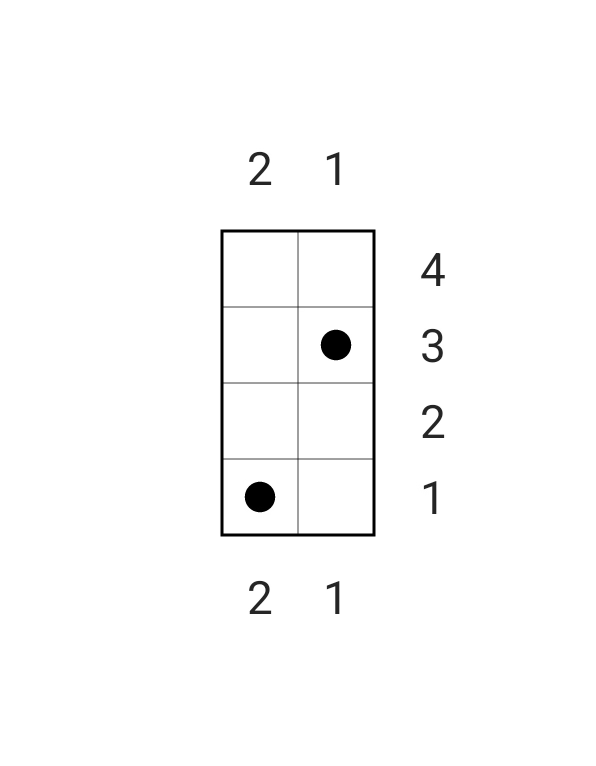
Chart key: Blank square = knit. Filled circle = purl.
Read every chart round from right to left and work rounds from bottom to top. Repeat the 2-stitch chart across the designated stitches.
Written instructions:
Round 1: *K1, p1; repeat from * across.
Round 2: Knit.
Round 3: *P1, k1; repeat from * across.
Round 4: Knit.
Repeat Rounds 1–4 for the pattern.
Toe
Using CC and Judy’s cast-on, cast on a total of 20 (20, 24), 24, 24 (24, 28) sts, with 10 (10, 12), 12, 12 (12, 14) sts on each of two needles.
Round 1: Knit.
Round 2 (increase round): *K1, m1l, knit to the last st on the needle, m1r, k1; repeat from * on the second needle. 4 sts increased.
Repeat Rounds 1 and 2 until there are 40 (44, 52), 56, 60 (64, 72) sts total, ending after Round 2.
Work the increase round a total of 5 (6, 7), 8, 9 (10, 11) times.
If using dpn separate your stitches as follows:
Needle 1 (top of foot) – 20 (22, 26) 28, 30 (32, 36) sts
Needle 2(bottom of foot) –10 (11, 13) 14, 15 (16, 18)
Needle 3 (bottom of foot) – 10 (11, 13) 14, 15 (16, 18) sts each
When using a circular needle, place a marker between the instep and sole stitches and another marker at the beginning of the round. The first 20 (22, 26), 28, 30 (32, 36) sts form the instep; the remaining stitches form the sole.
Switch to mc.
Knit 1 round.
Foot
Beginning with Round 1 of the stitch pattern, work the first 20 (22, 26), 28, 30 (32, 36) sts in pattern and knit the remaining sole sts.
Continue until the sock measures approximately 2½ (4½, 5½), 6, 6½ (7½, 8½) in / 6.5 (11.5, 14), 15 (16.5, 19, 21.5) cm from the tip of the toe, ending after Round 2 or Round 4 of the stitch pattern.
These measurements leave approximately 1½ (1½, 1¾), 2, 2½ (2½, 2¾) in / 4 (4, 4.5), 5 (6.5, 6.5, 7) cm between the heel opening and the intended back of the finished heel.
Continue working the instep in the established stitch pattern and the sole in stockinette through the heel-placement round and leg.
HEEL PLACEMENT
Work the next stitch-pattern round across the 20 (22, 26), 28, 30 (32, 36) instep sts.
Cut MC, leaving a tail for weaving in.
Using smooth waste yarn in a contrasting color, knit across the 20 (22, 26), 28, 30 (32, 36) sole sts. Cut the waste yarn, leaving tails.
Return these sole sts to the original needle without twisting them. Join MC and knit across the same stitches again.
You are now at the beginning of the round. Continue with the next round of the established instep pattern.
Leg
Work in established pattern for 1 (1, 3) 3, 3 (5, 5) rounds from the top of the heel.
Cuff
Switch to cc. Knit 1 round
Work in 1×1 rib (k1, p1) for 16 (16, 20) 20, 20 (24, 24) rounds.
Bind off using your favorite stretchy bind off. I like to use a sewn or Italian bind off. You can always add a thread of elastic in the bind off to help it from getting stretched out from repeated use.
After Thought Heel
Carefully place the 20 (22, 26), 28, 30 (32, 36) live stitches immediately below the waste yarn onto one needle and the same number immediately above the waste yarn onto another needle. Remove the waste yarn, taking care not to drop any stitches.
You have 40 (44, 52), 56, 60 (64, 72) live heel sts total.
Join CC at one side of the opening. Place a beginning-of-round marker and a second marker halfway around, with 20 (22, 26), 28, 30 (32, 36) sts between markers.
Close any corner gaps when weaving in the yarn tails.
Work in stockinette st for 4 (6, 6) 6, 8 (8, 8) rounds.
Decrease round 1 – k1, ssk, knit to 3sts before marker, k2tog, k1, sm, k1, ssk, knit to 3sts before marker, k2tog, k1
Decrease round 2 – knit around sm as you get to them
Repeat Decrease Rounds 1 and 2 a total of 5 (6, 7), 8, 9 (10, 11) times. Each Decrease Round 1 decreases 4 sts. There are now 20 (20, 24), 24, 24 (24, 28) sts remaining, divided equally between the two needles.
Cut yarn, leaving a 12 in (30.5 cm) tail, and graft the heel closed using Kitchener stitch.
Weave in all ends
Kitchener stitch:
Arrange the remaining stitches equally on two parallel needles, with the sole stitches on one needle and the back-of-heel stitches on the other. Hold the wrong sides together and thread the yarn tail onto a blunt yarn needle.
Setup: Insert the yarn needle purlwise through the first stitch on the front needle and leave the stitch on the needle. Insert the yarn needle knitwise through the first stitch on the back needle and leave the stitch on the needle.
Step 1: Insert the yarn needle knitwise through the first stitch on the front needle and slip that stitch off.
Step 2: Insert the yarn needle purlwise through the next stitch on the front needle and leave it on.
Step 3: Insert the yarn needle purlwise through the first stitch on the back needle and slip that stitch off.
Step 4: Insert the yarn needle knitwise through the next stitch on the back needle and leave it on.
Repeat Steps 1–4 until one stitch remains on each needle. Work Steps 1 and 3 once more to remove the final stitches.
Adjust the grafting tension to match the surrounding stitches, then weave in the end.
ABBREVIATIONS
bor – beginning of round
CC – contrast color
k – knit
k2tog – knit 2 stitches together
m1l – pick up from front to back the strand between the 2sts on your needles, knit through back loop
m1r – pick up from back to front the strand between the 2sts on your needles, knit through the front loop
MC – main color
P – purl
pm – place marker
sm – slip marker
ssk – slip next st knitwise, slip next st knitwise, place stitches back onto left needle, knit both slipped sts together
yo – yarn over
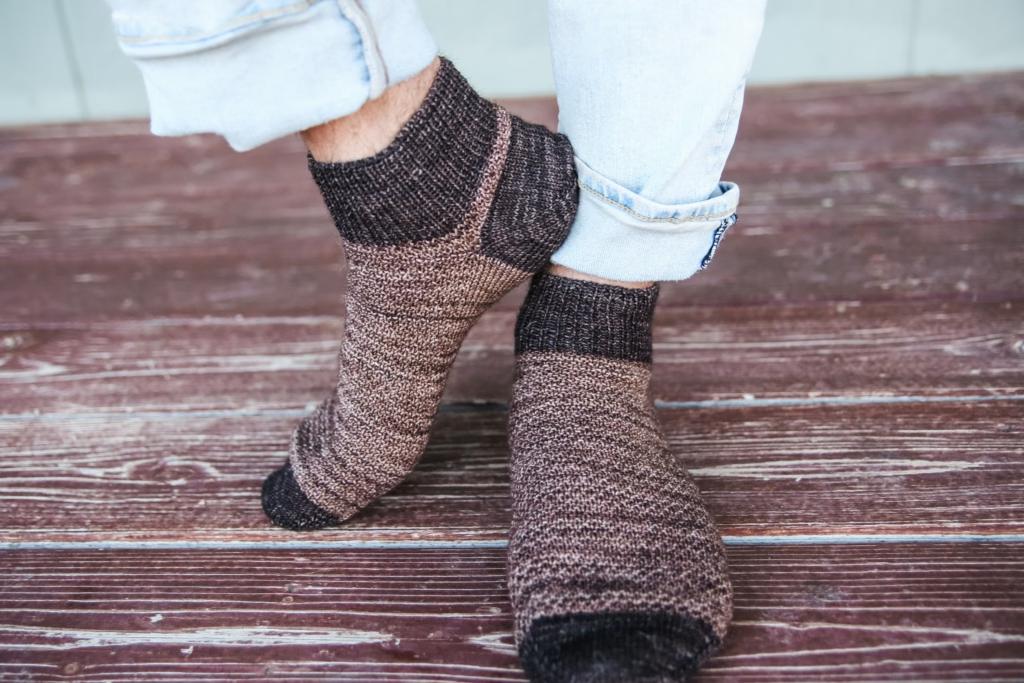
What colors would you choose for your Aaron Socks? Tell me your main color and contrast color combination in the comments!
This post may contain affiliate links. If you purchase through these links, I may earn a small commission at no additional cost to you. Thank you for supporting my free knitting patterns.