
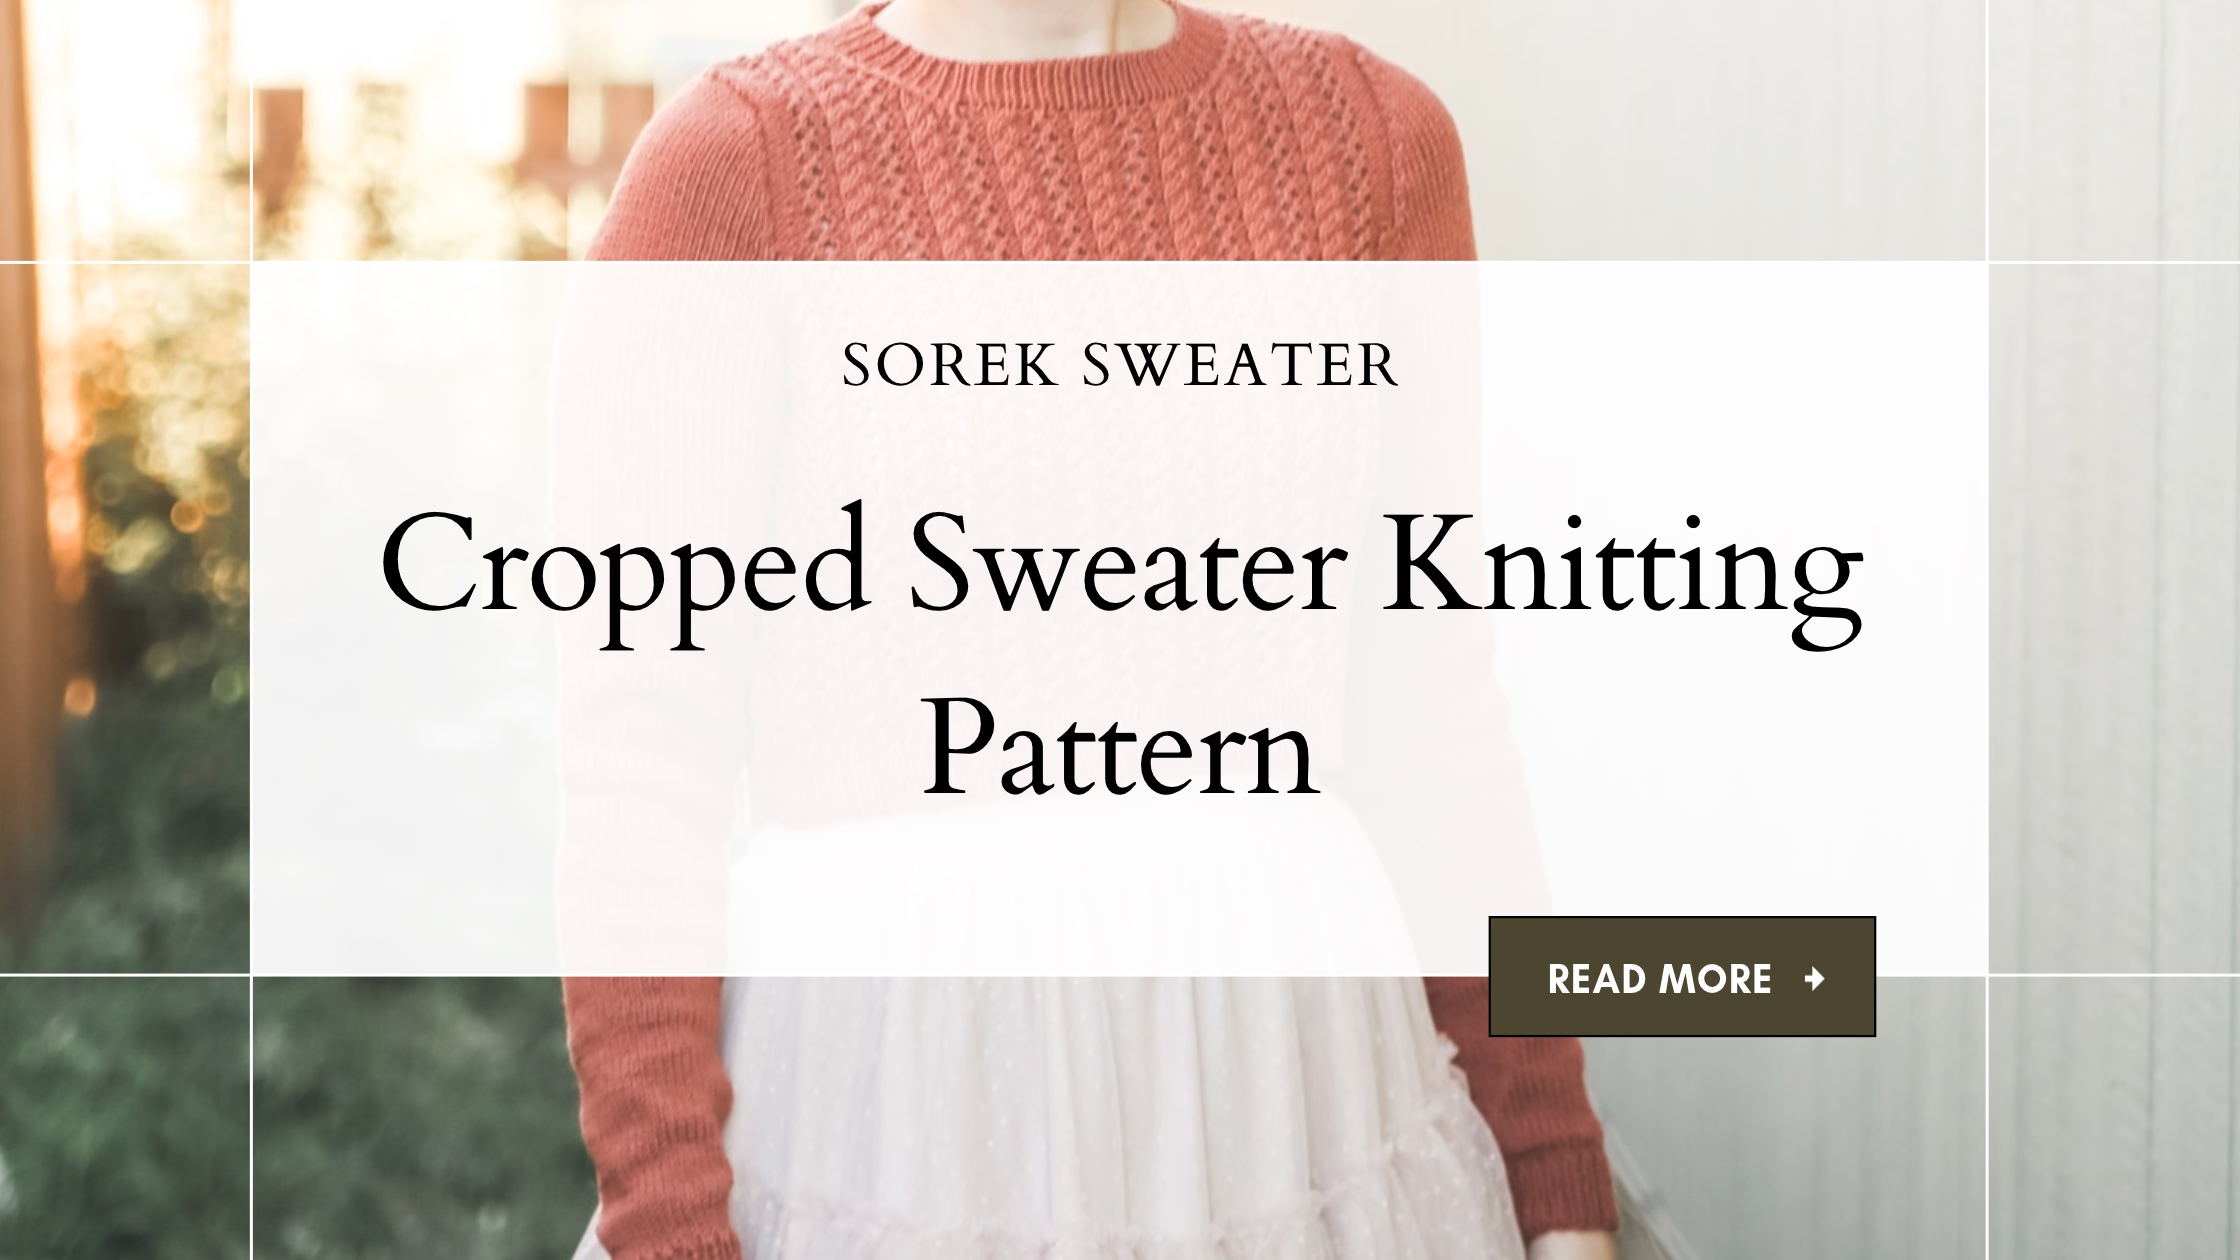
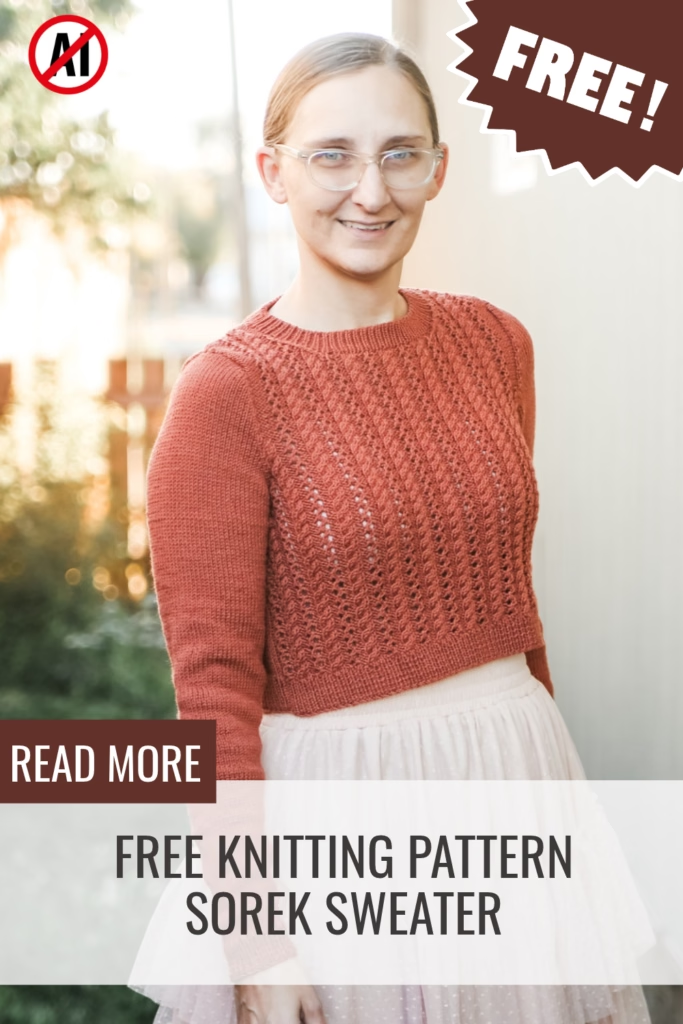
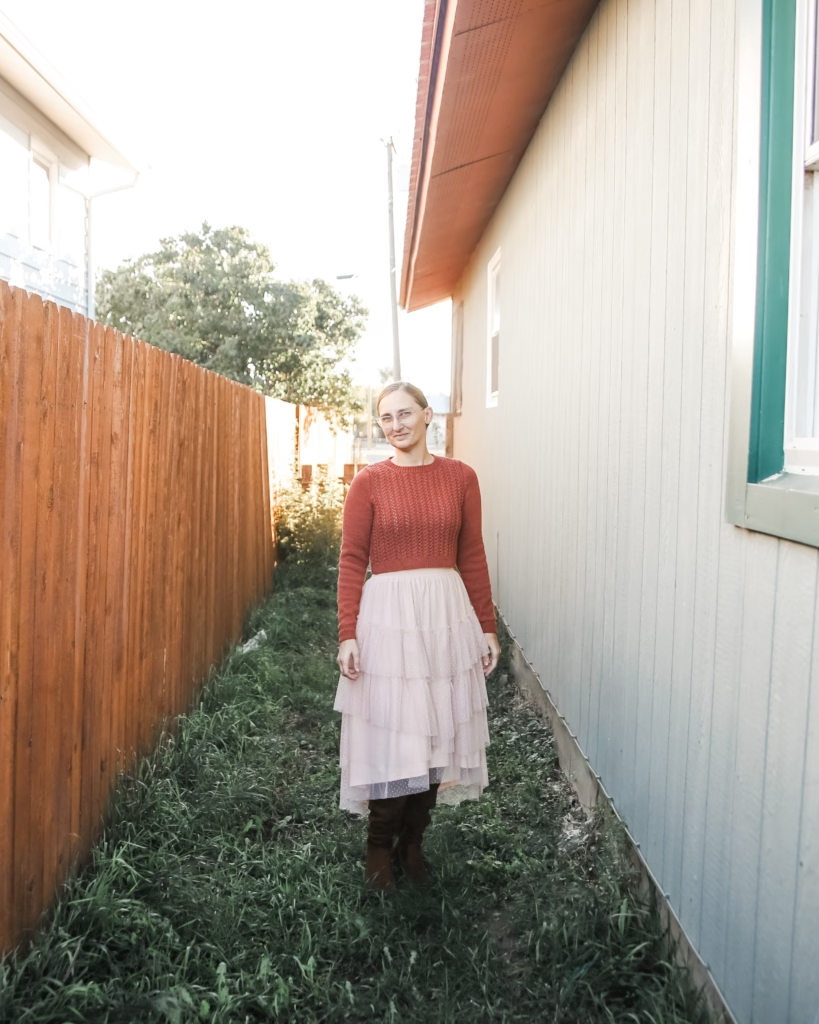
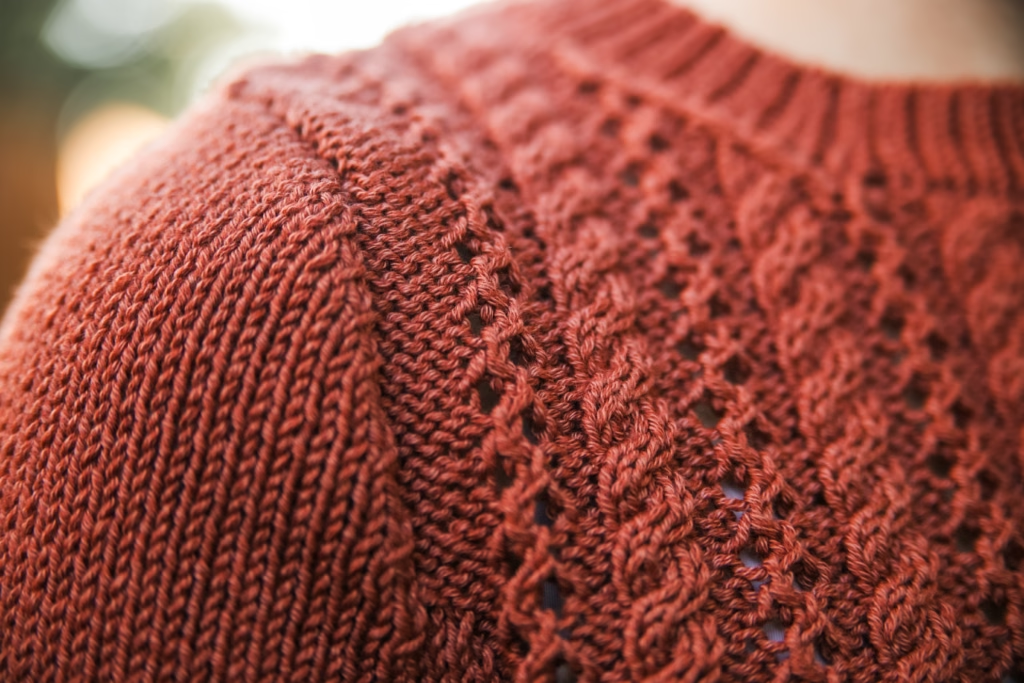
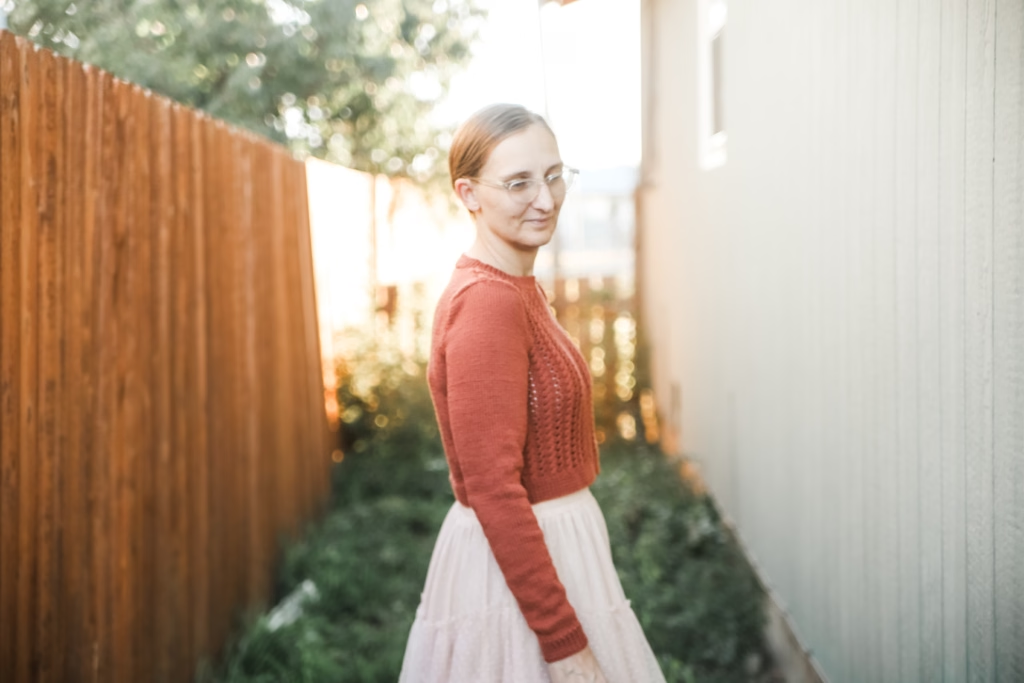
This cropped sweater knitting pattern brings a shorter silhouette and traditional seamed construction to my collection of free sweater knitting patterns. Meet the adult Sorek Sweater—a bottom-up pullover with set-in sleeves, a cable-and-eyelet front, and a cropped length that works beautifully with high-waisted skirts and over dresses.
If you prefer knitting your garment pieces flat, this one gives you another option for your handmade wardrobe. The front, back, and sleeves are worked separately, then sewn together. I used Lion Brand Cottino with US 5 (3.75 mm) and US 3 (3.25 mm) needles for a sweater that combines an interesting front with simple stockinette on the back and sleeves.
There is something so satisfying about watching separate pieces become a sweater. You finish a front, a back, and two sleeves, and then the seams bring the whole thing together.
Sorek has plenty to keep your needles busy without putting a stitch pattern on every surface. The front gets the cables and eyelets, while the back and sleeves give you stretches of straightforward knitting.
What materials do you need for this cropped sweater knitting pattern?
I used Lion Brand Cottino for the Sorek Sweater. The pattern includes adult sizes XS through 4X, so check the yarn amount for your chosen size before gathering your supplies.
You will need US 5 (3.75 mm) needles for the main fabric and US 3 (3.25 mm) needles for the ribbing. Circular needles can hold the stitches comfortably while you work back and forth, and you will also use them for the neckband, which is worked in the round.
Have a yarn needle ready for seaming and weaving in ends, along with stitch markers, stitch holders or waste yarn, and a cable needle for the front stitch pattern.
Before casting on, take time to make and wash a gauge swatch. The pattern gauge is 24 stitches and 32 rows over 10 cm in stockinette stitch, using the larger needles. Your needle size may need adjusting to match that gauge.
If you substitute yarn, pay attention to the fabric as well as the stitch count. A sweater needs to feel good to wear, and a swatch gives you a chance to check its drape before committing to a whole garment.
Choose your size using the bust measurement guidance in the pattern. The listed body measurements describe the person wearing the sweater, so keep that distinction in mind when looking at sizing.
How is the Sorek cropped sweater knitting pattern constructed?
The Sorek Sweater is worked from the bottom up in separate pieces. You begin the front and back with 1×1 ribbing, then switch to the larger needles for the body.
The back is stockinette, while the front uses a repeating cable-and-eyelet stitch pattern. That combination gives the sweater a detailed front without asking you to track cables across the back and sleeves too.
The armholes, neckline, and shoulders are shaped as you work. Each sleeve is knitted flat from its ribbed cuff upward, with increases along the sleeve and decreases to shape the sleeve cap.
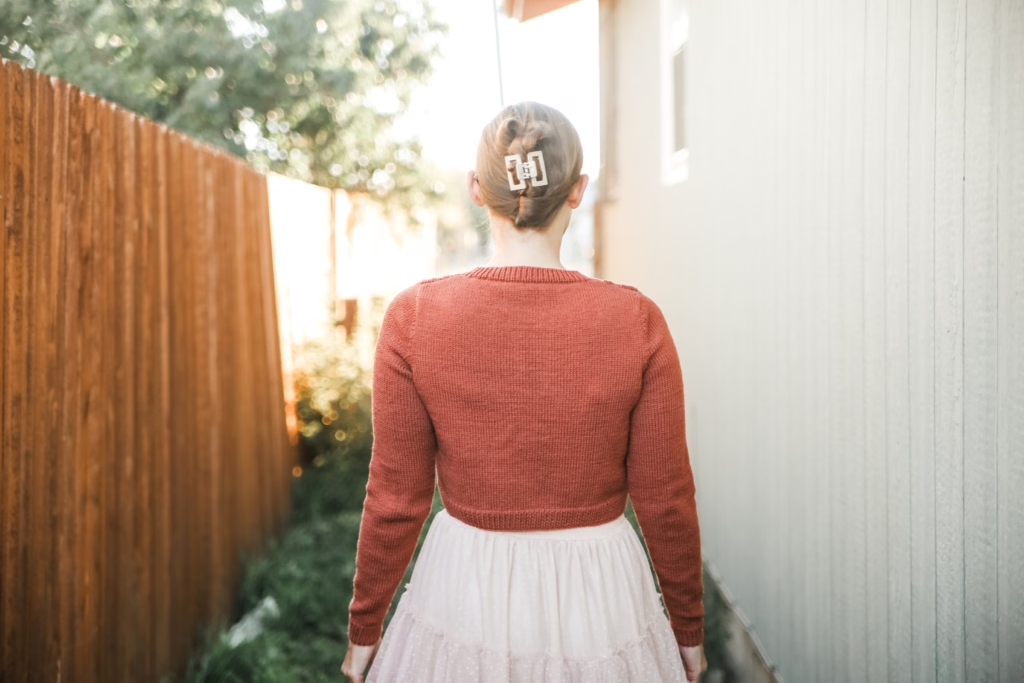
The set-in sleeves are sewn into the shaped armholes, creating a defined shoulder line. After joining the shoulder seams, you pick up stitches around the neckline and work the ribbed neckband in the round.
That means the main sweater pieces are knitted flat, with a small amount of knitting in the round for the finishing. The remaining seams and woven-in ends turn those pieces into a finished pullover.
The cropped length is part of the design, so think about where you want the hem to sit before beginning. Measuring a sweater you already enjoy wearing with your favorite skirt or dress can be a helpful starting point. If you add body length, remember to allow extra yarn and keep the front and back lengths matched to the armholes.
What should you knit next after the Sorek Sweater?
If you enjoy garment knitting with shaped sleeves or interesting stitch details, here are a few more free patterns to explore:
- Peter Sweater — a youth sweater with cable details for your next smaller-sized garment project.
- Grace Turtleneck Sweater — a children’s pullover with repeating cables and a turtleneck.
- Youth Puff Sleeve Tee — a child-sized tee with puff sleeves that give the finished garment its personality.
- Adult Puff Sleeve Tee — an adult option when you want a shorter-sleeved project with a little extra shape at the shoulder.
These patterns give you a few different directions to take your next sweater project. Choose cables for more texture, a turtleneck for extra coverage, or puff sleeves when you want the sleeve shape to be the focus.
For this project, I like how the cropped shape works alongside the more traditional construction. You get the process of knitting and seaming individual pieces, with a finished sweater that is easy to pair with a high-waisted skirt or layer over a dress.
If you have been looking for a cropped sweater knitting pattern worked flat, Sorek might be the next project for your needles. Gather your yarn, check your gauge, and start with that first ribbed edge.
Sorek Sweater Free Pattern
MATERIALS AND INFO
Size: XS, S (M, L) XL, 2X (3X, 4X)
Materials: Approximately 1180, 1332 (1475, 1619) 1830, 1962 (2114, 2283) yds of Lion Brand Cottino 296y/100g yarn needle, stitch markers
Needle Size: 5(US) 3.75mm needles and 3(US) 3.25mm needles
Gauge (tension): 24sts & 32 rows to make 10cm square, using size 5(US) 3.75mm needles working in stockinette stitch
To fit chest measurement: 75, 85 (95, 105) 115, 125 (135, 145) cm / 29.5, 33.5 (37.5, 41.25) 45.25, 49.25 (53.25, 57) in.
METHOD
Sorek Sweater is a bottom-up set in sleeve pullover in an easy-care yarn. It is worked flat.
Abbreviations can be found on the last page.
Note: choose size based on bust measurement for best fit
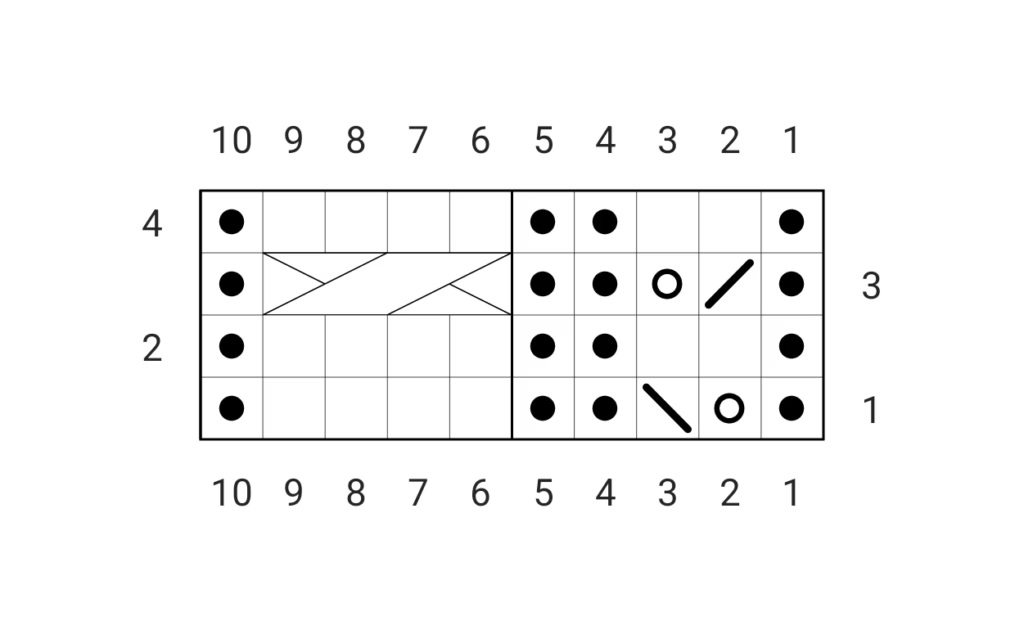
Row 1 – p1, yo, ssk, p2, k4, p1
Row 2 – K1, p4, k2, p2, k1
Row 3 – p1, k2tog, yo, p2, cb2/2, p1
Row 4 – K1, p4, k2, p2, k1
Chart Key:
Empty square: Knit on RS rows; purl on WS rows.
Filled dot: Purl on RS rows; knit on WS rows.
Open circle: Yarn over.
Left-leaning slash: SSK.
Right-leaning slash: K2tog.
Four-stitch cable symbol: CB2/2.
BACK
Cast on using smaller circular needle: 106, 116 (126, 136) 156, 166 (176, 186) sts.
Work in 1×1 ribbing for 4cms or 1.5ins.
Switch to larger needles.
Work in the stockinette stitch until the piece measures 20.5, 21 (21, 22.5) 22.5, 24 (25, 26) cm / 8, 8.25 (8.25, 8.75) 8.75, 9.5 (9.75, 10.25) in from the cast-on edge, or desired length, ending after a WS row. Make sure the front and back lengths to the armhole match.
SHAPE BACK ARMHOLES
Cast off 6, 6 (6, 6) 6, 6 (6, 6) stitches at beginning of next 2 rows.
94, 104 (114, 124) 144, 154 (164, 174) sts
Decrease 1 stitch at each end of the following 4, 7 (9, 12) 14, 17 (20, 23) rows.
86, 90 (96, 100) 116, 120 (124, 128) sts
Then decrease 1 st each end of every other row 2, 3 (3, 3) 6, 6 (6, 7) times
82, 84 (90, 94) 104, 108 (112, 114) sts
Then decrease 1 st each end of every 4th row 2, 1 (1, 1) 3, 2 (2, 1)
78, 82 (88, 92) 98, 104 (108, 112) sts
Continue without shaping until the work measures 38, 40.5 (41, 42.5) 44, 46 (48, 50.5) cm / 15, 16 (16.25, 16.75) 17.25, 18 (19, 20) in from the cast-on edge, ending after completing a WS row.
SHAPE BACK SHOULDERS
Bind off 5, 5 (6, 6) 7, 7 (8, 8) sts at beginning of the next 2 rows.
Bind off 5, 5 (6, 6) 7, 7 (8, 8) sts at beginning of row, knit until 9, 10 (9, 11) 11, 11 (11, 11) sts are on right needle.
Put remaining sts on stitch holder.
Turn, bind off 3sts, work to end of row.
Turn, bind off remaining 6, 7 (6, 8) 8, 8 (8, 8) sts
With RS facing, rejoin yarn to the held stitches. Bind off 40, 42 (46, 46) 48, 54 (54, 58) stitches for the center back neck, then knit to the end.
There are 14, 15 (15, 17) 18, 18 (19, 19) stitches in this shoulder section, including the stitch remaining after the bind-off.
Turn. Bind off 5, 5 (6, 6) 7, 7 (8, 8) stitches, then purl to the end.
Turn. Bind off 3 stitches at the neck edge, then knit to the end.
Turn. Bind off the remaining 6, 7 (6, 8) 8, 8 (8, 8) stitches.
FRONT
Cast on using smaller circular needle: 106, 116 (126, 136) 156, 166 (176, 186) sts.
Work in 1×1 ribbing for 4cms or 1.5ins.
Switch to larger needles.
Set-up row (RS): K1 for the selvedge, work the 10-stitch chart repeat 10, 11 (12, 13) 15, 16 (17, 18) times, work the first 4 stitches of the chart once more, then k1 for the final selvedge.
Work in the established stitch pattern until the piece measures 20.5, 21 (21, 22.5) 22.5, 24 (25, 26) cm / 8, 8.25 (8.25, 8.75) 8.75, 9.5 (9.75, 10.25) in from the cast-on edge, or desired length, ending after a WS row. Make sure the front and back lengths to the armhole match.
SHAPE FRONT ARMHOLES
Maintain the established stitch columns during shaping. Work a yarn over only when its corresponding decrease can also be worked. If shaping prevents working the complete yarn-over/decrease pair, omit both and work the remaining stitches in reverse stockinette (purl right side rows/knit wrong side rows). Work a cable crossing only when all 4 cable stitches remain available.
Cast off 6, 6 (6, 6) 6, 6 (6, 6) stitches at beginning of next 2 rows.
94, 104 (114, 124) 144, 154 (164, 174) sts
Decrease 1 st at each end of following 4, 7 (9, 12) 14, 17 (21, 23) rows.
86, 90 (96, 100) 116, 120 (124, 128) sts
Then decrease 1 st each end of every other row 2, 3 (3, 3) 6, 6 (6, 7) times
82, 84 (90, 94) 104, 108 (112, 114) sts
Then decrease 1 st each end of every 4th row 2, 1 (1, 1) 3, 2 (2, 1)
78, 82 (88, 92) 98, 104 (108, 112) sts
Continue in the established pattern until the piece measures 32.5, 34 (34, 35.5) 37.5, 39 (40, 42.5) cm / 12.75, 13.5 (13.5, 14) 14.75, 15.25 (15.75, 16.75) in from the cast-on edge, ending after completing a WS row.
LEFT FRONT NECK SHAPING
Work 25, 27 (28, 30) 33, 34 (36, 37) stitches in the established pattern. Place the remaining stitches on a holder and turn.
Decrease 1 st at neck edge of next 5, 6 (6, 6) 6, 7 (7, 7) rows.
Then decrease 1 st at neck edge of every other row 3, 3 (3, 3) 3, 3 (3, 4) times.
Then decrease 1 stitch at the neck edge of every following 4th row 1, 1 (1, 1) 2, 2 (2, 2) times.
16, 17 (18, 20) 22, 22 (24, 24) sts remain.
Continue without shaping until work measures 38, 40.5 (41, 42.5) 44, 46 (48, 50.5) cms or 15.25, 16 (16.25, 17) 17.5, 18.5 (19.25, 20.25) ins
LEFT FRONT SHOULDER SHAPING
Starting on a right-side row, bind off 5, 5 (6, 6) 7, 7 (8, 8) sts, work across remains sts, turn.
Work 1 row with no decreases, turn.
Bind off 5, 5 (6, 6) 7, 7 (8, 8) sts, work across remains sts, turn.
Work 1 row with no decreases, turn.
Bind off remaining 6, 7 (6, 8) 8, 8 (8, 8) sts.
RIGHT FRONT NECK SHAPING
With RS facing, rejoin yarn to the held stitches. Bind off 28, 28 (32, 32) 32, 36 (36, 38) stitches for the center front neck, then work in the established pattern to the end. Turn.
Decrease 1 st at neck edge of next 5, 6 (6, 6) 6, 7 (7, 7) rows.
Then decrease 1 st at neck edge of every other row 3, 3 (3, 3) 3, 3 (3, 4) times.
Then decrease 1 stitch at the neck edge of every following 4th row 1, 1 (1, 1) 2, 2 (2, 2) times.
16, 17 (18, 20) 22, 22 (24, 24) sts remain.
Continue without shaping until work measures 38, 40.5 (41, 42.5) 44, 46 (48, 50.5) cms or 15.25, 16 (16.25, 17) 17.5, 18.5 (19.25, 20.25) ins
RIGHT FRONT SHOULDER SHAPING
Starting on a wrong-side row, bind off 5, 5 (6, 6) 7, 7 (8, 8) sts, work across remains sts, turn.
Work 1 row with no decreases, turn.
Bind off 5, 5 (6, 6) 7, 7 (8, 8) sts, work across remains sts, turn.
Work 1 row with no decreases, turn.
Bind off remaining 6, 7 (6, 8) 8, 8 (8, 8) sts.
SLEEVES (MAKE 2)
With smaller needles, cast on 46, 46 (46, 46) 46, 46 (56, 56) sts.
Work for 4cms/1.5ins in 1×1 ribbing.
Change to larger needles. You will work the rest of the sleeve in stockinette st (knit every right side row and purl every wrong side row).
Work 4, 4 (4, 4) 4, 4 (4, 4) rows.
After the initial 4 stockinette rows, increase 1 stitch at each end of the next RS row.
Then increase 1 stitch at each end of every following 8th, 6th (4th, 4th) 2nd, 2nd (2nd, 2nd) row 1, 1 (5, 19) 2, 9 (5, 14) additional times.
Then increase 1 stitch at each end of every following 10th, 8th (6th, 6th) 4th, 4th (4th, 4th) row 9, 12 (14, 5) 26, 23 (25, 21) times.
68, 74 (86, 96) 104, 112 (118, 128) sts.
Continue in stockinette stitch until the sleeve measures 42.5, 44 (45, 45) 45.5, 46 (46, 47) cm / 16.75, 17.25 (17.75, 17.75) 18, 18 (18, 18.5) in from the cast-on edge, ending after a WS row.
SLEEVE HEAD
Bind off 6 stitches at the beginning of each of the next 2 rows.
Decrease 1 stitch at each end of the next 4, 7 (9, 12) 14, 17 (20, 23) rows.
Then decrease 1 stitch at each end of every following other row 2, 3 (4, 5) 6, 6 (6, 7) times.
Then decrease 1 stitch at each end of every following 4th row 4, 4 (3, 3) 2, 1 (2, 2) times.
Work 1 row without shaping.
Sizes 3X and 4X: Proceed to the final bind-off.
Remaining sizes: Decrease 1 stitch at each end of every following other row 2, 2 (2, 1) 1, 1 times.
Then decrease 1 stitch at each end of the next 3, 4 (2, 2) 3, 3 rows.
All sizes: Bind off the remaining 26, 22 (34, 38) 40, 44 (50, 52) stitches.
NECKBAND
Sew shoulder seams.
Pick up and knit 19, 20 (22, 22) 24, 25 (25, 27) sts down left front,
28, 28 (32, 32) 32, 36 (36, 38) sts across neck,
19, 20 (22, 22) 24, 25 (25, 27) sts up right front,
46, 48 (52, 52) 54, 60 (60, 64) sts around back.
Join in the round. 112, 116 (128, 128) 134, 146 (146, 156) sts
Neck rounds – work in k1p1 ribbing around
Continue repeating rounds until the neck measures 2.5cms or 1 ins.
Bind off in pattern.
FINISHING
Sew sleeve on to body and remaining side seams, weave in all ends and block as desired.
ABBREVIATIONS
cb2/2 – place the next 2 sts on your cable needle, hold in back, knit the next 2 sts, knit the 2 sts on your cable needle
k – knit
k2tog -knit 2 stitches together
M1L – With left needle pick up strand between 2 stitches front to back. Knit through back loop
M1R – With left needle pick up strand between 2 stitches back to front. Knit through front loop
P – purl
sl – slip stitch
ssk – Slip the next 2 stitches individually knitwise, return them to the left needle without changing their new orientation, then knit them together through the back loops.
yo – yarn over
Do you enjoy knitting sweaters in separate pieces? Let me know in the comments—and tell me what color you would choose for your Sorek Sweater!
This post may contain affiliate links. If you purchase through these links, I may earn a small commission at no extra cost to you. Thank you for supporting my blog!